
Yield: 6 chocolate almond brioche rolls // Total Time: 2 hr. 45 min. // Disclaimer: This post includes affiliate links.
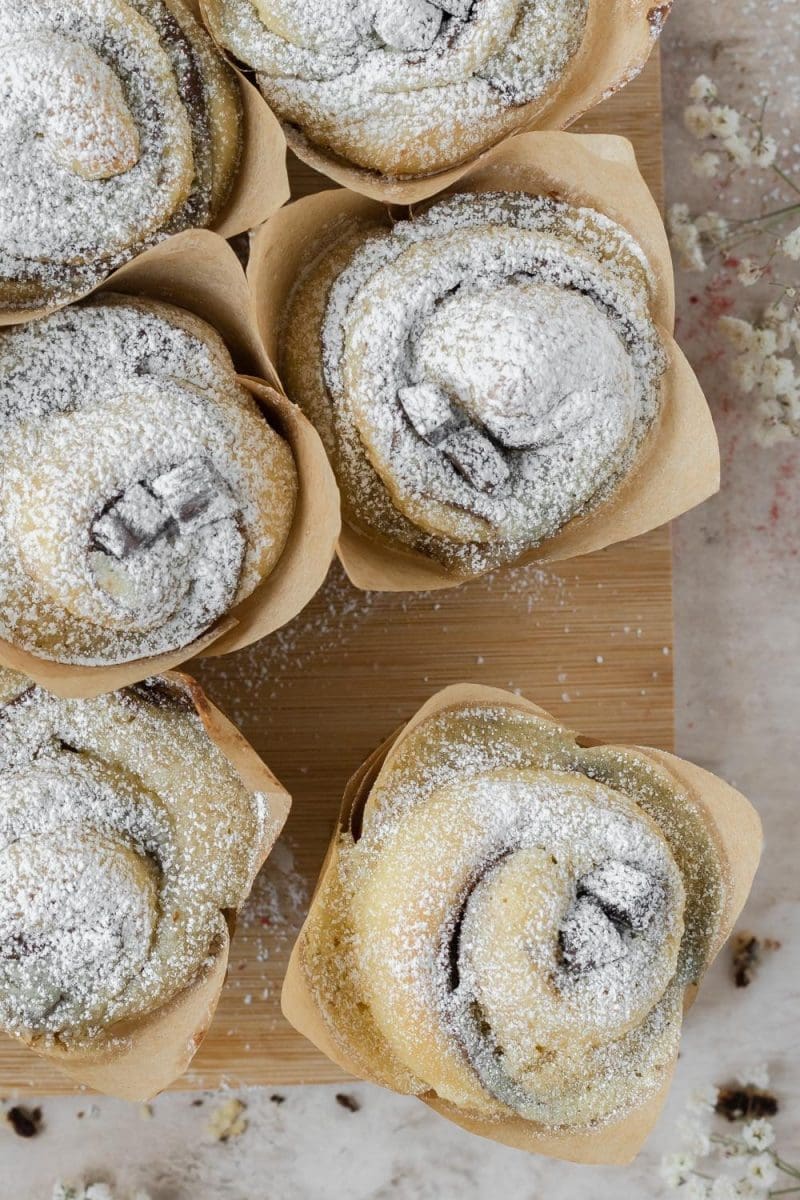
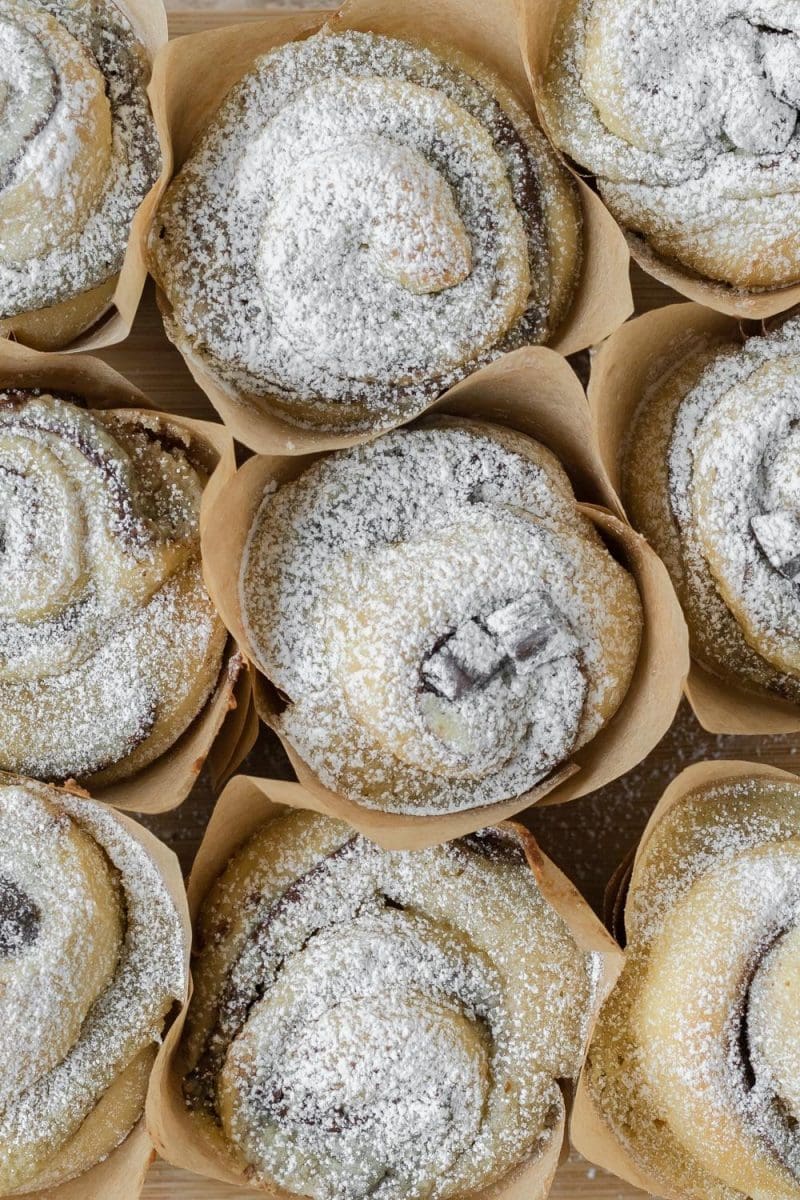
Light and fluffy brioche, chocolate, and frangipane baked up into adorable, delicious muffins.

chocolate almond brioche rolls
Hear me out: chocolate and delicious almond-y frangipane wrapped up in light and fluffy brioche dough, then baked in a muffin tin. These chocolate almond brioche rolls are equally fun to look at and fun to eat! If you are a fan of chocolate and almonds, these are the perfect weekend baking project for you. Below you’ll find tips and tricks on how to make these chocolate almond brioche rolls turn out perfectly every time!
small batch brioche rolls
I love making small batch bakes because they are the perfect size myself and others who don’t have a lot of people to bake for in their home. Small batch helps cut down on waste and eliminates the feeling that all that excess dessert MUST be eaten. All my recipes can easily be doubled or tripled to fit your needs. I just highly recommend using grams, especially if you’re scaling the recipe!
recipe tips
weigh your ingredients
Weighing your ingredients is important for getting the recipe perfect and getting consistent results. Not weighing your ingredients can lead to adding too much or too little of an ingredient. If you haven’t already, I highly recommend purchasing a kitchen scale. This one is super cheap and worked well for me when I was starting out!
the dough will need to knead for a while
Kneading this dough will take a longer time than you are probably used to. This dough is enriched with eggs and butter which makes it take longer for the proper amount of gluten to develop. Kneading in the mixer can take me anywhere from 10-20 minutes. Also, please make sure you are using a higher protein all purpose flour that has at least 11%, not 10% protein (I use King Arthur Flour, 11.7%.) The dough is ready to be used when it passes the windowpane test and has pulled away from the sides and bottom of the bowl. If you are weighing your ingredients, just trust the process! If you are using cup measurements and the dough just is not coming together after 20 minutes, try adding in 1 tbsp. of flour at a time.
use room temperature ingredients
The ingredients need to be at room temperature so that they properly incorporate with each other. Take out the egg at least 30 minutes and up to 1 hr 30 min. before starting the recipe, and the cream cheese about an hour before the rolls are done. To bring an egg to room temperature quickly, you can place it under hot water for 1 minute. To bring cream cheese to room temperature quickly, slice it, place it on a plate, and microwave it in 5-second intervals!
heating the milk
Heating the milk is important for bringing the yeast to an optimal temperature for rising. The milk should be heated to ~100°F / 38°C but it does not have to be exact. As long as the milk is between 95°F – 110°F, it is good to be used. If the temperature exceeds 110°F, wait for it to cool down before using it so that you do not kill the yeast!
dough rising environment
For the first rise, I recommend letting the dough rise in the fridge overnight simply because it’s much easier to work with when it’s cold, and then you don’t have to worry about doing everything in one day. For the second rise (and if you do choose to do both rises in one day) – you’re going to want to make sure your dough is in a warm environment for it to rise faster. If the room is cold, the dough will take longer to rise. I like to place my bowl of dough on top of my oven, preheat the oven to the lowest temperature it will go, and then turn the oven off and let it continue to rise there.
how to tell your dough is done kneading: the windowpane test
The windowpane test is (in my opinion) the best way to tell that your dough has been properly kneaded. Once the dough starts to pull away from the sides and the bottom of the mixing bowl, it is most likely ready. However, just to be sure that it’s good to go I check if it passes the windowpane test. To do that, take some of the dough in your hands and start to slowly stretch it out. If it can get thin enough to where light passes through it before tearing, then it’s good to go! If not, keep kneading until it does!
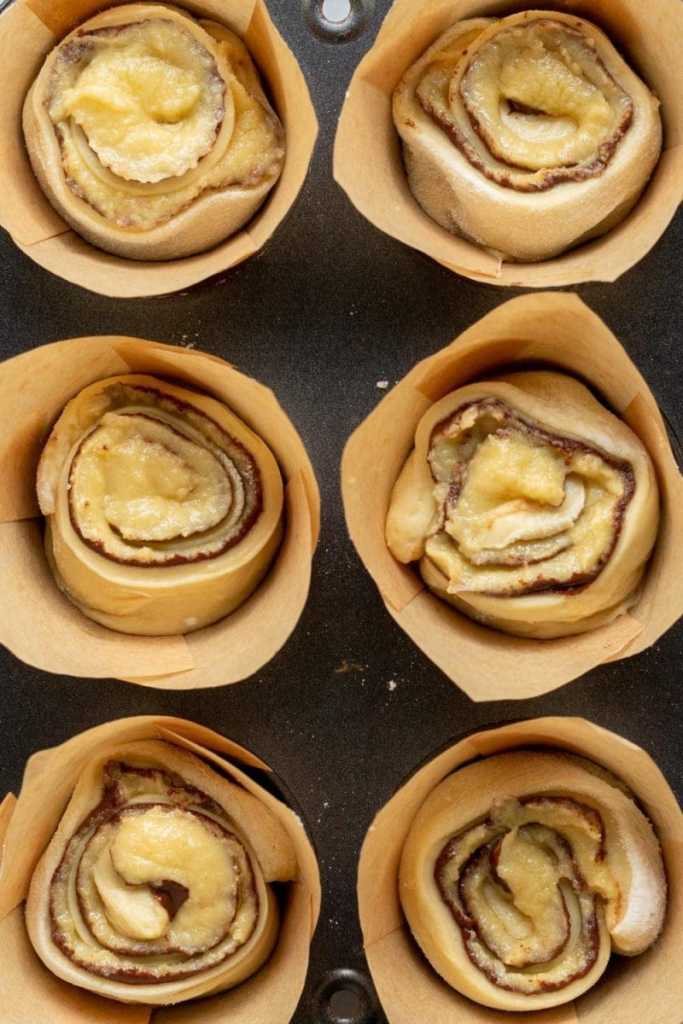
use tulip muffin liners
I recommend using tulip muffin liners because regular muffin liners won’t support the rolls as they rise while baking. You could also make them yourself super easily! Cut out six 6″ squares of parchment paper, then butter the muffin tin and place the parchment squares into the cavities. They won’t stick down completely, but they will stay in place once you place the rolls into them!

ingredients and substitutions
For the brioche dough:
All purpose flour: for structure and chewiness. Please be sure that you are using a high-quality flour that has a high protein %, such as King Arthur (11.7%) so that your gluten will develop. If you’re using a low protein flour, the gluten will not develop enough and you will have to add a lot more flour to the brioche, which will alter the dough!
Active dry yeast: for making the dough rise. You can easily substitute in instant yeast if that is what you have on hand. You will just skip the step of combining the warm milk, sugar, and yeast!
Salt: for balancing and bringing out the sweetness of the brioche. Salt also “controls” the yeast to make sure that it does not overly expand.
Granulated sugar: for sweetening the brioche and for helping the yeast with rising. We will use a little bit of sugar in the brioche as well as in the hazelnut sugar.
Egg: for binding and adding moisture.
Unsalted butter: for tenderizing the brioche rolls and giving them a buttery, melt-in-your-mouth feel. I would not recommend substituting in salted butter since salt is important to controlling yeast growth and the amount of salt in salted butter is quite variable.
Whole milk: for tenderizing and hydrating the dough. Whole milk will provide the softest rolls because the extra fat helps tenderize the dough. You can however swap in 1%, 2% or your favorite non dairy milk alternative! Just note that the dough may be a little less soft and fluffy due to the varying fat content.
For the frangipane filling:
Unsalted butter: for texture and flavor. You can also use salted butter here.
Granulated sugar: for sweetening the frangipane.
Egg: helps to bind the frangipane mixture together.
Almond extract: for extra almond flavor in the filling, you can choose to omit this if you don’t have any on hand.
Almond flour: the most important ingredient!
All purpose flour: just one tablespoon of all purpose flour helps thicken up the filling.
Salt: balances and brings out the flavor and sweetness of the filling.
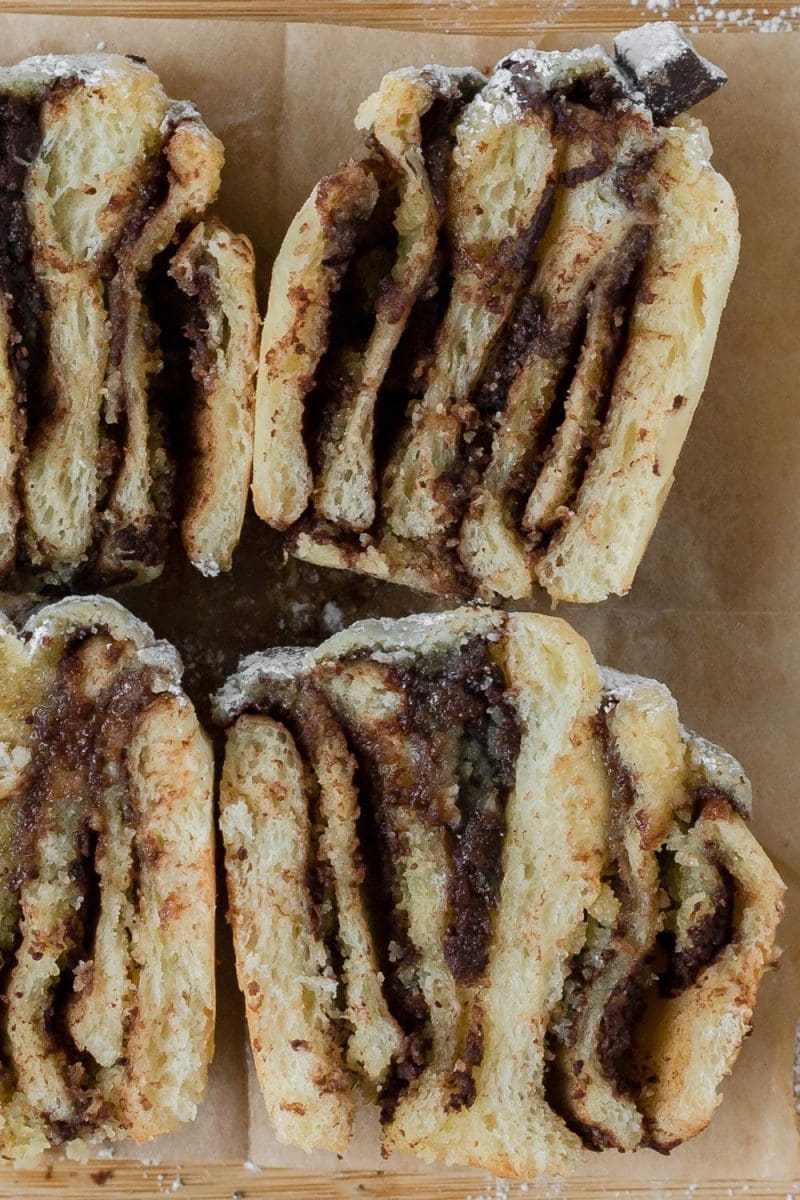
Chocolate: I used chocolate baking chunks here because they solidify for a nice rippled chocolate effect throughout the rolls. Feel free to use your favorite chocolate chips, chunks, or baking bar here!
how to make chocolate almond brioche rolls
Here’s what making these chocolate almond brioche rolls looks like throughout the process. The full recipe with instructions can be found at the end of this blog post!
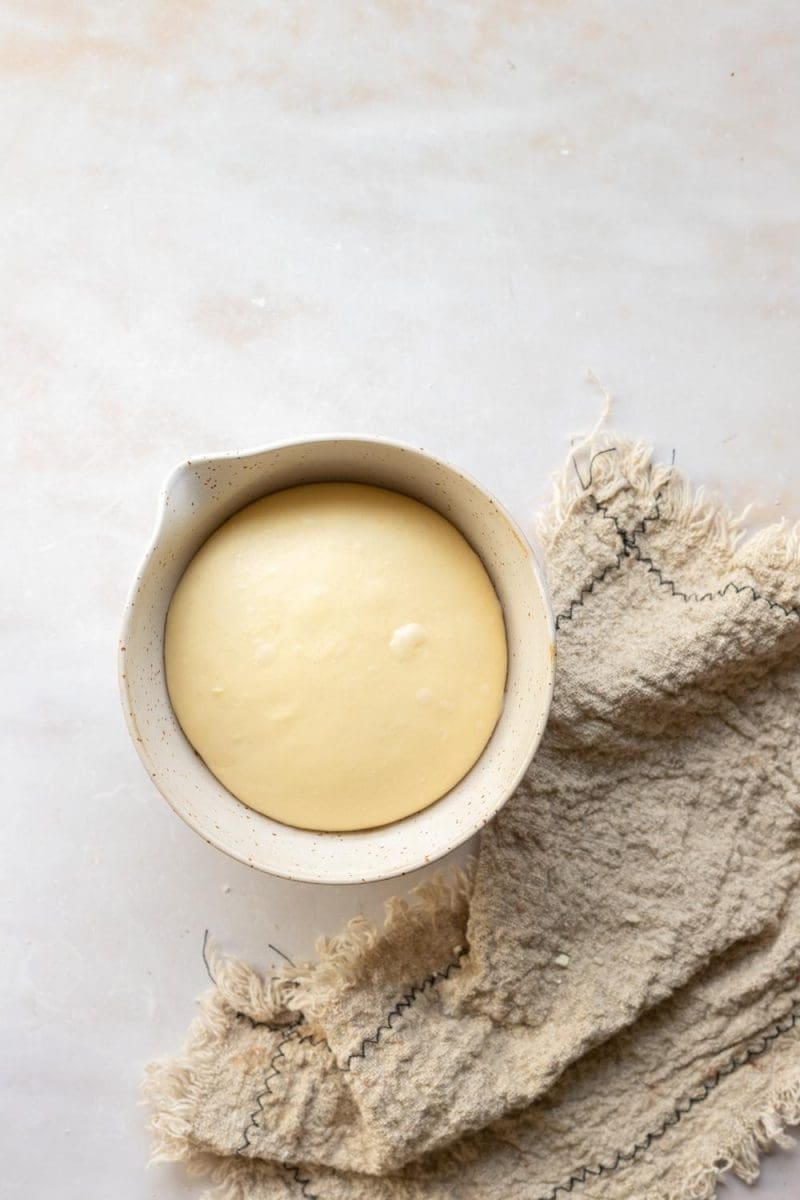
- Make the dough and let it rise until doubled in size.
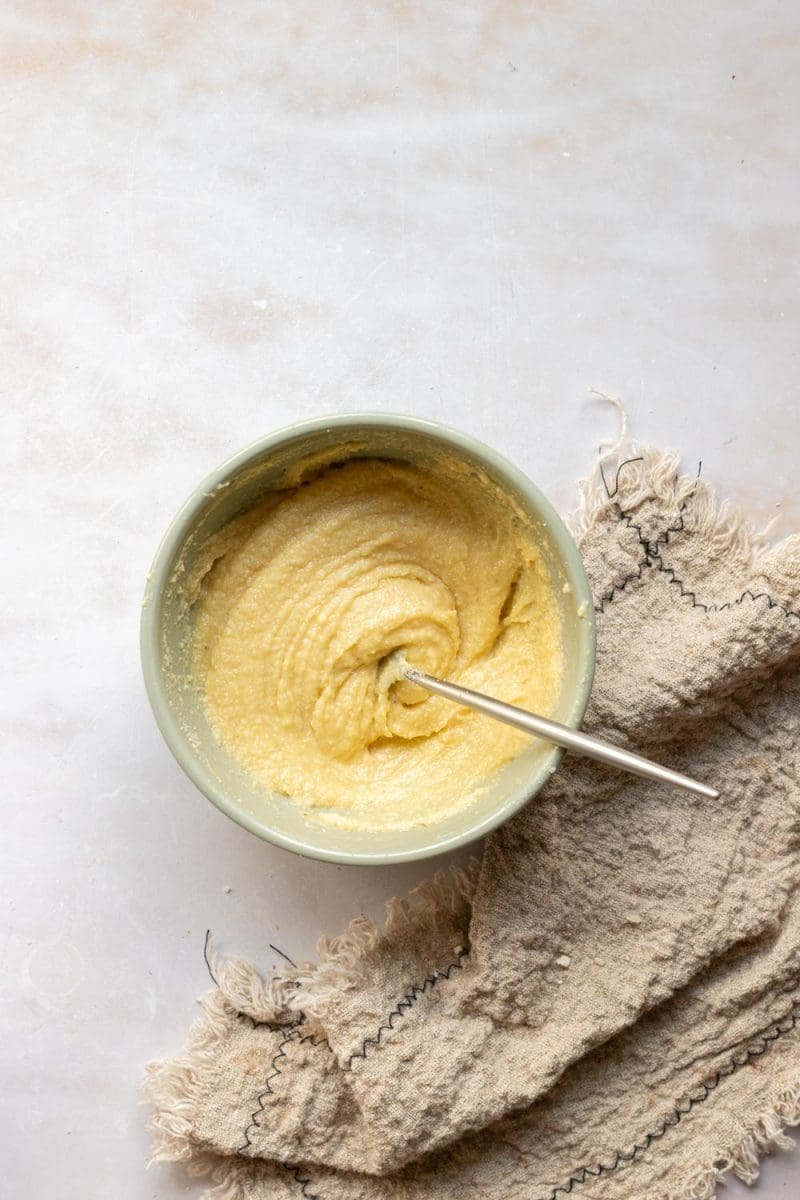
- Mix together the frangipane ingredients.
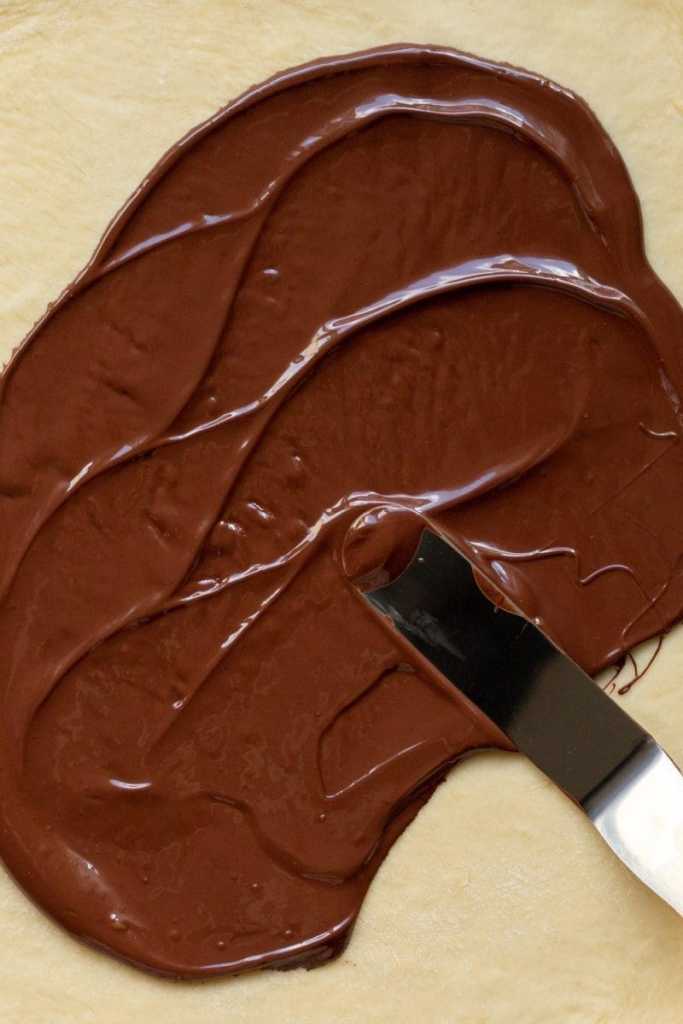
- Roll out the dough, then spread the melted chocolate into an even layer over the dough.
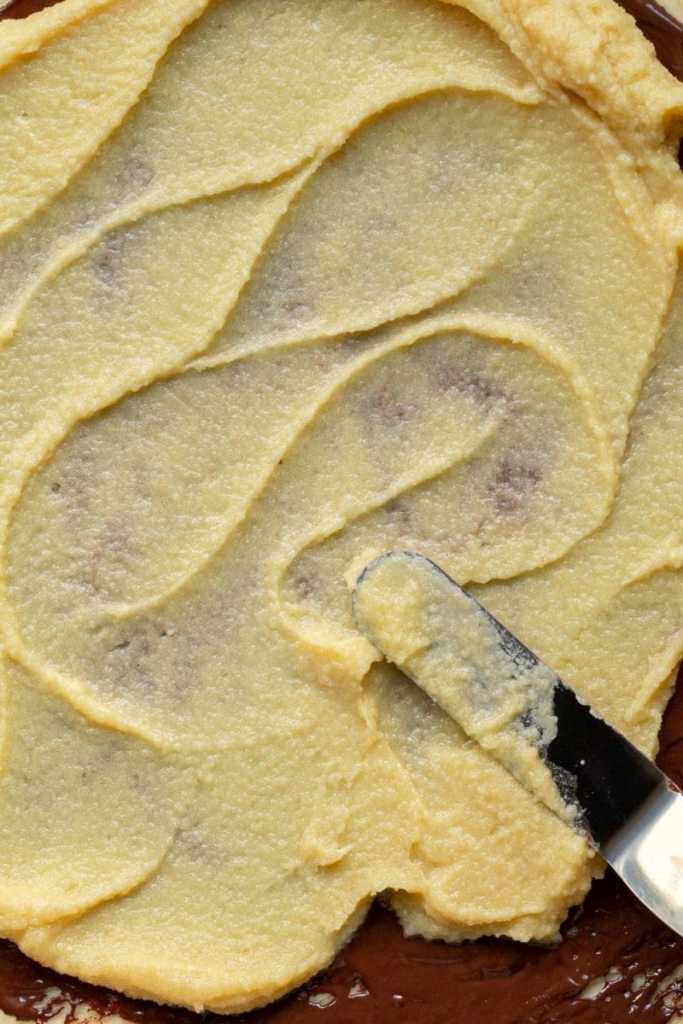
- Let the chocolate sit for 1-2 minutes to slightly set, then spread the frangipane over the chocolate.
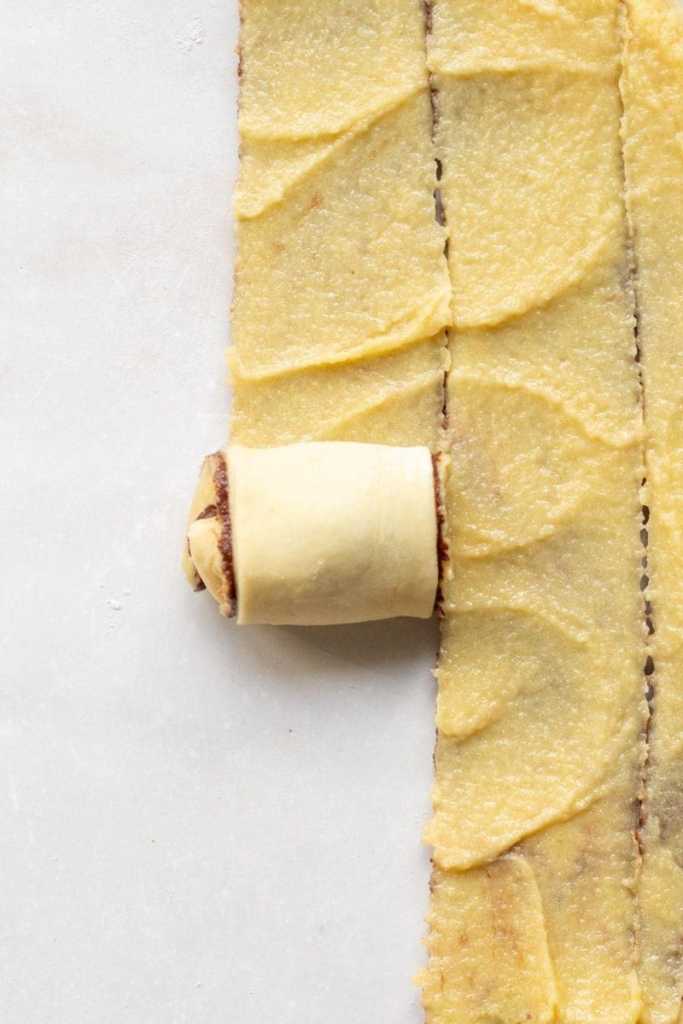
- Slice the dough into 6 strips, then roll up each strip.
- Place each roll into a muffin liner, let the rolls rise again, then bake and enjoy!
chocolate almond brioche rolls q&a
can I bake these in a different pan?
Yes! After slicing these, you can set them all together in an 8″ cake pan to make chocolate almond brioche rolls that are more like cinnamon rolls than muffins.
can I double this recipe?
Yes! I can’t emphasize using a kitchen scale enough for this recipe already, but if you are going to double or half the ingredients it is even more important that you weigh your ingredients. The dough is very hydrated and slight alterations can change the texture of the dough.
can I use instant yeast instead of active dry yeast?
Yes of course! Instead of mixing the heated milk, sugar, and yeast together, just pop all of the dough ingredients into your mixing bowl to start kneading. I do highly recommend refrigerating the dough overnight to make it easier to work with and more flavorful. However, if you are making the recipe all in one day, and using instant yeast, simply let the dough rest for just 10 minutes as the first rise (or however long it states on the instant yeast packet), then proceed with the rest of the recipe.
can I make the dough ahead of time?
Yes, and I highly recommend it because it will be easier to work with! Simply knead the dough together, cover it, and leave it to rise in the fridge overnight. When ready to make the rolls simply take the dough out of the fridge and proceed with the recipe.
how should I store these rolls?
Yeast breads typically will taste the best on the day that they are baked, as they tend to stale quickly. These will taste the best the day that they are baked, and the day after. Store them in an airtight container at room temperature.
why do you measure in grams?
My recipes are all written in grams because it is the most accurate way to bake. When you use a kitchen scale, you ensure that your baked goods turn out as close to the written recipe as possible. Plus, the cleanup is way easier when using a scale! I will provide standard cup measurements but please note that I have not tested the recipe using cup measurements and therefore can not guarantee your recipe will come out how mine did. Here is my favorite kitchen scale.
a note on oven temperature
Ovens vary and fluctuate in temperature and aren’t always at the temperature they claim to be. If you love to bake like I do, I highly recommend getting an oven thermometer. They are super helpful for letting you know when your oven might be lying to you! I use this one.
brioche troubleshooting
my yeast mixture isn’t foaming, what should I do?
The mixture should start foaming around 5 minutes in. If it has not foamed after 10 minutes, the yeast is likely dead. You want to make sure that the milk temperature does not exceed 110°F / 43°C or it will kill the yeast. If you try it again and it still does not foam, the yeast you are using may be expired and you will want to purchase some more before proceeding.
the dough just isn’t coming together
I can’t recommend the use of a kitchen scale enough, especially for this super-hydrated dough. If you’ve been kneading and kneading and the dough still won’t come together, add 1 tbsp. of flour at a time and knead for 2 minutes until the dough comes together. Please note that the dough at times has taken me up to 20 minutes to knead and pass the windowpane test!
tools and ingredients
You can find all my favorite tools and ingredients that I use on my Amazon Storefront page, here!
did you make these chocolate almond brioche rolls?
If you made these chocolate almond brioche rolls I would love to see them and know your thoughts! Please leave a comment and review down below, and tag me on Instagram @freshbeanbakery. If you have any questions about the recipe I will gladly do my best to answer them in the comments below!
Chocolate Almond Brioche Rolls
Equipment
Ingredients
Brioche
- 80 g whole milk (⅓ c.)
- 1 tsp. active dry yeast
- 1 tbsp. granulated sugar
- 160 g all purpose flour (1 ⅓ c.)
- ½ tsp. salt
- 1 egg room temperature
- 42 g unsalted butter (3 tbsp.) room temperature
Frangipane Filling
- 56 g unsalted butter (¼ c.) room temperature
- 50 g granulated sugar (¼ c.)
- 1 egg room temperature
- ¼ tsp. almond extract
- 60 g almond flour (½ c.)
- 1 tbsp. all purpose flour
- ⅛ tsp. salt
- 85 g semi sweet chocolate chips (½ c.)
Instructions
Brioche
- In a microwave safe measuring cup, heat the milk to 100°F / 38°C. Whisk in the yeast and the sugar. Set aside until the mixture begins to foam. (~5 minutes)
- While waiting, add the flour, salt, egg, and butter to the bowl of a stand mixer fitted with the dough hook attachment. When the yeast mixture begins to foam, add it in to the rest of the ingredients.
- Knead the mixture on medium speed for ~15-20 minutes. The dough is ready when it is no longer sticking to the sides or bottom of the bowl, and passes the windowpane test.*
- Once the dough is done kneading, shape the dough into a ball and place it back into the mixing bowl. Cover the mixing bowl with plastic wrap, and place it in a warm area to rise until doubled in size (~1 hr.)**
- Before it's time to roll out the dough, make the frangipane filling.
Frangipane
- In a small bowl, beat together the butter and sugar until smooth, then beat in the egg and almond extract. Mix in the almond flour, flour, and salt, then set aside.
- Melt the chocolate in a microwave safe bowl, then set aside.
Shaping the rolls
- Cut out six 6" squares of parchment paper to use as the muffin liners (or use pre-made tulip muffin liners.) Butter six cavities on a muffin pan, and push the parchment into them.
- Once the dough has doubled in size (or after taking it out of the fridge after rising overnight), lightly punch it down to remove excess air. Transfer the dough to a clean and lightly floured surface, then roll it out to a 12″ x 10″ (30 x 25 cm) rectangle.
- Carefully spread the melted chocolate over the dough, and let it sit for 1-2 minutes for the chocolate to slightly set.
- Place dollops of the frangipane over the chocolate, then spread it out evenly over the dough.
- Use a pizza cutter to cut 6 strips of dough from the longer (12") side. Roll each strip of dough into a tight roll, then place each roll into a muffin liner.
- Lightly cover the pan with a towel, and let the rolls rise in a warm environment until doubled in size (~30 min.)
- (Optional but recommended): Make an egg wash by whisking together 1 egg and 1 tbsp. milk. Brush the egg wash over each roll, then bake at 350°F / 175°C for 15-20 minutes. Use a thermometer to check when the rolls are done cooking (190°F / 88°C.)
- Dust with powdered sugar, serve, and enjoy!


I’ve been wanting to make these for a while, and I finally got the chance this weekend. They are SOO DELICIOUS. I made some minor adjustments here and there based on what ingredients I had on hand, but everything still came out perfectly! I’ll definitely be doubling this recipe in the future.
Looks delicious! I don’t see eggs in the dough recipe, though?
Thank you so much! There is 1 egg in the brioche and 1 in the frangipane 🙂
I made these over the weekend. I used the weight measurements and i still needed to add about an extra 1/3C of flour for the dough to come together, but the rest of the recipe went smoothly. They tasted amazing yesterday after I baked them but they taste considerably less amazing the next day. So definitely serve the same day!
I made a quadruple batch of these yesterday to take into work today. I goofed a little on the high side with my butter measurement and my eggs were XL so my dough was a bit wetter meaning that I had to add extra flour but I just kept adding until the dough pulled away from the bowl. Did a same day rise by putting the dough in my unheated basement for about 8 hours. These turned out great even though my son said that he thought the brioche dough could have used a bit more sugar. Impressed myself. 😉
Doubled the recipe-the only change that I made was the chocolate because it was what I had on hand. This recipe is amazing! Use the weight measurements and wait for the dough to window pane. It will get there-It may appear complicated but in reality, it is not. Added plus-it is a show stopper! Take the time to use parchment. Thank You!
Necesito esta receta en español por favor. Se ve deliciosa 😋😋
Just made these and they turned out great! I love anything frangipane and will double the recipe and share with my kids’ teachers! Thanks for sharing the recipe!
Thank you so much, I’m so happy you liked them! 🙂
I am hoping to make these this weekend! Is that a normal size muffin tin or jumbo?
Exciting, I hope you love them! I used a normal size muffin tin
Im newer to working with brioche dough but absolutely love it, so the second I saw this recipe I knew I had to try it! The rolls came out wonderful and 4 of the 6 are already eaten; thank you for such a well written recipe!
Ah thank you so much, I’m so happy you enjoyed the recipe. Thank you for making it! 🙂
I really wanted to love this recipe, but I had several issues throughout the process 🙁 I used weighted measurements so that was not the problem. First, my dough was way too wet so I ended up adding ~2 tbsps of flour which only helped slightly, it never did pull away from the sides of the bowl completely. Then when I was melting the chocolate chips, they were very gritty and did not form a smooth paste like yours in the picture, so that was also very difficult to spread. The dough itself was still much too sticky to roll out with a rolling pin even after the rise, so it kept ripping in the middle. I ended up making it work, but they did not look how they should have. Idk, maybe I did something wrong on my end but with metric measurements, there shouldn’t be so much variability with the results. I still love your recipes, just wanted to give some feedback on this one.
Hello, I’m so sorry you had issues with the recipe! I use this dough almost exclusively so I’m unsure why yours was so sticky but I would recommend adding in flour until the dough is no longer sticking to your hands when you work with it. Also, it has taken me up to 20 minutes to knead in the mixer before and can look like it’s not coming together even at the 10-12 minute mark sometimes! If it was ripping in the middle, it sounds like it was underkneaded and therefore didn’t have enough structure to hold together. Regarding the chocolate – it will get gritty if water is introduced to it or if you microwaved it for too long before stirring the chips, the result being burnt cocoa. Sorry that it didn’t turn out the first time but I hope this info is useful and thank you for trying out my recipes! 🙂
I made these last weekend and also had a very wet dough in the mixer at the outset. I think I ended up adding almost twice as much flour. Miraculously, I ended up with 6 appropriately sized buns, so I have no clue what was going on. I’m going to make again to see if I have the same flour ratio issue.
p.s. they were dang good!