
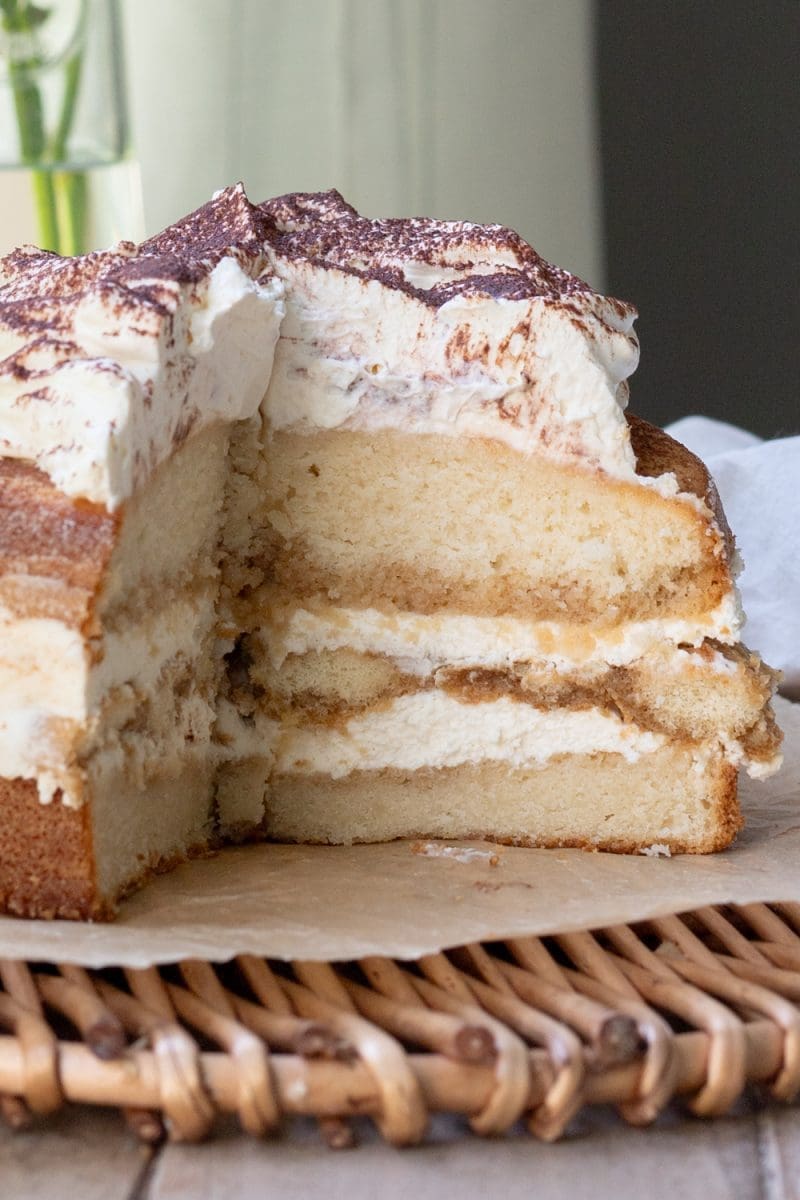
Tiramisu cake, with a super light and fluffy vanilla cake that’s soaked with espresso, filled with tiramisu, and topped with mascarpone cream.
This post may contain affiliate links, please read the privacy policy for details. This post is sponsored by Papanicholas Coffee. All opinions are my own.
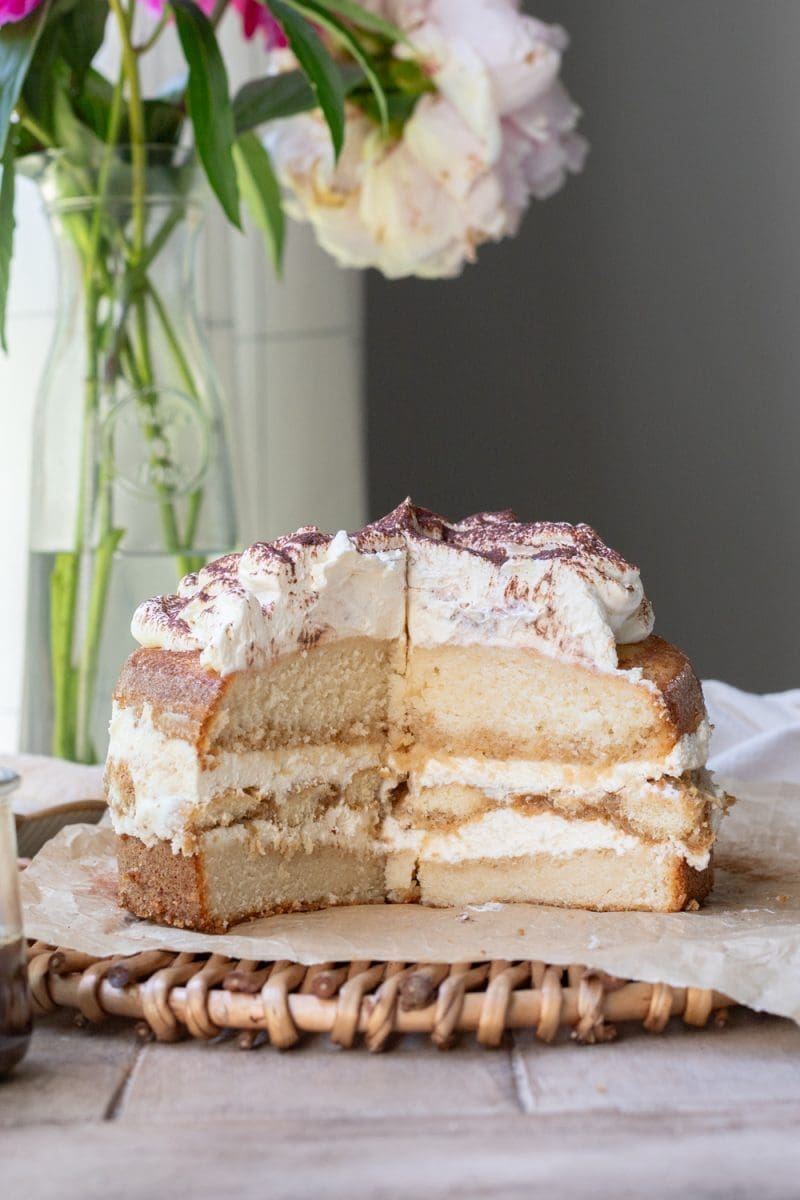
tiramisu cake
I know I say this a lot but I am VERY excited to share this recipe with you all today! If you look around my blog you might notice that I love coffee, which obviously means I love tiramisu as well. Today we’re turning tiramisu into a cake. And we’re not just putting all the flavors of a tiramisu into a cake. – we’re stuffing a cake *with* tiramisu.
The only thing special you’ll need is a 7″ springform pan (or 6″ for a taller cake) – you can find the one I used here. But other than that, this cake is super easy to make. So let’s get into it! 🙂
why you’ll love this tiramisu cake:
- It’s super light and fluffy: we’re adding whipped egg whites into the vanilla cake to make it extra light and fluffy.
- Tiramisu: I mean, it’s tiramisu stuffed into a cake, what’s not to love about that.
- It’s delicious: I wouldn’t give you something that I didn’t think was delicious of course, but if you’re a fan of tiramisu, I think you’ll be a big fan of this cake.
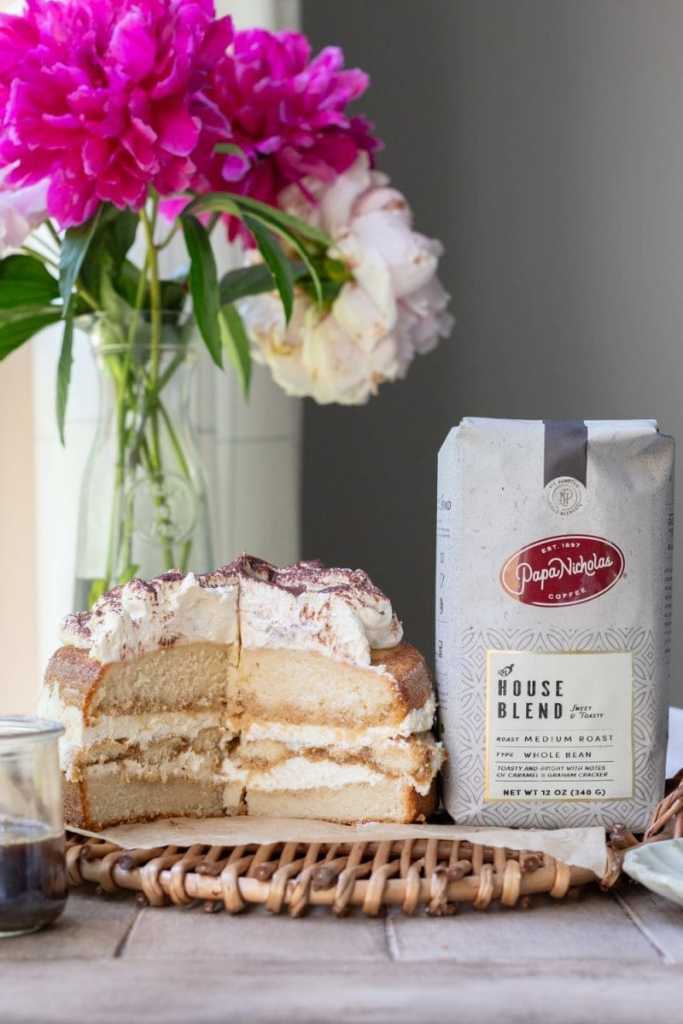
papanicholas coffee
My favorite brand of coffee is PapaNicholas Coffee, so it’s perfect that I get to work with them! I use their coffee beans every single day and am so happy to be able to spread my love of their coffee to you. Today I partnered up with PapaNicholas Coffee for these hazelnut mocha cupcakes and used their House Blend Espresso which is toasty yet bright, with notes of caramel & graham cracker. I can’t recommend them enough, so please be sure to check them out! You can find their website by clicking here. And if you do end up purchasing their coffee be sure to use code FRESH20 which will get you 20% off any of their coffee!.

expert baking tips
Weigh your ingredients:
My recipes are all written in grams because it is the most accurate way to bake. When you use a kitchen scale, you ensure that your baked goods turn out as close to the written recipe as possible. Plus, the cleanup is way easier when using a scale! I will provide standard cup measurements but please note that I have not tested the recipe using cup measurements and therefore can not guarantee your recipe will come out how mine did. Here is my favorite kitchen scale.
Be careful when mixing the cake batter:
When you over-mix your batter, you create more gluten in the batter which will make your cake go from light and moist to dense and chewy. When you mix in the wet ingredients, be sure to only mix just until that last streak of flour disappears.
Use room temperature ingredients:
This is super important for allowing the batter to come together smoothly. You’ll want to take your ingredients out of the fridge about an hour before baking to allow them enough time to come to room temperature.
Keep a close eye on the cake while it bakes:
Cakes and cupcakes like to go from under-baked to over-baked super quickly so it is important to keep a close eye on them. I’d recommend that you start checking on the cake around 35 minutes.
BE CAREFUL WHEN BEATING THE FILLING
When you’re beating together the mascarpone with the vanilla and sugar, you’ll really only want to mix it for ~30 seconds, just until it’s all combined. Mascarpone likes to get weird and clumpy the longer you beat it, as opposed to ingredients like butter and cream cheese which get nice and smooth.
A note on oven temperature:
Ovens vary and fluctuate in temperature and might not always actually be at the temperature they claim to be at. If you love to bake like I do, I highly recommend getting an oven thermometer. They are super helpful for letting you know when your oven might be lying to you! I use this one.

ingredients for tiramisu cake:
vanilla cake:
- All purpose flour: gives the cake structure.
- Baking powder: for helping the cake rise.
- Salt: for balancing and bringing out the sweetness of the batter.
- Unsalted butter: for tenderizing the cake and for flavor. You can substitute in salted butter, just be sure to omit the extra salt in the batter.
- Vegetable oil: for tenderizing the cake. If you don’t have vegetable oil on hand, you can use another neutral oil such as canola.
- Granulated sugar: for adding sweetness and for locking in moisture.
- Egg whites: for binding the batter together, adding moisture, and for making the cake super light and fluffy.
- Vanilla: for flavor.
- Sour cream & whole milk: for moisture and for tenderizing the cake. I recommend full-fat for both of these for the best texture, but low-fat or non-dairy alternatives should work well here.
espresso soak:
- Espresso: I know it’s a sponsored post but trust me when I say that PapaNicholas is truly my #1 espresso of choice and I drink it any day. Here I used their House Blend which is delicious, but you can use any espresso blend – flavored or not – here.
- Coffee liquor: my favorite (and the one I used here) is Kahlua.
- Granulated sugar: just a tiny bit to cut the bitterness of the espresso.
Tiramisu:
- Mascarpone: the base of any good tiramisu.
- Vanilla: for flavor, you can use extract or vanilla bean paste.
- Granulated sugar: for a bit of sweetness.
- Heavy whipping cream: we’ll be using heavy whipping cream here to make the mixture light and fluffy, and to eliminate the need for eggs in the filling.
- Ladyfingers: make sure you have the hard, crunchy ladyfingers rather than the cakey ones which will fall apart. If you’re able to get them, Savoirardi are the ones I use and prefer (I find them at Jewel Osco.)
how to make tiramisu cake
Below are some images of what the cake looks like at various points of the process. You can find the full recipe at the end of the blog post!


- Beat together the flour, baking powder, salt, sugar, and butter.
- Then mix in your wet ingredients, excluding the egg whites.
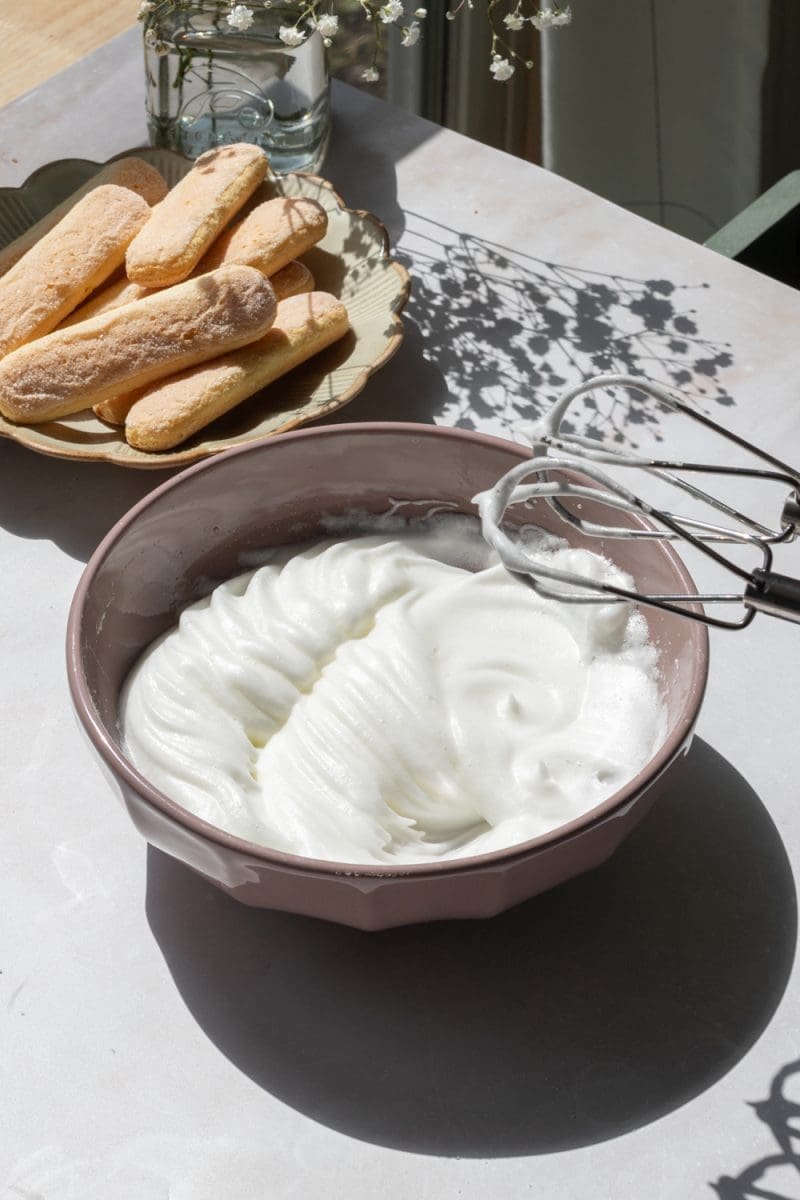
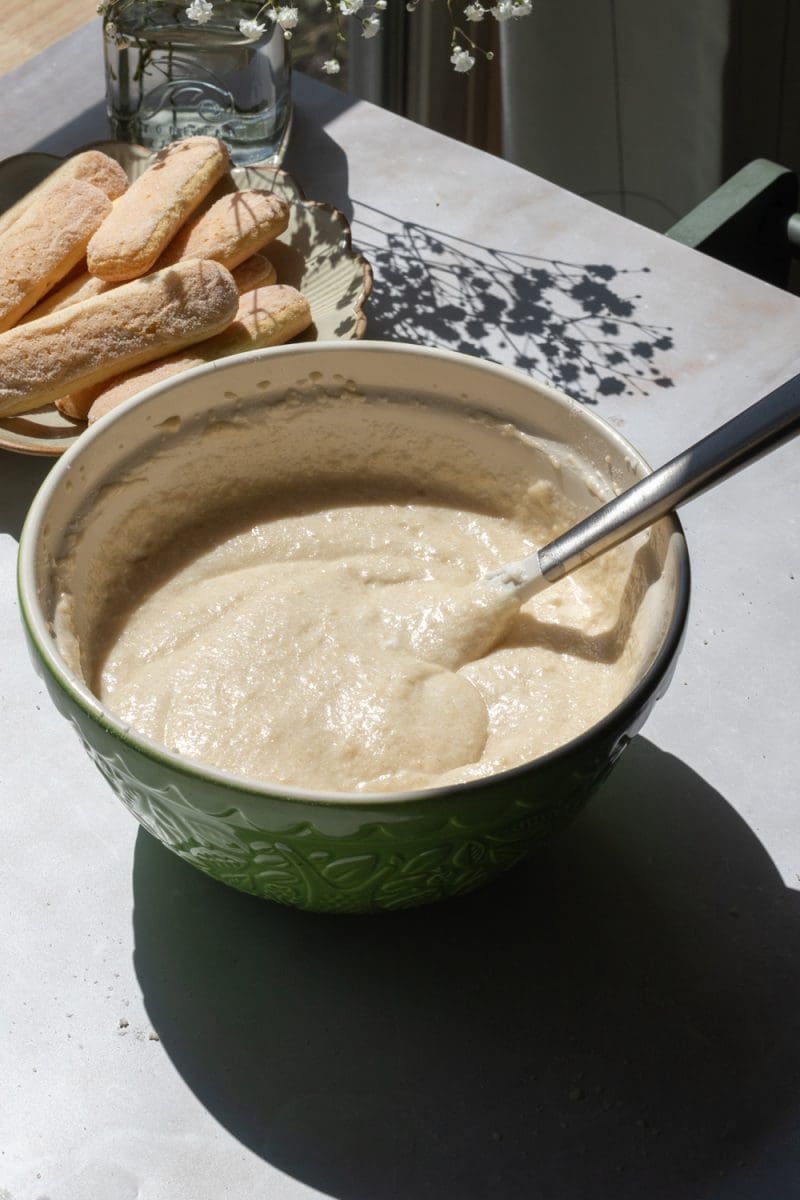
- In a separate bowl, beat the egg whites until stiff peaks form. Then, fold the egg whites in to the cake batter.
- Bake the cake.
- Make the espresso soak and tiramisu filling.
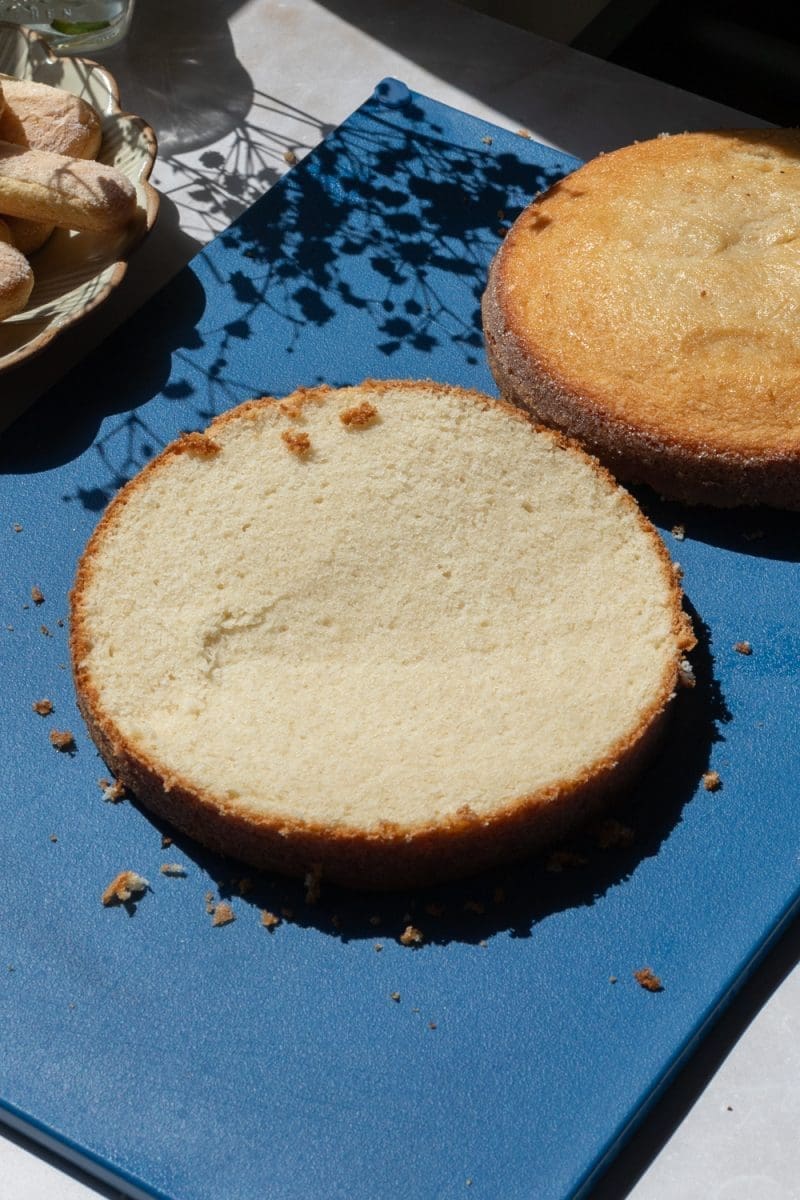
- Once the cake has cooled, slice it in half horizontally.


- Soak the cake with some of the espresso filling.
- Spread some of the mascarpone cream on to the cake, then top it with espresso soaked ladyfingers, another layer of mascarpone cream, and the top of the cake. Chill, then serve with more mascarpone cream and a dusting of cocoa!
tiramisu cake recipe q&a
Can I bake this cake in a different sized pan?
You could bake this in a 8″ springform. Just note that the cake and cream layer will be a tad thinner.
can I make this cake ahead of time?
Definitely! You can bake the cake up to two days in advance and keep it stored in an airtight container at room temperature. I would recommend waiting to fill the cake with the cream until the day you want to serve it, so you don’t have to keep it stored in the fridge where it will dry out faster.
how to store tiramisu cake
Once you fill the cake, you’ll want to keep it stored in an airtight container in the fridge, where it will keep well for about 3 days.

tools and ingredients:
You can find all my favorite tools and ingredients that I use on my Amazon Storefront page, here!
other recipes you might enjoy:
did you make this recipe?
I’d love to see and know your thoughts! please leave a comment and review below, and tag me on instagram @freshbeanbakery. #freshbeanbakery
Tiramisu Cake
Ingredients
Vanilla Cake
- 150 g all purpose flour (1 ¼ c.)
- 1 ¼ tsp. baking powder
- ½ tsp. salt
- 175 g granulated sugar (¾ c. + 2 tbsp.)
- 85 g unsalted butter cubed, room temperature (6 tbsp.)
- 25 g vegetable oil (2 tbsp.)
- 1 tbsp. vanilla
- 60 g sour cream room temperature (¼ c.)
- 100 g whole milk room temperature (¼ c. + 3 tbsp.)
- 2 egg whites room temperature
Espresso Soak
- 170 g espresso (6 oz.)
- 3 tbsp. coffee liquor
- 1 tbsp. granulated sugar
Tiramisu
- 280 g mascarpone (1 ¼ c.)
- 2 tbsp. granulated sugar
- 1 ½ tsp. vanilla
- 280 g heavy whipping cream (1 ¼ c.)
- 7* ladyfingers
- cocoa powder for dusting
Instructions
Vanilla Cake
- Preheat the oven to 350°F / 175°C. Butter a 7" springform pan*, then coat the inside with sugar.
- To a medium sized mixing bowl, add the flour, baking powder, salt, sugar, and cubed butter. Use a hand mixer or a stand mixer fitted with the paddle attachment to beat the mixture together until the butter has completely combined with the dry ingredients and no lumps remain.
- Add in the oil, vanilla, sour cream and milk. Whisk the ingredients together just until a cohesive batter has formed.
- In a separate bowl, beat the egg whites until they reach stiff peaks.
- Add the egg whites to the batter and gently fold them into the batter until the mixture is cohesive.
- Pour the cake batter into your prepared pan. Bake for 35-45 minutes, until a toothpick inserted in the center of the cake comes out with only a few moist crumbs.
- Allow the cake to rest in the cake pan for at least 15 minutes before transferring it out to a cooling rack.
Espresso Soak
- In a small bowl, mix together the freshly brewed espresso, coffee liquor and sugar. Place the mixture in the freezer for ~5 minutes, until it cools to room temperature.
- Once the cake has completely cooled to room temperature, slice it in half horizontally to get two even pieces.
- Use ~⅓ c. of the mixture to brush on the inside of both halves of the cake.
- Place the bottom half of the cake back into the springform pan.
Tiramisu
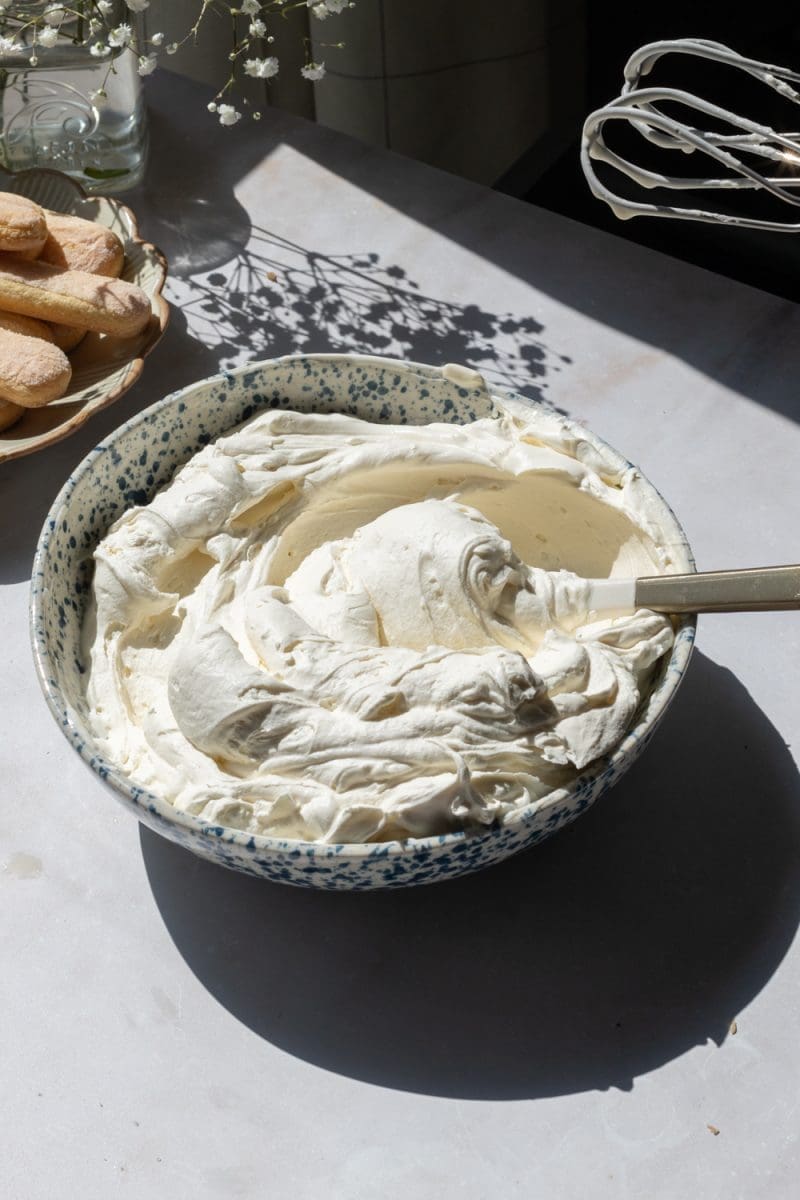
- In a medium sized mixing bowl with a hand or stand mixer, beat together the mascarpone, sugar, and vanilla just until the mixture is cohesive.
- Slowly beat in the heavy whipping cream. Once all of the heavy cream has been added, beat the mixture until stiff peaks form.
- Spread ¼ of the mascarpone cream on top of the cake in the springform pan.
- Quickly dip the ladyfingers into the espresso mixture on both sides, then layer them into a single layer on top of the mascarpone cream.
- Spread ⅓ of the remaining mascarpone cream over the ladyfingers.
- Place the top half of the cake on to the mascarpone cream – pushing down slightly to secure it.
- Cover the cake with plastic wrap and leave it in the fridge to set for at least 30 minutes. Place the remaining mascarpone cream in the fridge as well until you are ready to serve the cake.
- Once you're ready to serve the cake, spread the remaining mascarpone cream on top and dust it with some cocoa powder. Then, slice, serve, and enjoy!
Notes
Nutrition
Please note that the nutrition facts are only an estimate and may vary based on different brands of ingredients and any substitutions made.


This was so crazy good and a lot easier to execute than I expected! Def don’t forget the espresso soak it really brings a whole new level of flavor to the cake
Thank you so much Tess, I’m so happy you liked the cake! 🙂
What can you substitute the alcohol with? We don’t drink alcohol and I would still love to make this cake
Hi! You can just omit the rum and replace it with more espresso! 🙂