
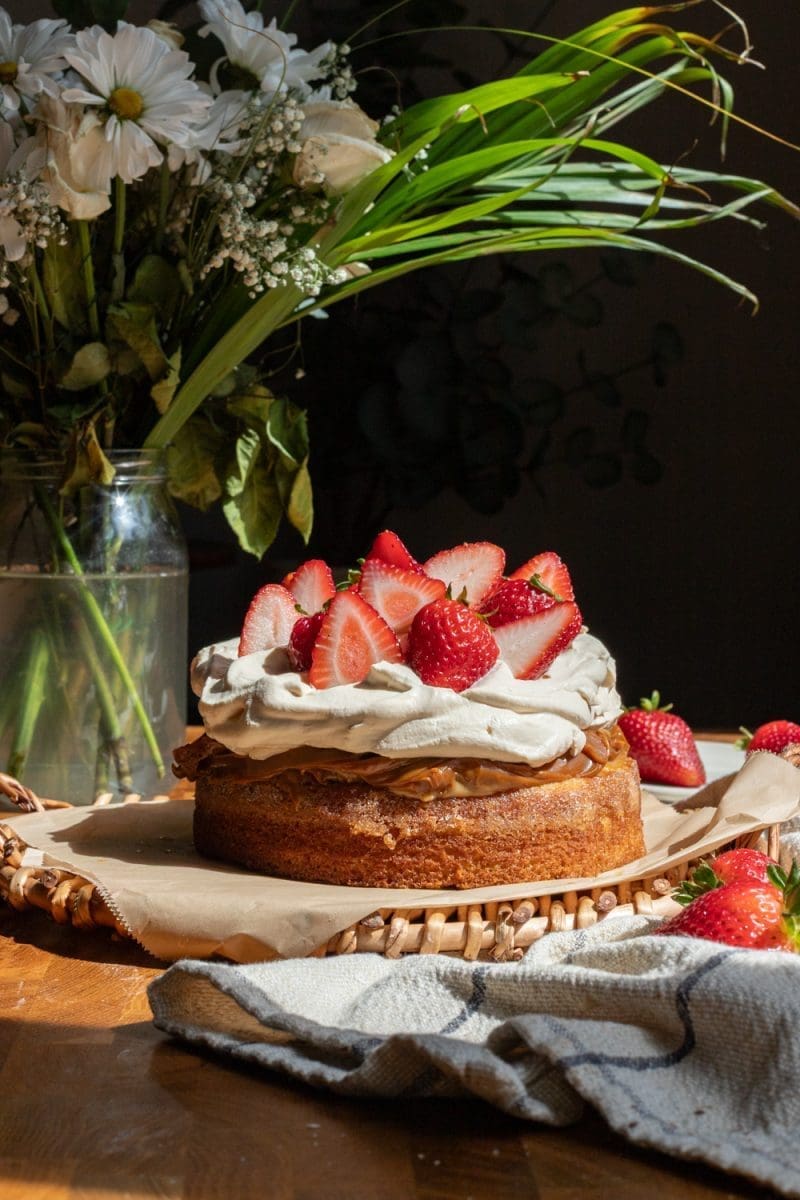
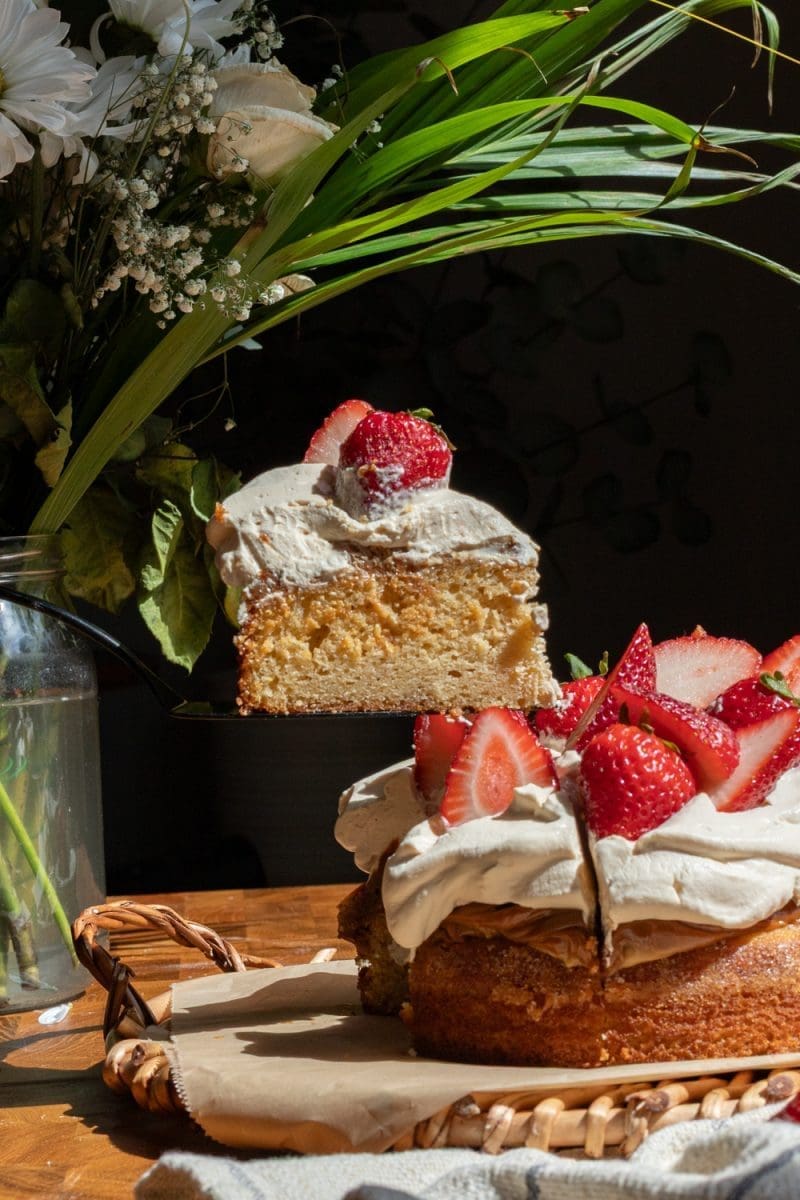
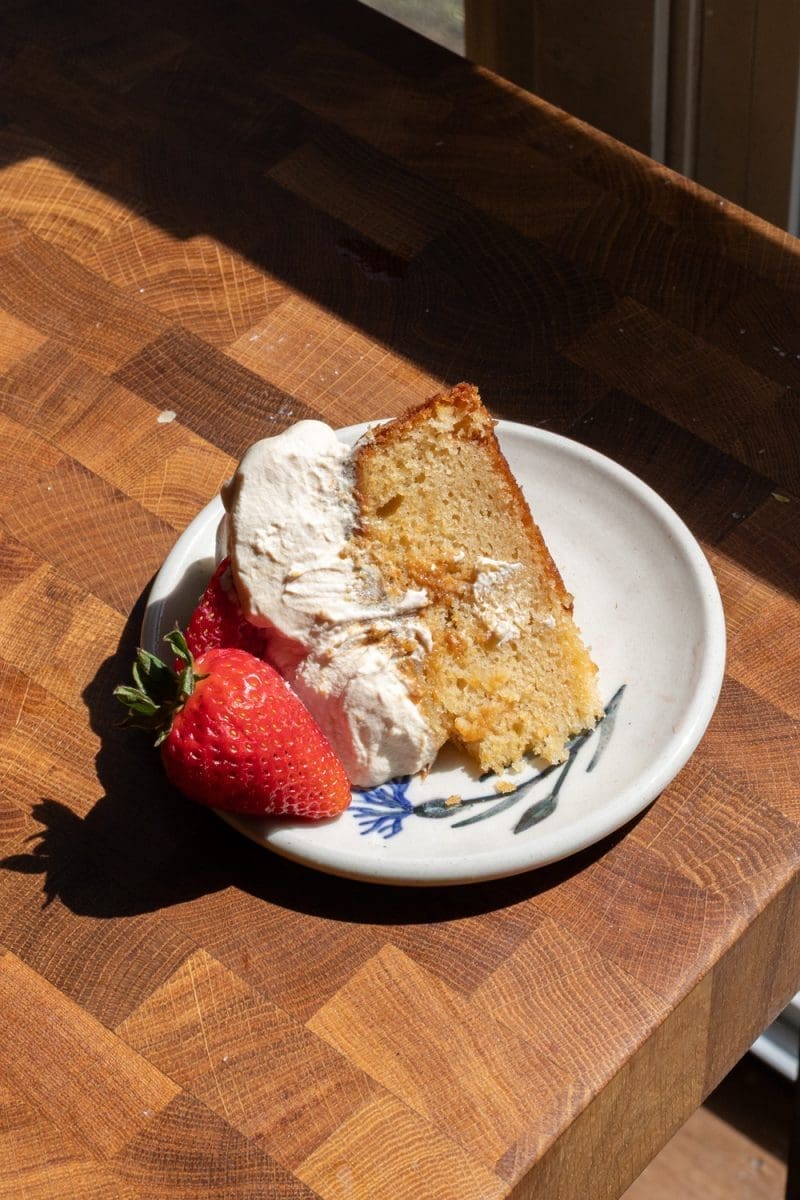
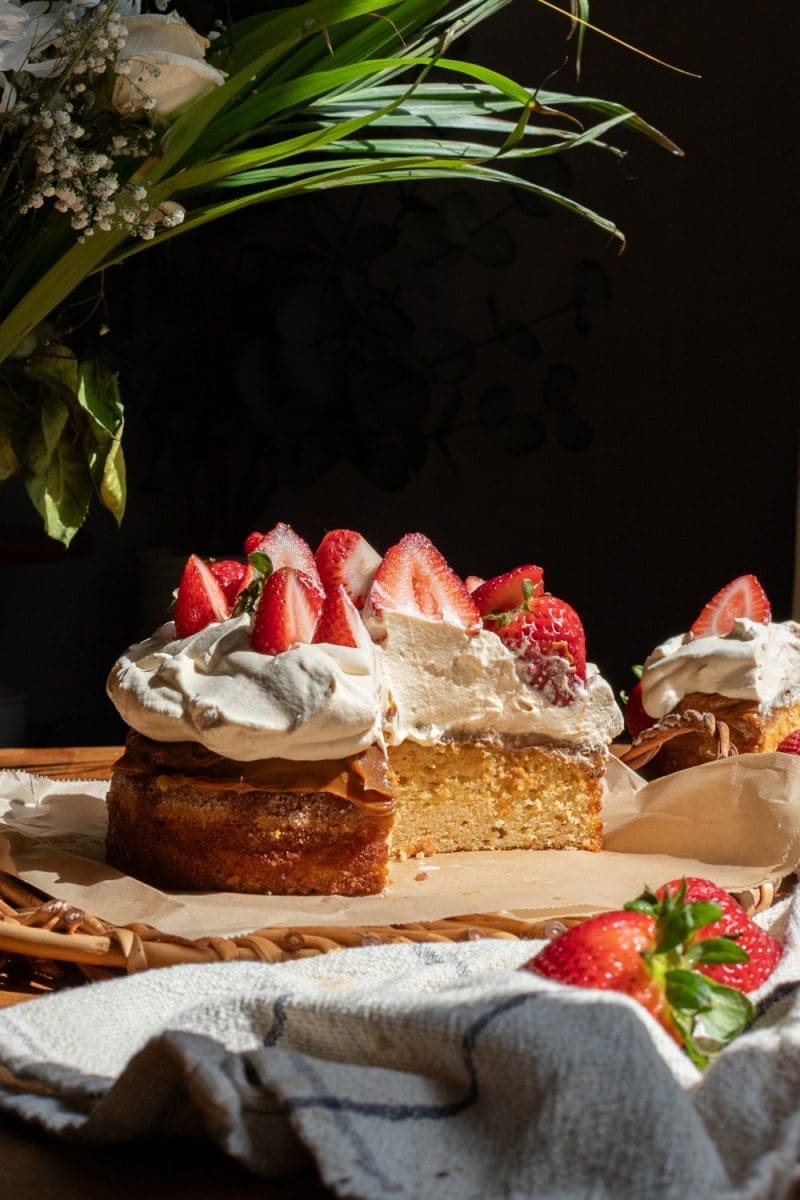
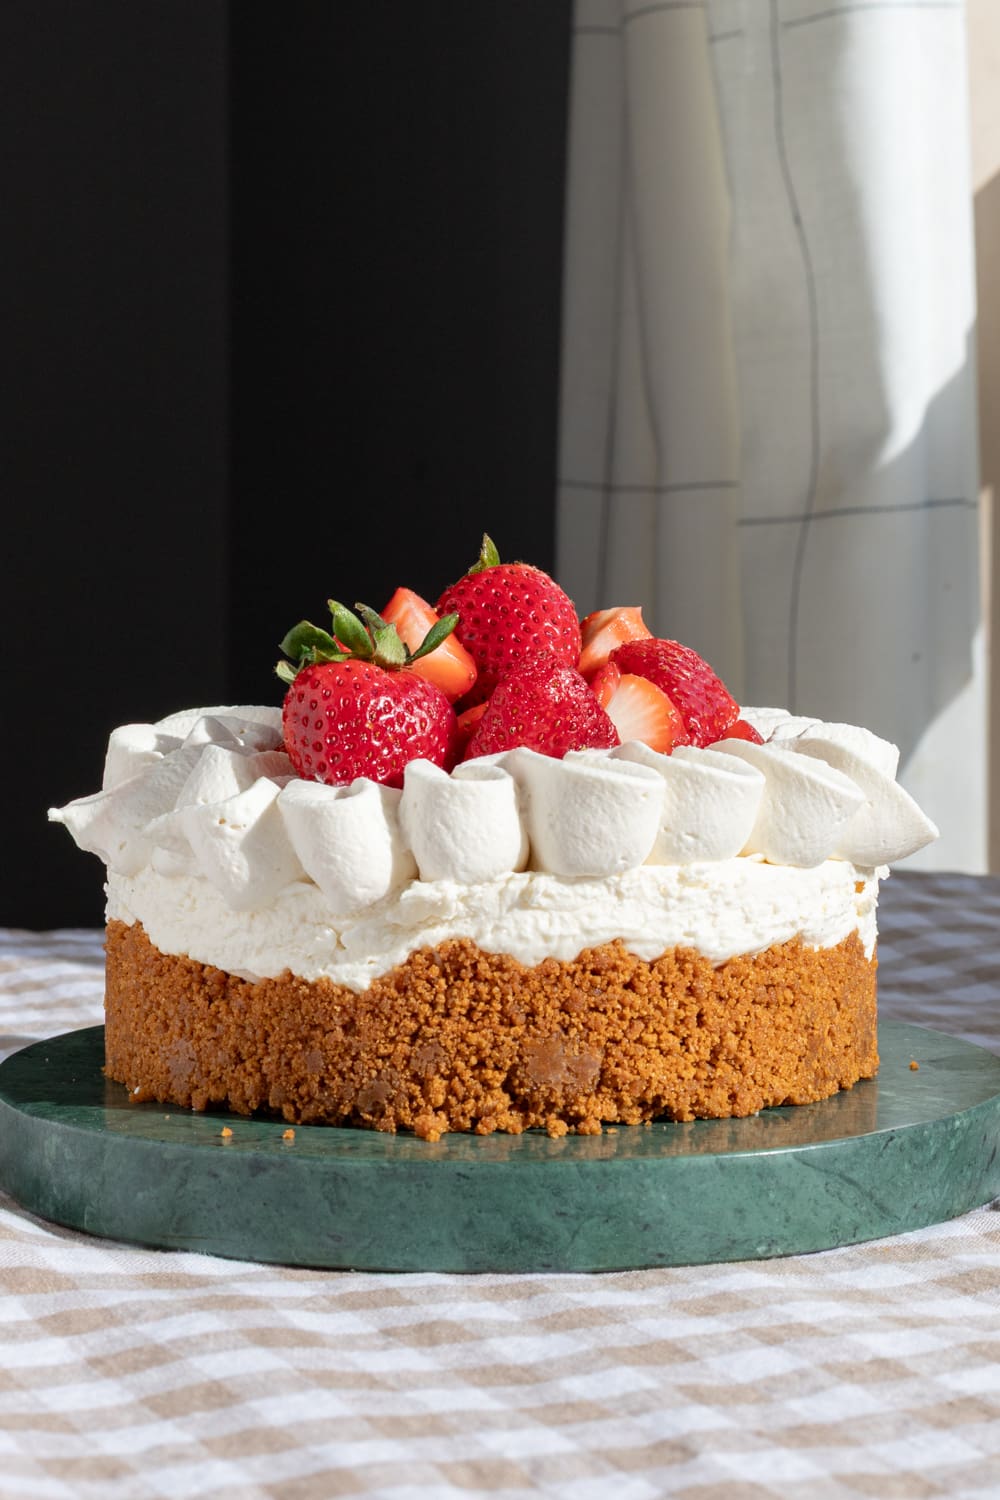
Dulce de leche strawberry shortcake – with a fluffy dulce de leche cake that’s topped with a thick layer of dulce de leche, vanilla bean whipped cream & fresh strawberries.
This post may contain affiliate links, please read the privacy policy for details. // Recipe updated 05/28/2025.
dulce de leche strawberry shortcake
Hello hello! ☺︎ Today we’re taking strawberry shortcake to the ultimate next level by making a dulce de leche strawberry shortcake. It starts with a moist dulce de leche vanilla cake that’s paired with a dulce de leche milk soak, and then topped with a thick layer of dulce de leche. To that, we pile on a very tall layer of fresh vanilla bean whipped cream, and of course, a ton of fresh strawberries.
The only thing special you’ll need is a 7″ springform pan – you can find the one I used here. But other than that, this cake is super easy to make. So let’s get into it! 🙂
why you’ll love this dulce de leche cake
- Dulce de leche: the cake is *loaded* with dulce de leche – it’s in the cake, in the milk soak, on top of the cake, and in the whipped cream.
- The topping: no frosting here – a very tall layer of dulce de leche, fresh whipped cream, and a ton of strawberries make up the topping of this cake.
expert baking tips
Weigh your ingredients:
My recipes are all written in grams because it is the most accurate way to bake. When you use a kitchen scale, you ensure that your baked goods turn out as close to the written recipe as possible. Plus, the cleanup is way easier when using a scale! I will provide standard cup measurements but please note that I have not tested the recipe using cup measurements and therefore can not guarantee your recipe will come out how mine did. Here is my favorite kitchen scale.
Be careful when mixing the cake batter:
When you over-mix your batter, you create more gluten in the batter which will make your cake go from light and moist to dense and chewy. When you mix in the wet ingredients, be sure to only mix just until that last streak of flour disappears.
Use room temperature ingredients:
This is super important for allowing the batter to come together smoothly. You’ll want to take your ingredients out of the fridge about an hour before baking to allow them enough time to come to room temperature.
Keep a close eye on the cake while it bakes:
Cakes and cupcakes like to go from under-baked to over-baked super quickly so it is important to keep a close eye on them. I’d recommend that you start checking on the cake around 35 minutes.
A note on oven temperature:
Ovens vary and fluctuate in temperature and might not always actually be at the temperature they claim to be at. If you love to bake like I do, I highly recommend getting an oven thermometer. They are super helpful for letting you know when your oven might be lying to you! I use this one.
dulce de leche strawberry shortcake ingredients –
dulce de leche cake:
- All purpose flour: gives the cake structure.
- Baking powder: helps the cake rise.
- Salt: for balancing and bringing out the sweetness of the batter.
- Unsalted butter: for tenderizing the cake and adding flavor. You can substitute salted butter, just be sure to omit the extra salt in the batter. You can also use your favorite dairy-free butter stick in its place.
- Vegetable oil: for tenderizing the cake. You can substitute any neutral oil, such as canola, in place of vegetable oil.
- Granulated sugar: for sweetening the cake and keeping it moist.
- Egg: for binding and for moisture.
- Dulce de leche: we’ll use some dulce de leche directly in the cake for flavor.
- Vanilla: for flavor.
- Sour cream: adds moisture and makes the cake tender. I recommend full-fat sour cream for the best texture.
- Whole milk: adds moisture – like above I recommend whole for the best results. However, 2%, 1%, or your favorite non-dairy milk should work just fine.
dulce de leche milk soak:
- Whole milk & dulce de leche: to keep the cake moist.
whipped cream and topping:
- Heavy whipping cream: the base of the whipped cream.
- Dulce de leche: you’ll need a little bit for the whipped cream itself, and a lot for a layer of dulce de leche on top of the cake.
- Vanilla bean paste: for flavor – vanilla extract also works perfectly here.
- Salt: for balancing and bringing out the flavor and sweetness of the whipped cream.
- Strawberries: you’ll want fresh strawberries here – if you’re not a fan of strawberries you can top this cake with any other berry or your favorite seasonal fruit.
how to make dulce de leche strawberry shortcake
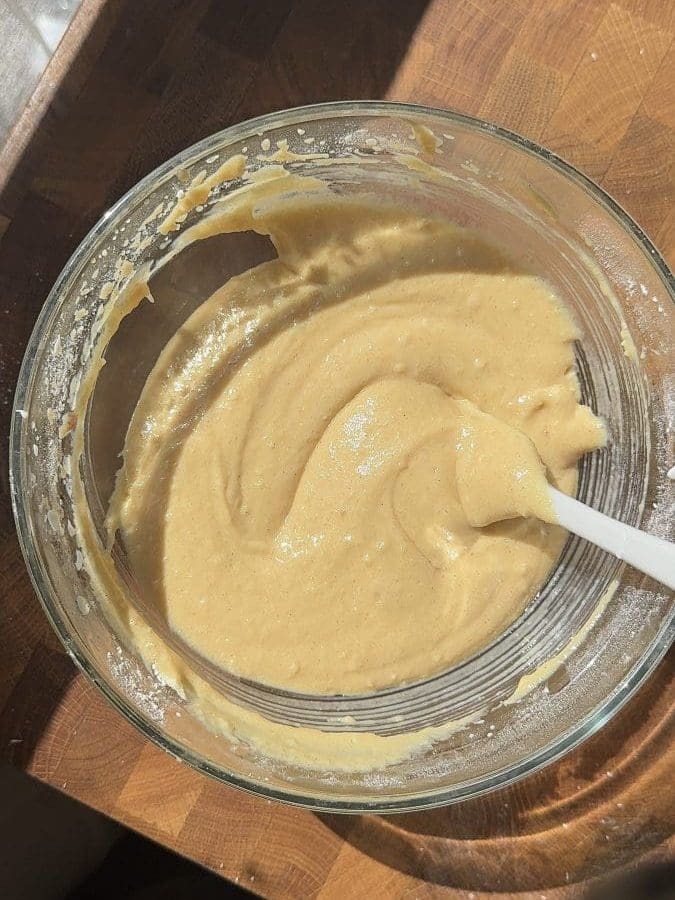
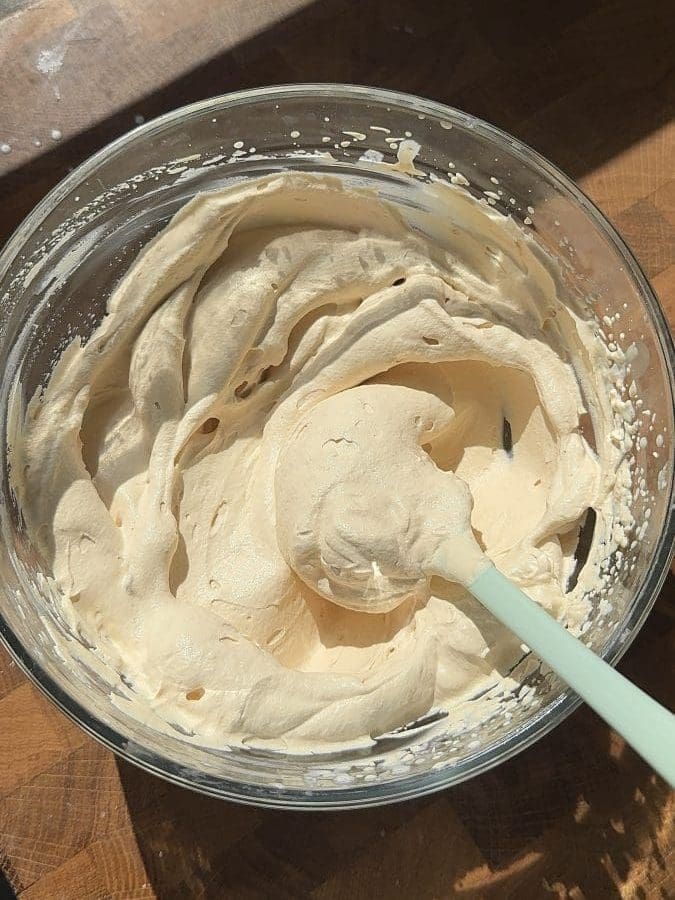
Below are some images of what the cake looks like at various points of the process. You can find the full recipe at the end of the blog post!
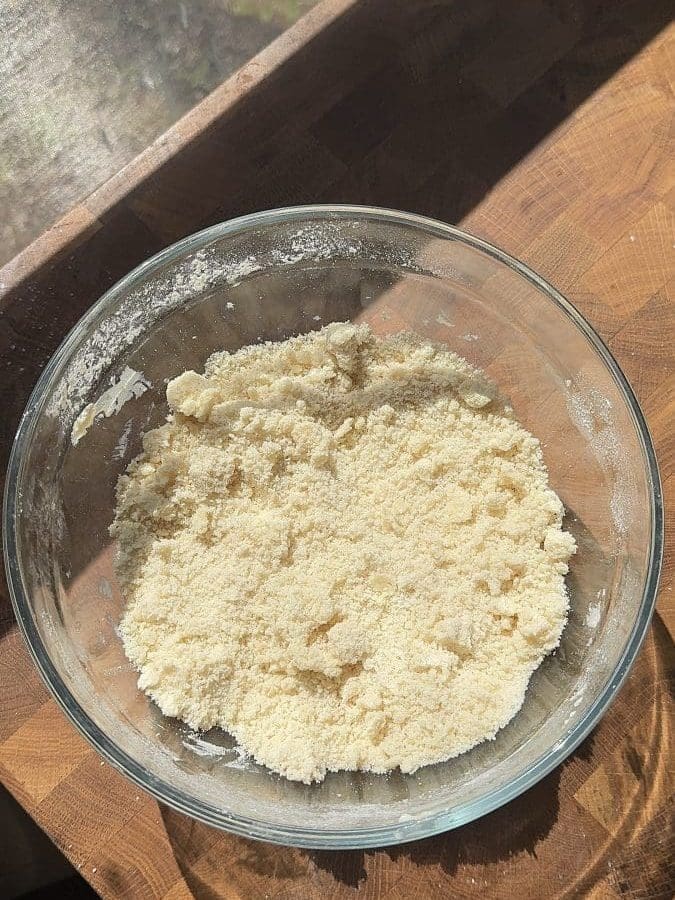
- Beat together the dry ingredients & butter.
- Then beat in the wet ingredients.
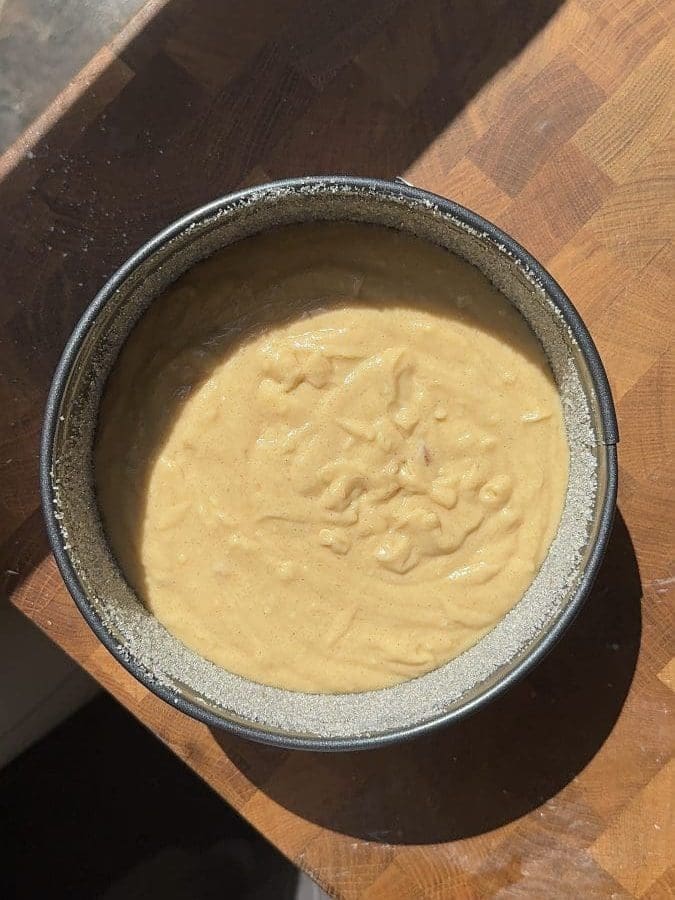
- Bake the cake.
- Once the cake has cooled to room temperature, top it with the milk soak and make the whipped cream.
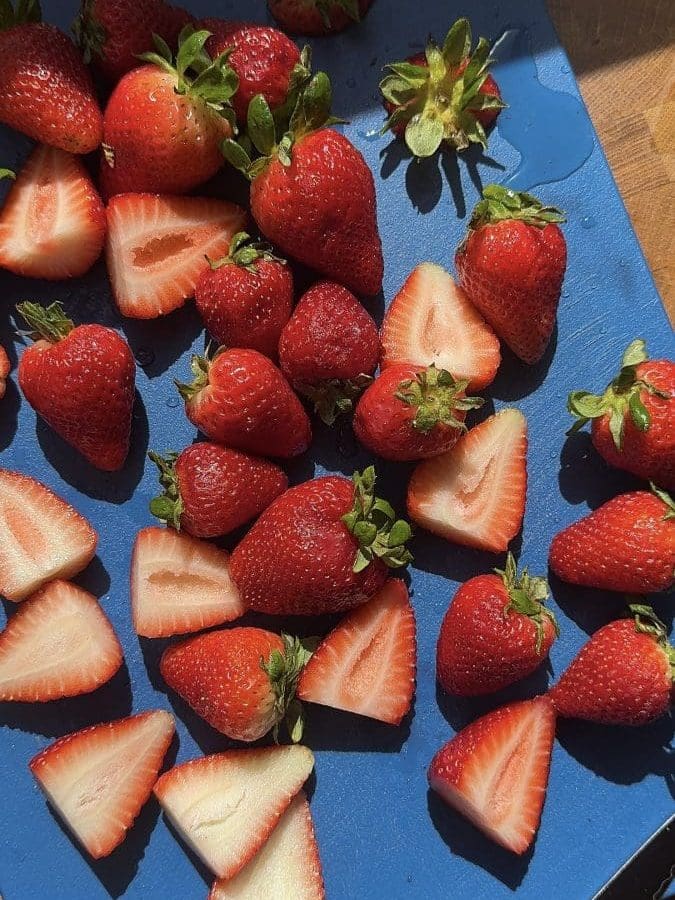

- Chop up the strawberries.
- Assemble the cake, then serve & enjoy!
dulce de leche strawberry shortcake
recipe q&a
caramel vs dulce de leche
Dulce de leche and caramel look pretty similar but are quite different. Caramel is simply made by melting down and caramelizing sugar, and then that can be made into caramel sauce with the addition of butter and heavy cream. Dulce de leche, however, is much richer than caramel. That’s because it’s made through a slow process of simmering milk with sugar until both the regular sugar and the sugars in the milk caramelize, leaving you with this rich and creamy mixture. In a pinch you could definitely sub caramel sauce into this recipe, but I much prefer the richness of dulce de leche here!
can I double this recipe?
Of course! I even more strongly recommend measuring by weight if you are going to double the recipe for the best results.
what size cake pan do I need?
I used a 7-inch cake pan for this strawberry dulce de leche cake. You can use a 8-inch cake pan instead, just note that the cake will be a little thinner and will probably require a little less baking time.
can I use a different fruit on top?
Definitely! Really any soft fruit would be delicious on top of this cake: blueberries, blackberries, raspberries, bananas, apricots, etc.
how to store strawberry shortcake
If possible, I would recommend waiting to top this cake until you are going to serve it. Otherwise, it will get a little soggy and you will have to store it in the fridge. Once you top the cake with the dulce de leche and whipped cream, it can stay out safely for up to 2 hours before needing to go in the fridge. If you’d like to make this cake ahead of time, you can wrap the cake in plastic wrap and keep it out on the counter, and make the whipped cream and store it in the fridge.
tools and ingredients:
You can find all my favorite tools and ingredients that I use on my Amazon Storefront page, here!
other recipes you might enjoy:
did you make this recipe?
I’d love to see and know your thoughts! please leave a comment and review below, and tag me on instagram @freshbeanbakery. #freshbeanbakery
Dulce de Leche Strawberry Shortcake
Ingredients
Dulce de Leche Cake
- 120 g all purpose flour (1 c.)
- 1 ¼ tsp. baking powder
- ¼ tsp. salt
- 100 g granulated sugar (½ c.)
- 56 g unsalted butter room temperature, cubed (4 tbsp.)
- 25 g vegetable oil (2 tbsp.)
- 1 egg room temperature
- 20 g dulce de leche (1 tbsp.)
- 1 tsp. vanilla
- 60 g sour cream room temperature (¼ c.)
- 70 g whole milk room temperature (2 ½ oz.)
Dulce de Leche Milk Soak
- 10 g dulce de leche (1 ½ tsp.)
- 30 g whole milk (1 oz.)
Dulce de Leche Whipped Cream
- 180 g heavy whipping cream (6 ½ oz.)
- 20 g dulce de leche (1 tbsp.)
- 1 tsp. vanilla bean paste
- ⅛ tsp. salt
Topping
- 200 g dulce de leche (½ c. + 2 tbsp.)
- ~1 lb. fresh strawberries washed and halved
Instructions
Dulce de Leche Cake
- Preheat the oven to 350°F / 175°C. Butter a 7" cake pan and coat it with granulated sugar.
- To a medium sized mixing bowl, add the flour, baking powder, salt, sugar, and cubed butter. Use a hand mixer or a stand mixer fitted with the paddle attachment to beat the mixture together until the butter has completely combined with the dry ingredients and no lumps remain.
- Add in the oil, egg, dulce de leche, vanilla, sour cream, and milk. Whisk the ingredients together just until a cohesive batter has formed.
- Pour the cake batter into your prepared pan, then bake for 30-35 minutes, until a toothpick inserted into the center of the cake comes out with just a few moist crumbs.
- Allow the cake to fully cool to room temperature before assembling.
Dulce de Leche Milk Soak
- Add the dulce de leche and milk to a microwave safe measuring cup. Microwave for 30 seconds, then stir the mixture and microwave it for another 30 seconds. Your dulce de leche should be melted and combined with the milk, but if it's not, microwave in 10 second intervals until it is.
- Poke a bunch of small holes in to the top of your room temperature cake in the springform pan. Pour the milk soak over the cake and leave it to sit while you make the whipped cream.
Dulce de Leche Whipped Cream
- In the bowl of a stand mixer fitted with the whisk attachment, or with a hand mixer, beat together the heavy whipping cream, dulce de leche, vanilla, and salt until soft peaks form.
Assembling the cake
- Wash and cut the strawberries in half, leaving some whole for the looks if desired (like in the pictures.)
- Gently dollop the 200g of dulce de leche on top of the cake, and spread around into an even layer.
- Pile on the whipped cream and gently spread it around, then pile on the strawberries.
- Slice, serve, and enjoy!

Hi! I was wondering if this cake is for 7 inch or 9 inch pans? The recipe itself says 7 inch but above in the Q&A you said you used 9 inch. I’d love to know as I really want to make this cake, it looks so good! Thank you
Hi! Sorry about that – this cake *used* to be 9″ but now it’s 7″ – I’ve now updated that section! 🙂
Hi Erin,
This was mind-blowingly delicious!
Thank you for sharing 🙂
Thank you so much Caroline, I’m so happy you enjoyed the cake! 🙂
This was perfect – exactly what I wanted when looking for a summery dessert recipe. Recipe was easy to follow and the end product was delicious. Brought to a party and 3 people asked me for the recipe. I will be making this again!
Thank you so much Grace, I’m so happy you and others enjoyed the cake! 🙂
Thank you SO much for this recipe. I made it for my birthday. It was easy to follow and the result was beyond perfect. My family and I loved it! I’m obsessed with how good this recipe turned out! Thank you again!! 🙂
Ahh thank you, I’m so happy you liked the recipe! 🙂 Happy belated birthday!
What is the best alternative to vegetable oil for this recipe?
Canola oil is the closest neutral alternative! Any oil will work – just note that if it’s something flavorful (such as olive oil), you’ll get some of that taste in the cake as well.
I made this cake 2 days in a row for separate occasions, it was a huge hit; so, so yummy!
One of my family’s new favourite desserts.
Ah thank you so much, I’m so happy you and your family enjoyed it! 🙂
Hi,
Could I use three 6 in or two 8 inch pans? How would the baking times change?
Thank you!
Hi! If you split the batter between three 6 in. pans the layers will be shorter so you’ll probably want to start checking on the cakes around 15-20 min. You wouldn’t have enough batter for two 8 in. pans with just 1 of this recipe, but if you doubled it and split it between two 8 in. pans then they’d be a bit thicker and would probably take around 40-50 min. rather than 30-40. I hope this helps!
This was an incredibly easy cake to make! It was also decadently delicious! I will be making this again!!
Ahh thank you so much, I’m so happy you enjoyed it! 🙂