
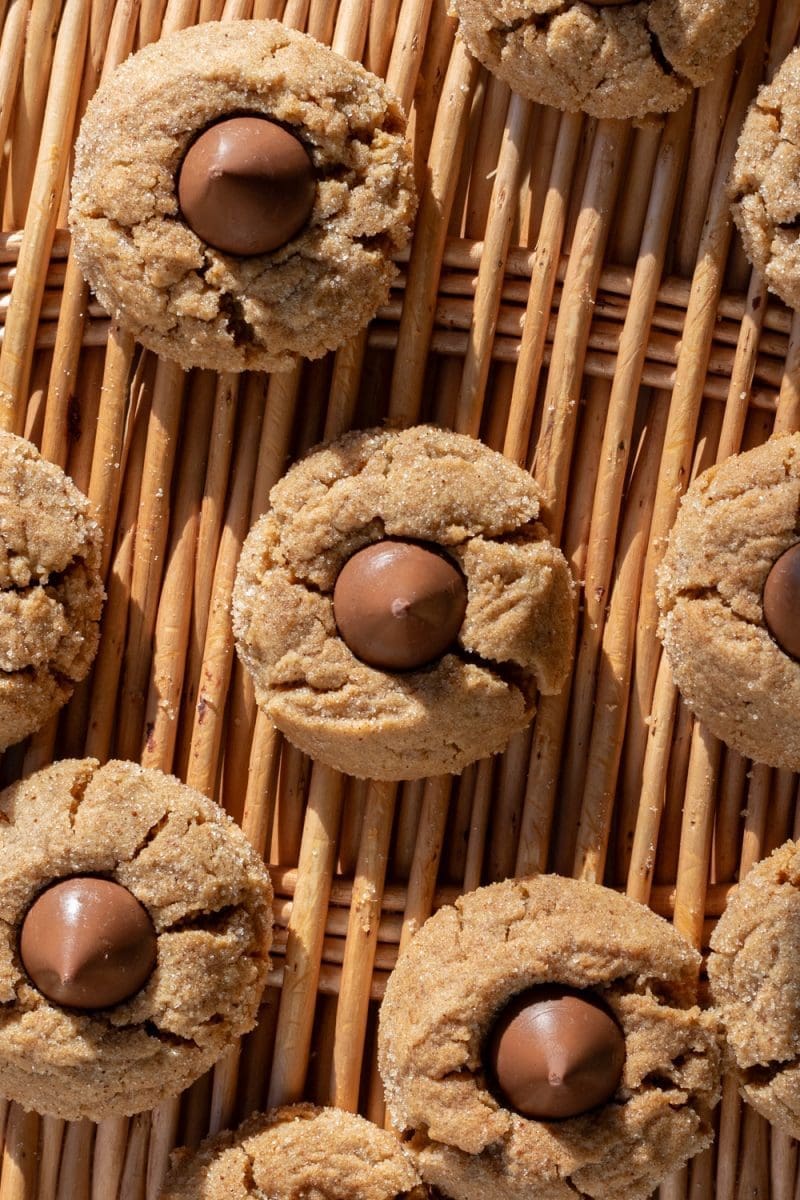
Small batch peanut butter blossoms made with brown butter, dark brown sugar & nutmeg.
This post may contain affiliate links, please read the privacy policy for details. // Recipe updated 12/01/24.

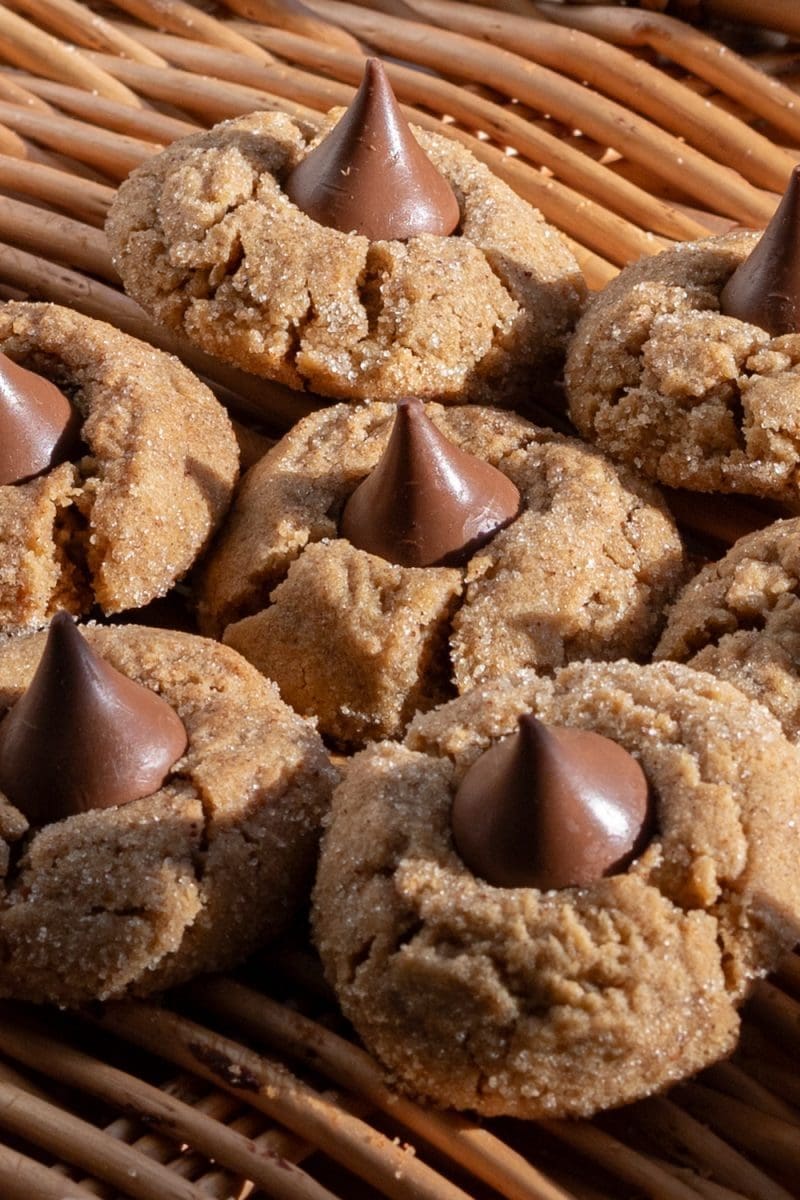
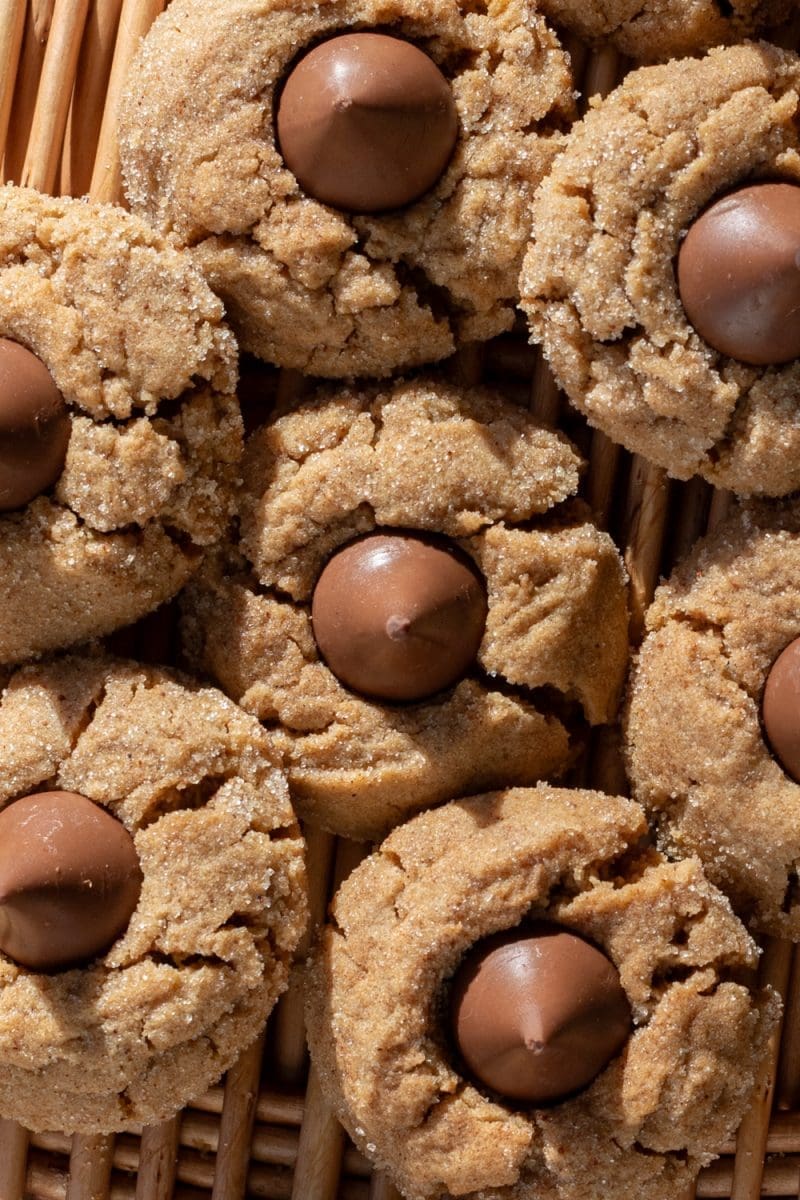
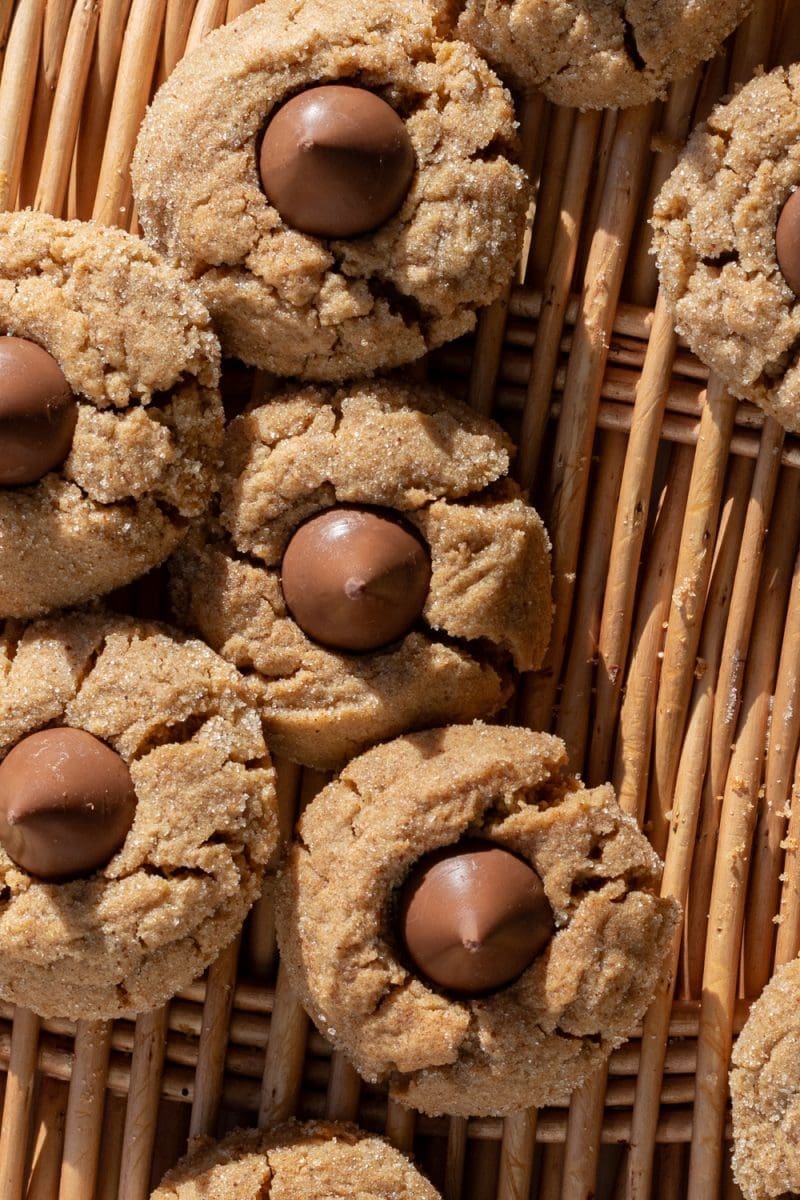
small batch peanut butter blossoms
When I think of holiday cookies, peanut butter blossoms are one of the first that comes to mind. I mean, they’re so delicious, full of peanut butter flavor and they have the classic hershey kiss right in the center of each of them – what’s NOT to love?! I took these a step further than your classic recipe by using dark brown sugar for some deeper molasses flavor and a pinch of nutmeg for extra holiday flavor. Aand I’ve also updated them to now use brown butter for some extra toasty flavor. They are also small batch (of course), yielding 10 small delicious cookies.
So let’s get into it! 🙂
expert baking tips
Weigh your ingredients:
My recipes are all written in grams because it is the most accurate way to bake. When you use a kitchen scale, you ensure that your baked goods turn out as close to the written recipe as possible. Plus, the cleanup is way easier when using a scale! I will provide standard cup measurements but please note that I have not tested the recipe using cup measurements and therefore can not guarantee your recipe will come out how mine did. Here is my favorite kitchen scale.
mix the dough carefully
When you’re mixing in your flour, you’ll want to make sure you only mix just until that last streak of flour disappears in the dough. Otherwise, you run the risk of overmixing the dough which will make the cookies more tough and chewy.
under bake for perfect cookies
This is one of the best tips for making perfect cookies. Cookies will continue to bake on the hot cookie sheet after being taken out of the oven, so if you take them out when they look completely done, they will be over-baked. You can’t really tell if these cookies have golden brown edges, but, these are perfectly done at 8 minutes. They will still be quite soft, which will let the hershey’s be easily pushed into them after baking.
work fast, then chill –
Once these cookies come out of the oven, it’s go time! Immediately start pressing a hershey’s kiss in the middle of each cookie. If you wait any longer, the cookies will firm up and you won’t be able to press the candy in that well. Once each cookie has a kiss, immediately put the cookies in the fridge to chill for 10-15 minutes, just until the cookies are room temperature. This ensures that your chocolate won’t melt into a puddle in the cookie (which isn’t necessarily a bad thing of course, but, it’s not the desired effect!)
A note on oven temperature:
Ovens vary and fluctuate in temperature and might not always actually be at the temperature they claim to be at. If you love to bake like I do, I highly recommend getting an oven thermometer. They are super helpful for letting you know when your oven might be lying to you! I use this one.
ingredients for small batch peanut butter blossoms
peanut butter blossoms:
- All purpose flour: for structure and chewiness.
- Baking soda & baking powder: for helping the cookies rise.
- Salt: to help balance and bring out the sweetness of the cookies
- Ground nutmeg: a touch of nutmeg for some extra holiday flavor. You can easily omit this, or add in cinnamon or your favorite holiday spice in it’s place!
- Unsalted butter: for tenderness and flavor. You can use salted butter in place of the unsalted, just be sure to omit the extra salt from the cookies. I highly recommend splurging a little and using European style butter here for the best flavor.
- Creamy peanut butter: for flavor, texture & sweetness. I’m a big fan of natural peanut butter, but unfortunately that won’t work in this recipe. For baking, you’re going to want to make sure you have thick creamy peanut butter like Jif or Skippy’s.
- Dark brown sugar: for sweetness, flavor and for moisture. I do highly recommend using dark brown sugar because it helps make the cookies super soft and chewy and gives more of that classic gingerbread molasses flavor. However, in a pinch you can substitute in light brown sugar.
- Egg yolk: for binding and richness.
- Milk: for moisture. You only need a tiny amount of milk, so feel free to use your favorite dairy or non-dairy alternative milk here.
- Vanilla: for flavor.
- Hershey’s Kisses: it wouldn’t be a peanut butter blossom without a hershey’s kiss! You only need 10 for this recipe, which leaves plenty for snacking on while you’re waiting for these to bake up.
nutmeg sugar coating:
- Granulated sugar & ground nutmeg: like listed above, feel free to omit the nutmeg or replace it with cinnamon or your favorite holiday spice if desired!
how to make small batch peanut butter blossoms
Here are a few pictures of the steps for making these delicious peanut butter blossom cookies. You can find the full recipe at the end of this blog post!


- Brown the butter, then mix in the peanut butter until smooth.
- Mix in the dark brown sugar, egg yolk, milk and vanilla until smooth – followed by the dry ingredients.
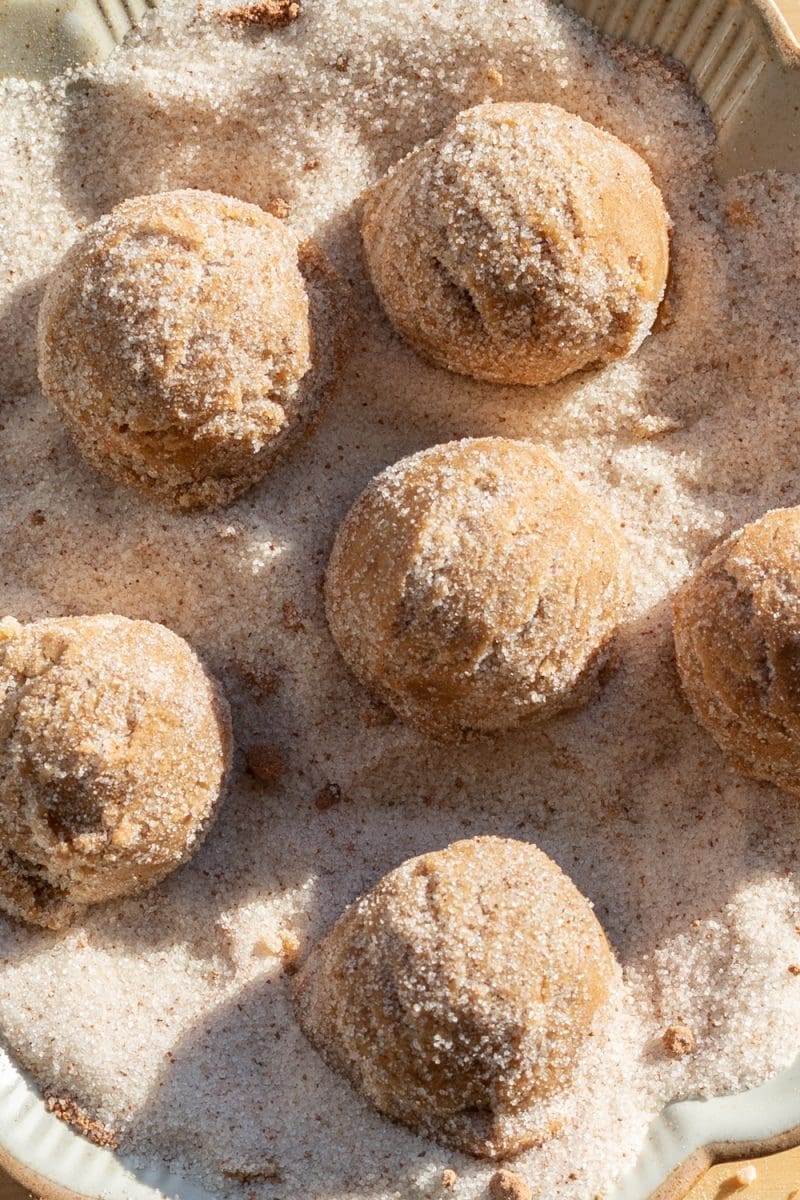
- Dish out the cookie dough with a 1.5 tbsp. cookie scoop, then coat each dough ball in nutmeg sugar.
- Bake, then immediately press a Hershey’s Kiss in the center of each cookie. Chill the cookies until the Hershey’s are no longer warm, then enjoy!
small batch peanut butter blossoms
recipe q&a
What is brown butter?
Brown butter is super simple to make so don’t worry! It’s just regular butter that is cooked on the stove until some of the moisture evaporates, allowing the milk solids in the butter to be toasted. The result is this butter with an amber hue and little speckles that has a toasted and slightly nutty aroma.
can I double this recipe?
Of course! Obviously they will not be small batch anymore but small batch isn’t always what we need! I even more strongly recommend measuring by weight if you are going to double the recipe for the best results.
can I make these cookies ahead of time?
I wouldn’t recommend making this cookie dough any more than 1 day in advance. The dough isn’t super hydrated, so it will dry out if left to sit for too long in the fridge. To prep the dough ahead of time, just cover the bowl tightly with plastic wrap and place it in the fridge overnight. You will probably need to let the dough sit at room temperature for 30 minutes before baking, or just until it’s scoop-able!
how should I store these cookies?
These cookies will taste the best on the day that they are baked, but can be kept in an airtight container at room temperature for up to 3 days.
tools and ingredients:
You can find all my favorite tools and ingredients that I use on my Amazon Storefront page, here!
other recipes you might enjoy:
did you make this recipe?
I’d love to see and know your thoughts! please leave a comment and review below, and tag me on instagram @freshbeanbakery. #freshbeanbakery
Small Batch Peanut Butter Blossoms
Equipment
Ingredients
Peanut Butter Blossoms
- 64 g unsalted butter (4 ½ tbsp.)
- 60 g creamy peanut butter (¼ c.)
- 90 g dark brown sugar (¼ c. + 3 tbsp.)
- 1 egg yolk
- ½ tbsp. milk
- ½ tsp. vanilla
- 90 g all purpose flour (¾ c.)
- ½ tsp. baking soda
- ¼ tsp. baking powder
- ¼ tsp. salt
- ¼ tsp. ground nutmeg
Coating
- 50 g granulated sugar (¼ c.)
- ½ tsp. ground nutmeg
Instructions
- Preheat the oven to 350°F / 175°C. Line a baking sheet with parchment paper or a silicone baking mat.
- In a small saucepan set over medium heat, brown the butter. Stir the butter occasionally until it turns amber in color and develops little brown specks.
- Add the peanut butter to a small mixing bowl, then pour the hot brown butter over the peanut butter. Mix until the peanut butter has melted and the mixture is cohesive, then set the bowl in the freezer to chill for 5 minutes.
- Add in the brown sugar, egg yolk, milk and vanilla. Whisk until well combined.
- Add in the flour, baking soda, baking powder and salt. Fold the mixture together just until no more flour streaks remain.
- Make the sugar coating by mixing the sugar and nutmeg together in a small bowl.
- Use a 1.5 tbsp. cookie scoop to dish out the dough, then roll each cookie in the nutmeg sugar.
- Evenly space out the coated scoops of the cookie dough on the cookie sheet and bake for 8 minutes. While the cookies are baking, unwrap 10 hershey's kisses so that they are ready when the cookies come out of the oven.
- IMMEDIATELY after the cookies come out of the oven, press a kiss into the center of each one. Once all the cookies have a kiss, place them in the fridge to chill for 10-15 minutes or until the cookies are no longer warm. Enjoy!


I think I made this recipe four times in December, it was that good! Also really fun to try with different Hershey kiss flavors!
Ah thank you so much, I’m so happy & honored you like them enough to make them so many times! Also that sounds so fun with other flavors! I’m planning on making them with almond butter & almond Hershey kisses this holiday season!
What is the shelf life of these cookies? Is it only 3 days or more than that. Pls let me know.
Hi, I recommend a max of 3 days on most baked goods. It’s not that they “go bad / expire” but more that they will start to stale. I always recommend making recipes as close as you can to the serving date for the best freshness but these would keep up to 7 days as long as they are stored in an airtight container. Hope this helps!