
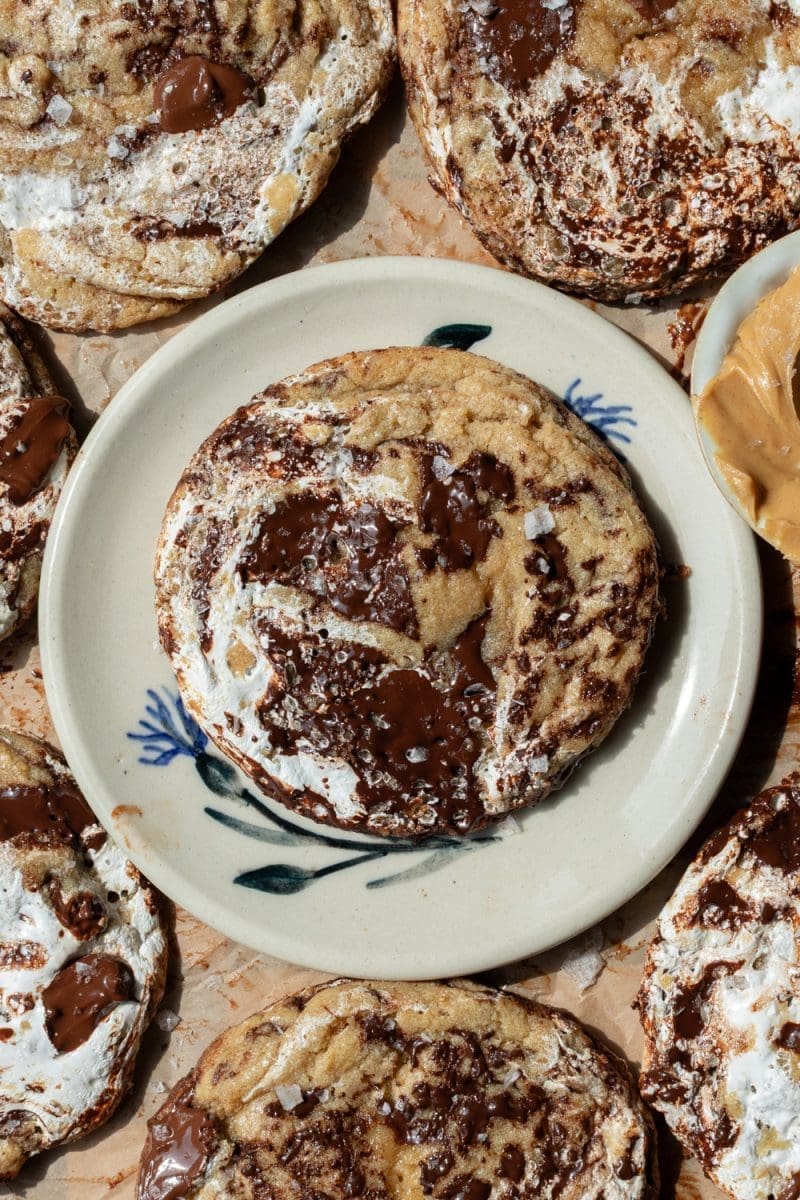
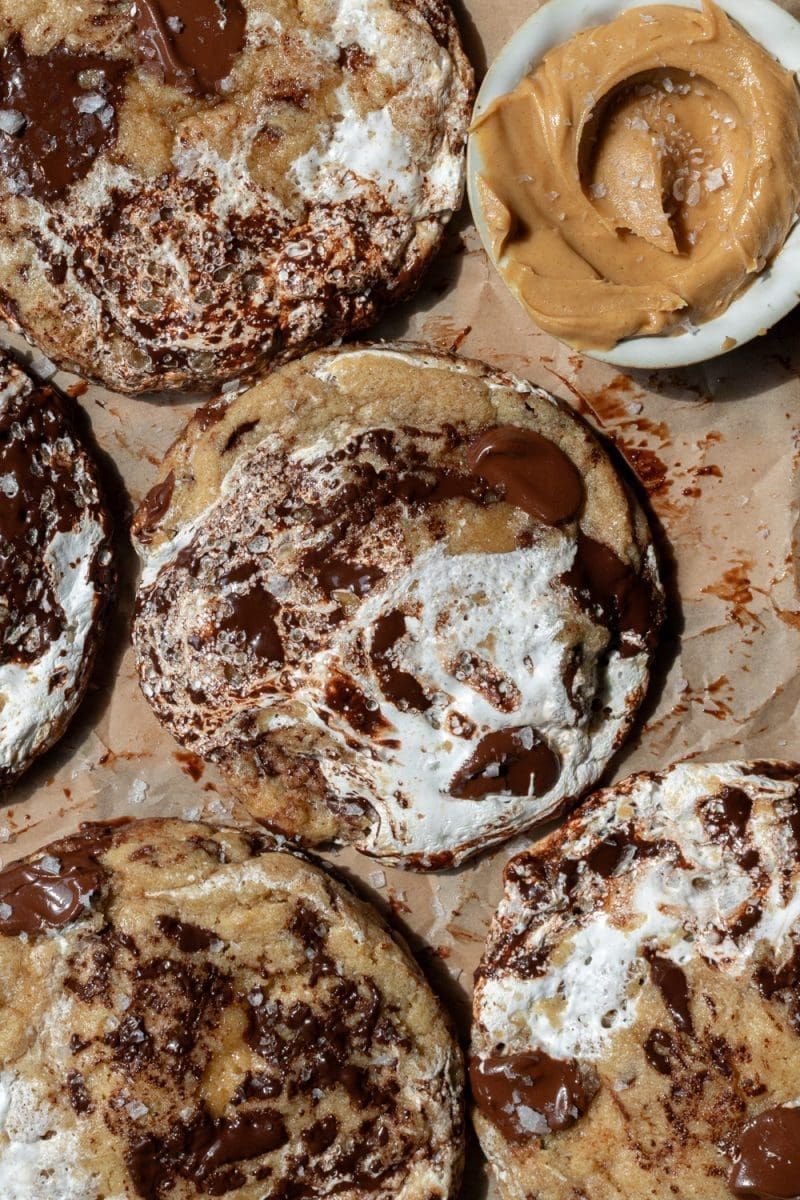
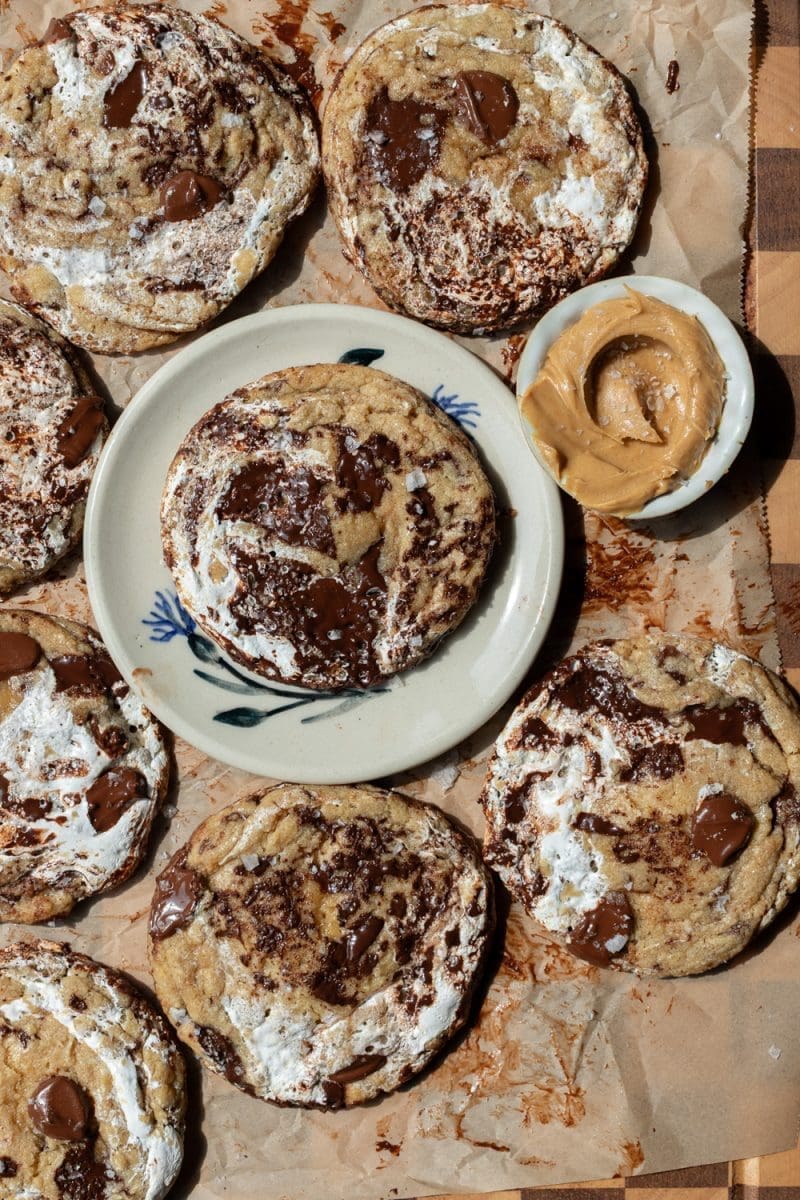
Soft fluffernutter brown butter peanut butter cookies, loaded with melty pools of chocolate and marshmallow fluff.
This post may contain affiliate links, please read the privacy policy for details.
fluffernutter chocolate chip cookies
Today we’re taking peanut butter chocolate chip cookies to the next level, by making them with brown butter and marbling them with marshmallow fluff. If you’ve never heard the term “fluffernutter”, it refers to a sandwich that’s made with peanut butter and marshmallow fluff. And while I probably wouldn’t have that sandwich, the combination seemed too good to not try it in a cookie! So here’s the rundown: the cookies are soft and chewy with crisp edges, loaded with brown butter and peanut butter flavor, have puddles of semi-sweet chocolate throughout, and are generously marbled on top with marshmallow fluff.
Just one thing – you WILL have to chill the dough, but just for 30 minutes! I promise it’s worth it. Letting the dough rest for 30 minutes is going to allow the ingredients to firm up so that they won’t spread as much in the oven, and is going to allow time for all those flavors to mend together, leaving you with a more flavorful cookie. So with that being said, let’s get into the recipe!
why you’ll love these fluffernutter cookies:
- Brown butter. It’s so delicious and such an easy way to add even more flavor into a cookie.
- One bowl, no mixer required. The cookies come together in one bowl and there’s no need for a stand mixer or hand mixer – just another reason that melted butter > creamed butter in a ccc.
- Marshmallow fluff. I mean just look at them, every cookie needs a little swirl of marshmallow fluff.
expert baking tips
Weigh your ingredients:
My recipes are all written in grams because it is the most accurate way to bake. When you use a kitchen scale, you ensure that your baked goods turn out as close to the written recipe as possible. Plus, the cleanup is way easier when using a scale! I will provide standard cup measurements but please note that I have not tested the recipe using cup measurements and therefore can not guarantee your recipe will come out how mine did. Here is my favorite kitchen scale.
how to marble in the marshmallow fluff
Marshmallow fluff is definitely not an easy ingredient to work with. I recommend dumping out some of the marshmallow fluff into a bowl before starting to make things easier. Then, grab two small spoons and use one to grab a dollop of the marshmallow fluff, and the other to scrape it off into the cookie dough. Repeat until you have a decent amount of the top layer of dough covered, then scoop out your cookies. Once you’ve used most of the marshmallow fluff, repeat the marbling so that every cookie has some on top.
Mix the dough carefully:
When adding in the flour, only fold the mixture just until no flour streaks remain. Over mixing the dough leads to more gluten formation, which can make the cookies thicker and more tough in texture.
Under bake for perfect cookies:
Cookies continue baking after they have been taken out of the oven. Once the edges turn slightly golden brown, and the cookies look just a little wet on top still, they are ready to come out. Let the cookies rest on the baking sheet for an additional 5 minutes before transferring them to a wire rack to cool.
The secret to perfectly round cookies:
Wanna know the secret to perfectly round cookies? It’s cookie scooting! Right when the cookies come out of the oven, take a bowl, cup, or biscuit cutter that is just slightly larger than your cookies and place it over one of the cookies. Gently swirl the bowl around the cookie to make the cookie perfectly round (and slightly thicker). And that’s all there is to it!
A note on oven temperature:
Ovens vary and fluctuate in temperature and might not always actually be at the temperature they claim to be at. If you love to bake like I do, I highly recommend getting an oven thermometer. They are super helpful for letting you know when your oven might be lying to you! I use this one.
ingredients for peanut butter marshmallow chocolate chip cookies:
- All purpose flour: for structure and chewiness.
- Baking soda & baking powder: helps the cookies rise and the edges crisp up.
- Salt: to help balance and bring out the sweetness of the cookies
- Unsalted butter: for tenderness and flavor. You can use salted butter in place of the unsalted, just be sure to omit the extra salt from the cookies. We’ll also be browning the butter for some extra delicious toasty flavor. If you’re looking to make this dairy-free, Miyoko’s Creamery vegan butter has the ability to brown just like regular butter and works like a charm.
- Granulated sugar & light brown sugar: a combination of both gives us cookies with crispy edges and soft and chewy centers.
- Peanut butter: it wouldn’t be peanut butter chocolate chip cookies without some peanut butter! I use and recommend regular creamy peanut butter, as the natural ones have a different texture that might not work well in the dough.
- Egg: for binding and for moisture.
- Chocolate: I used Valrhona feves which I love, but they are definitely on the pricier side and more of a treat-yourself item. If you’re not using feves, I recommend using a baking bar or guittard super cookie chips. You can also of course use chocolate chips here, just note that the cookies may end up a little thicker.
- Marshmallow fluff: for marbling on top of the cookies.
how to make fluffernutter chocolate chip cookies
Here are a few images going over the process of making these cookies. You can find the full recipe at the end of this blog post!
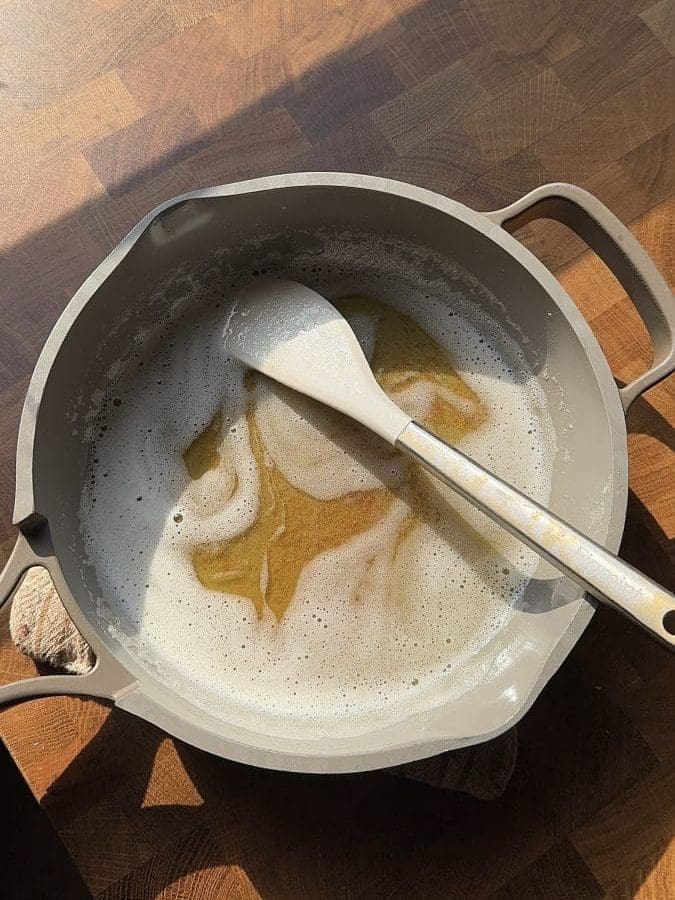
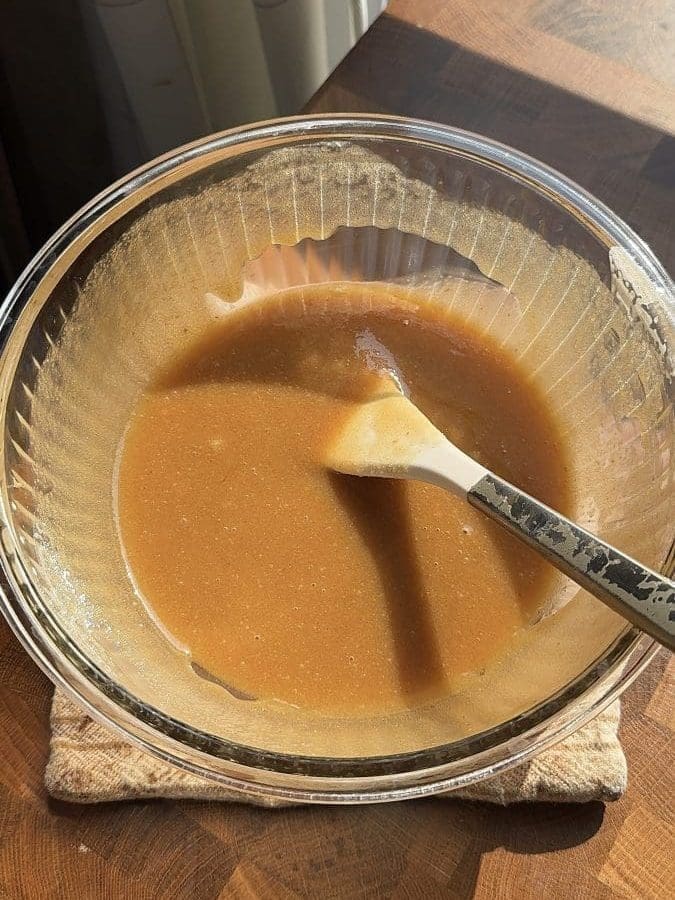
- Make the brown butter.
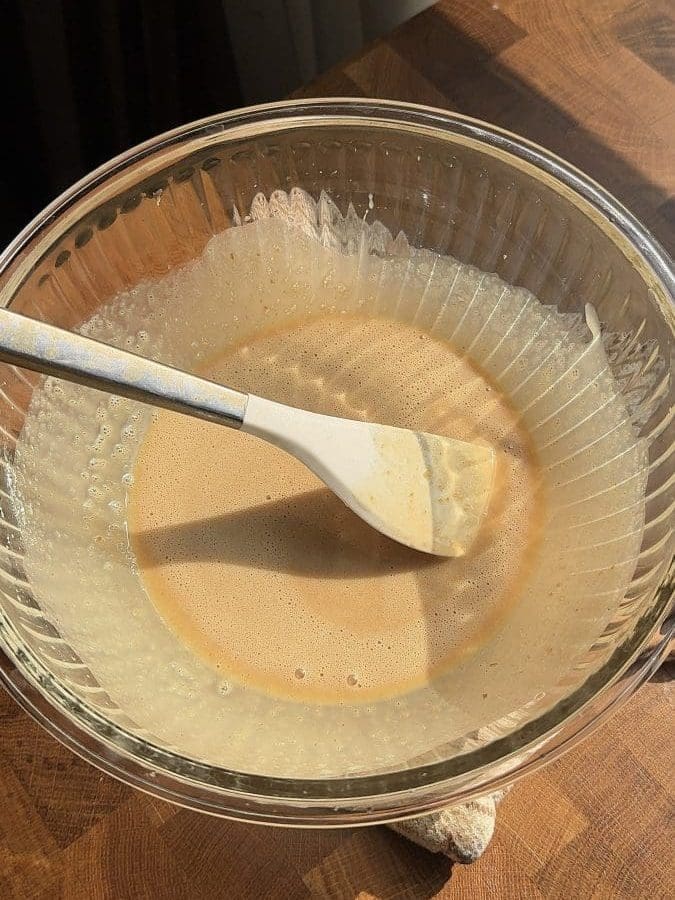
- Then mix together the hot brown butter and peanut butter.

- Mix in both sugars followed by the egg and vanilla.
- Then fold in the dry ingredients.


- Place dollops of marshmallow fluff on top of the dough. Scoop out balls of cookie dough, adding in more marshmallow fluff as needed.
- Bake, serve, and enjoy!
fluffernutter cookies recipe q&a
what is brown butter?
Brown butter is super simple to make so don’t worry! It’s just regular butter that is cooked on the stove until some of the moisture evaporates, allowing the milk solids in the butter to be toasted. The result is this butter with an amber hue and little speckles that has a toasted and slightly nutty aroma.
Because the butter gets cooked for a while, you do lose most of the moisture present in butter – just another reason I highly recommend weighing your ingredients! You should have 80g of butter left from the 100g at the start. Any less and you’ll want to add some water to the butter to bring it to 80g, or you’ll end up with some dry and crumbly cookies.
do I need to use peanut butter?
If you’re not a fan of, or are allergic to peanut butter, you can replace it with another creamy nut butter, such as almond butter. You unfortunately can’t leave it out of the recipe, but you could use my small batch chocolate chip cookies and marble the marshmallow into those!
can I double this recipe?
Definitely – I’ve tested this recipe up to quadrupling it with no problem. Please be sure to use grams for the best results.
can I make these cookies ahead of time?
Definitely – cookie dough really only gets better with time. You can keep the cookie dough tightly covered in the fridge for up to 2 days before baking. For longer term storage, you can also freeze the cookie dough balls. Just be sure to take the dough out of the fridge at least 30 minutes to 1 hour before you want to bake, so that it becomes soft enough to scoop again.
How to store peanut butter marshmallow chocolate chip cookies
Store these cookies in an airtight container at room temperature. They will keep for up to 5 days, but will taste the best 1-3 days after baking.
tools and ingredients:
You can find all my favorite tools and ingredients that I use on my Amazon Storefront page, here!
other recipes you might enjoy:

did you make this recipe?
I’d love to see and know your thoughts! please leave a comment and review below, and tag me on instagram @freshbeanbakery. #freshbeanbakery
Fluffernutter Chocolate Chip Cookies
Ingredients
- 100 g unsalted butter (7 tbsp.)
- 60 g creamy peanut butter (¼ c.)
- 100 g light brown sugar (½ c.)
- 50 g granulated sugar (¼ c.)
- 1 egg room temperature
- ½ tsp. vanilla
- 160 g all purpose flour (1 ⅓ c.)
- ½ tsp. baking soda
- ½ tsp. baking powder
- ½ tsp. salt
- 120 g semi-sweet chocolate* chopped (⅔ c.)
- 70 g marshmallow fluff (¾ c.)
Instructions
- Brown the butter: In a small saucepan set over medium heat, melt the butter. Stir the butter occasionally until it turns amber in color and develops little brown specks.
- Pour the brown butter into a medium sized mixing bowl. You should be left with at least 80g of brown butter (but not more than 85g.) If you have a little less than 80g, you can add in a few grams of water until you reach 80g.
- Mix the peanut butter into the hot brown butter until the mixture is smooth, then set the mixture in the freezer for 5 minutes.
- In the meantime, chop up your chocolate bar (if using) or break your chocolate feves in half.
- Once the brown butter has chilled a little bit, whisk in the granulated and light brown sugar.
- Whisk in the egg and vanilla.
- Add in the flour, baking soda, baking powder and salt. Use a rubber spatula to fold the mixture together just until a few flour streaks remain.
- Add in the chocolate and fold just until no flour streaks remain.
- Now the annoying but necessary part, chill your dough! Cover the bowl tightly with a lid or with plastic wrap, and set the dough to chill in the fridge for at least 30 minutes, and up to 2 days.**
- Preheat the oven to 350°F / 175°C. Line a cookie sheet with parchment paper or a silicone baking mat.
- Marble dollops of marshmallow fluff on top of the cookie dough.
- Scoop out heaping 3 tbsp. scoops of dough. Once you have used all of the marshmallow fluff on top, add on some more. Place the cookies spread apart to allow room for spreading.
- Top each cookie with additional chocolate if desired, and bake for 12-14 minutes, or until the edges of the cookies are golden brown.
- Immediately after taking the cookies out of the oven, you can take a bowl that is slightly larger than the cookies and swirl it around over the cookies to make them a little more uniform and circular. Serve and enjoy!
Notes
Nutrition
Please note that the nutrition facts are only an estimate and may vary based on different brands of ingredients and any substitutions made.


Cookies look delicious. I liked it the brand of chocolate and it’s pretty pricey. What other brand would you find is equity as good but not as expensive. Thank you . Debbie
Hi! I recommend using a chocolate baking bar or guittard super cookie chips – I have a note about it (& the chocolate being pricey) under the ingredients section! 🙂
I followed the recipe exactly and the cookies turned out sooooo good! It was my first time making brown butter, and I think I let it cool a little too much, so the cookies didn’t spread as much as they were supposed to, but it still made a delicious and fluffy cookie. My whole family loves them, especially my brother who loves marshmallow fluff!