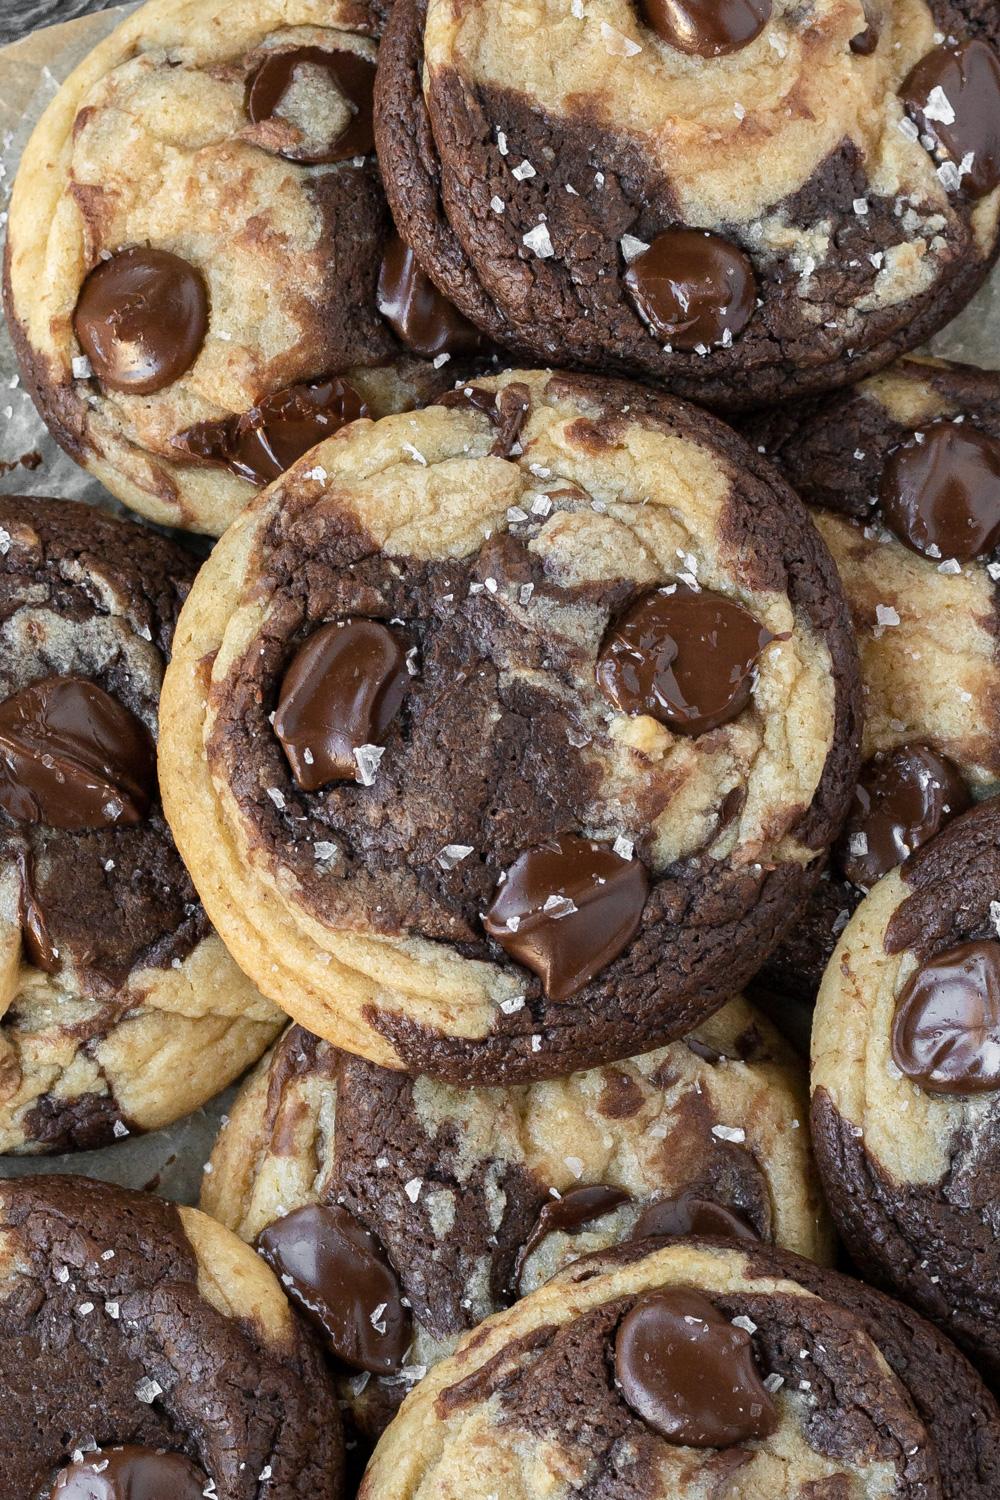
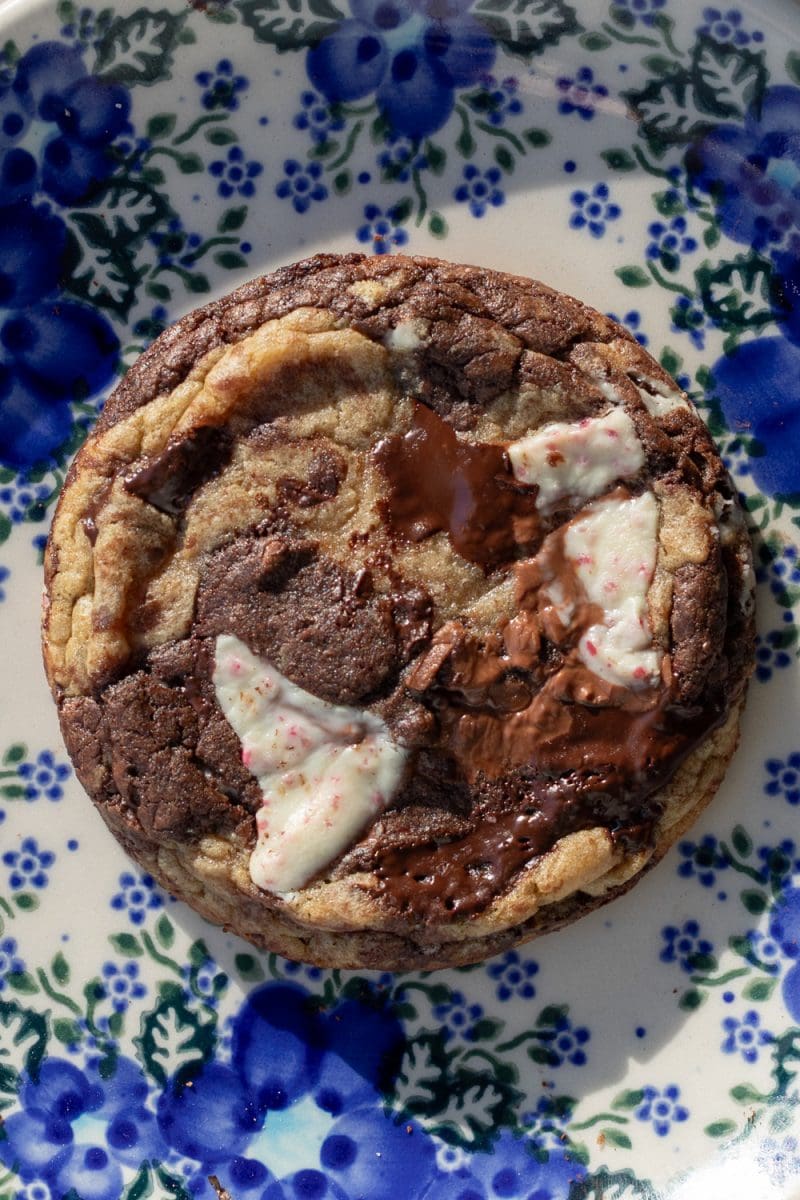
Peppermint chocolate chip cookies that are marbled with vanilla and chocolate dough, and pools of peppermint white chocolate and chocolate chips.
This post may contain affiliate links, please read the privacy policy for details.
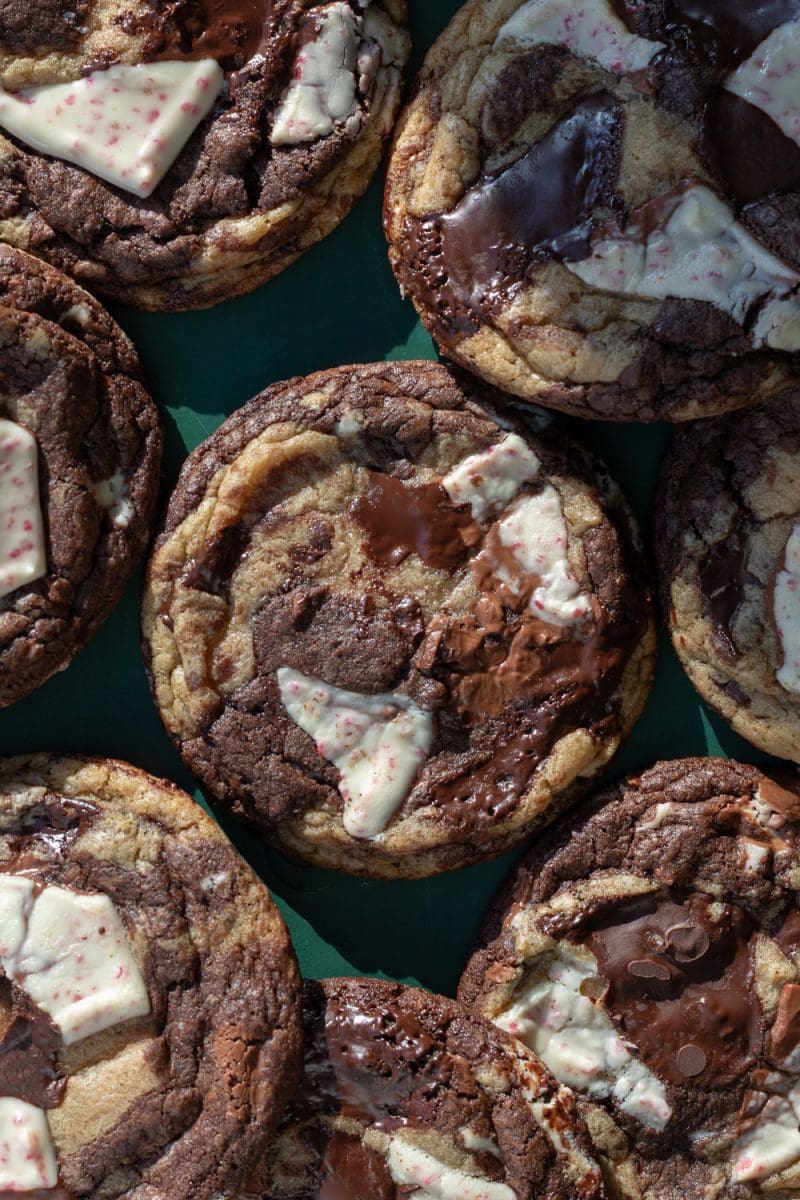
marbled peppermint chocolate chip cookies
Hello hello! I’m here today with a delicious chocolate chip cookie that’s perfect for the winter. It’s made with a vanilla cookie dough that’s loaded with chocolate, and it’s marbled with a chocolate cookie dough that’s loaded with peppermint white chocolate. So basically, it’s the best of both worlds with a little hint of peppermint throughout. They’re super soft and easy to make because there’s no mixer required, and it starts off with one cookie dough base that splits into two different doughs. So let’s get into it! ☺︎
expert baking tips
Weigh your ingredients:
My recipes are all written in grams because it is the most accurate way to bake. When you use a kitchen scale, you ensure that your baked goods turn out as close to the written recipe as possible. Plus, the cleanup is way easier when using a scale! I will provide standard cup measurements but please note that I have not tested the recipe using cup measurements and therefore can not guarantee your recipe will come out how mine did. Here is my favorite kitchen scale.
Mix the dough carefully:
When adding in the flour, only fold the mixture just until no flour streaks remain. Over mixing the dough leads to more gluten formation, which can make the cookies thicker and more tough in texture.
chill the cookies prior to baking
I know, I know – it’s frustrating to have to wait! However, because we’re using melted butter, we want to give the dough time to firm up. Letting the cookie dough chill just a little bit in the fridge means that the cookies will bake up thicker. This also gives the flavors a little bit of time to meld together.
Under bake for perfect cookies:
Cookies continue baking after they have been taken out of the oven. Once the edges turn slightly golden brown, and the cookies look just a little wet on top still, they are ready to come out. Let the cookies rest on the baking sheet for an additional 5 minutes before transferring them to a wire rack to cool.
The secret to perfectly round cookies:
Wanna know the secret to perfectly round cookies? It’s cookie scooting! Right when the cookies come out of the oven, take a bowl, cup, or biscuit cutter that is just slightly larger than your cookies and place it over one of the cookies. Gently swirl the bowl around the cookie to make the cookie perfectly round (and slightly thicker). And that’s all there is to it!
A note on oven temperature:
Ovens vary and fluctuate in temperature and might not always actually be at the temperature they claim to be at. If you love to bake like I do, I highly recommend getting an oven thermometer. They are super helpful for letting you know when your oven might be lying to you! I use this one.

ingredients for marbled peppermint chocolate chip cookies:
- All-purpose flour: for structure and chewiness.
- Dutch-processed cocoa powder: for the chocolate part of the cookie dough. I recommend dutch cocoa for the best flavor but you could also use natural unsweetened cocoa here.
- Baking powder & baking soda: for helping the cookies rise.
- Salt: to help balance and bring out the sweetness of the cookies
- Unsalted butter: for tenderness and flavor. You can use salted butter in place of the unsalted, just be sure to omit the extra salt from the cookies. You can also use your favorite non-dairy butter stick here.
- Granulated sugar & dark brown sugar: a combination of both gives us cookies with crispy edges and soft and chewy centers.
- Egg: for binding and for moisture.
- Vanilla: for flavor. I use and love this vanilla extract!
- Semi-sweet chocolate: I recommend semi-sweet or dark chocolate. Please note that if you use all chocolate chips, the cookies will bake up a little thicker, and if you use all chopped chocolate, they will be a tad thinner.
- Peppermint white chocolate: such as Ghirardelli’s peppermint bark (not sponsored!) If you can’t find any pre-made pepermint white chocolate you can use regular white chocolate and add 1/2 tsp. of peppermint extract to the chocolate cookie dough.
how to make peppermint chocolate chip cookies
Here’s a little look into the process of making these marbled peppermint chocolate chip cookies. The full recipe is at the end of this blog post!

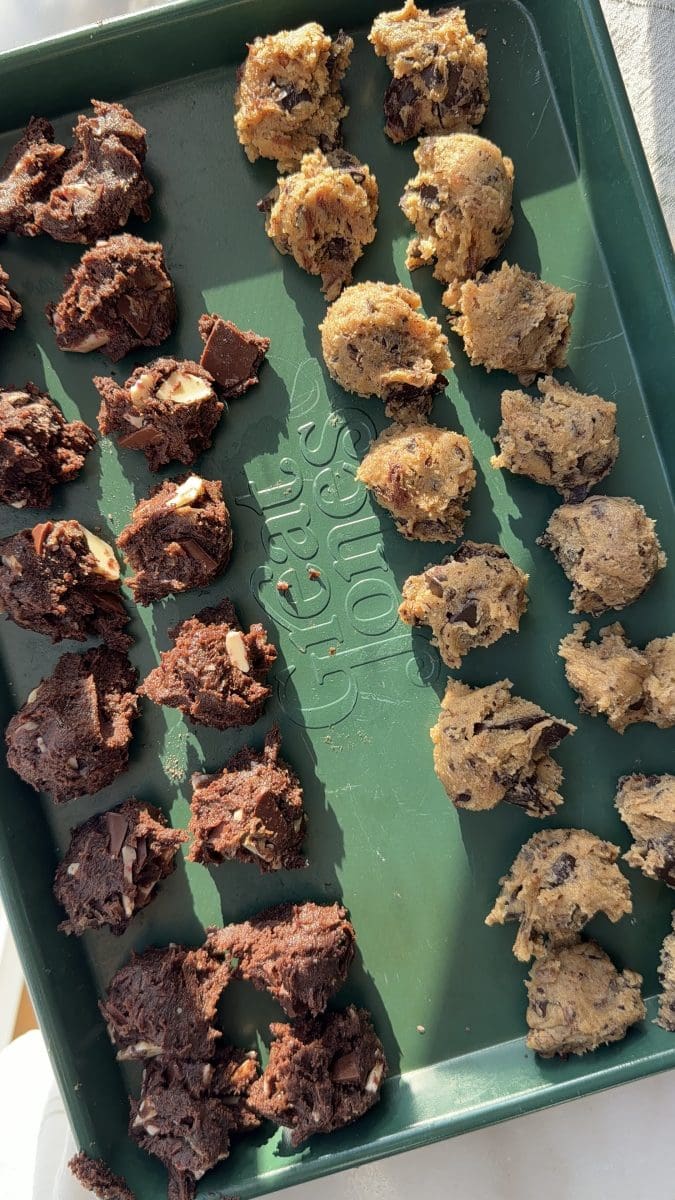
- Make the two separate cookie doughs, then let them chill in the fridge.
- Scoop out 1.5 tbsp. scoops of each of the cookie doughs, then split them in half.

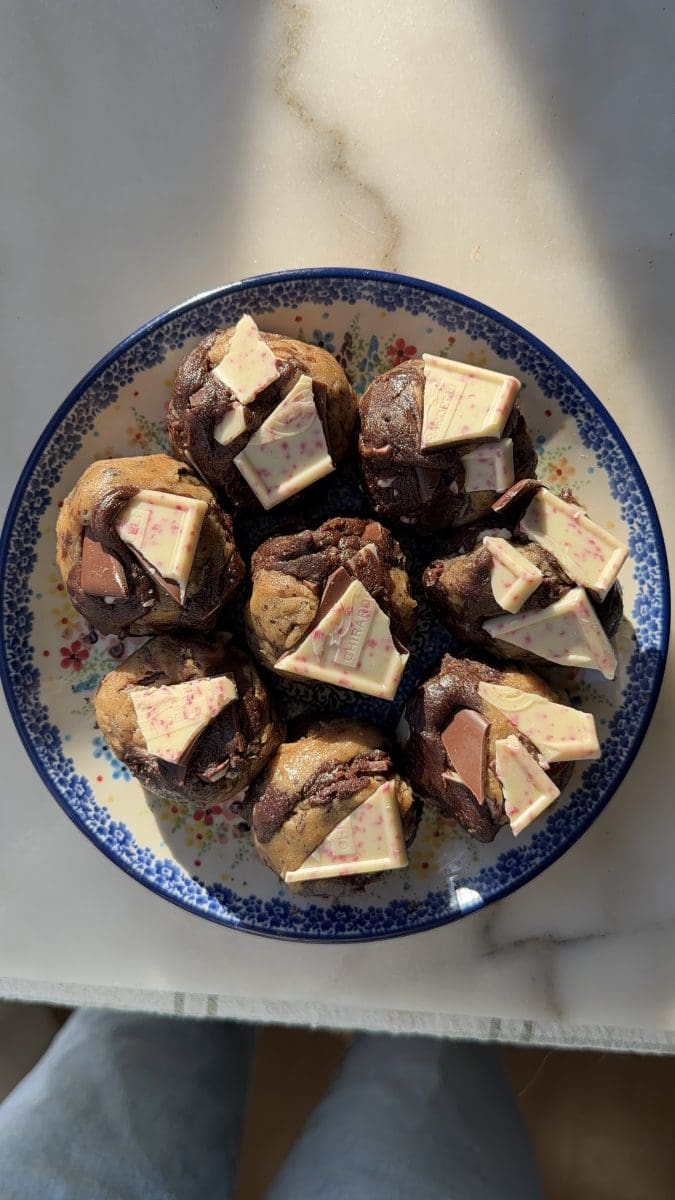
- Marble the two doughs together.
- Chill the dough for another 15 minutes, then bake and enjoy!
peppermint chocolate chip cookies recipe q&a
can I double this recipe?
Definitely – I’ve tested this recipe up to quadrupling it with no problem. Please be sure to use grams for the best results.
can I make these cookies ahead of time?
Definitely – cookie dough really only gets better with time. You can keep the cookie dough tightly covered in the fridge for up to 2 days before baking. For longer term storage, you can also freeze the cookie dough balls. Just be sure to take the dough out of the fridge at least 30 minutes to 1 hour before you want to bake, so that it becomes soft enough to scoop again.
How to store marbled peppermint chocolate chip cookies
Store these cookies in an airtight container at room temperature. They will keep for up to 5 days, but will taste the best 1-3 days after baking.
why did my cookies turn out more dry/crumbly/thicker than pictured?
- Measuring error: Typically, the #1 culprit for this is always not measuring the flour properly. If you use cup measurements, you run the risk of adding too much flour to the dough which can make it super dry. If you’re using cup measurements, make sure that you fluff up your flour and then spoon it into your measuring cup, rather than scooping up the flour with the measuring cup.
- Overmixing: if you over-mix the dough, you will introduce more gluten into the cookies which will lead to tougher, thicker cookies. Make sure to only fold in the flour just until that last streak of flour disappears into the dough.
- Oven temperature: Like I said before, it’s possible that your oven isn’t at the temperature that it claims to be at – which is, unfortunately, more common than it should be. If your oven is hotter than 350F without your knowledge, you’ll end up with thicker, more dry cookies.
Why did my cookies spread so much?
- Chilling the dough: The #1 reason for this would be that you didn’t chill the cookie dough. Although it can be frustrating to wait, the cookie dough does need to chill to give time for the butter to firm up and the ingredients to meld together so that they don’t completely spread out in the oven.
- Oven temperature: It could also be that your oven temperature is running lower than it claims to be. For that reason, I recommend always using an oven thermometer.
tools and ingredients:
You can find all my favorite tools and ingredients that I use on my Amazon Storefront page, here!
other small batch recipes you might enjoy:
did you make this recipe?
I’d love to see and know your thoughts! please leave a comment and review below, and tag me on instagram @freshbeanbakery. #freshbeanbakery
Peppermint Chocolate Chip Cookies
Ingredients
Cookie Dough Base
- 90 g unsalted butter (6 ⅓ tbsp.)
- 100 g dark brown sugar* (½ c.)
- 50 g granulated sugar (¼ c.)
- 1 egg room temperature
- 1 tsp. vanilla
Vanilla Cookie Dough
- 80 g all-purpose flour (⅔ c.)
- ¼ tsp. baking powder
- ¼ tsp. baking soda
- ¼ tsp. salt
- 85 g semi-sweet chocolate** (½ c.)
Chocolate Cookie Dough
- 68 g all purpose flour (½ c. + 1 tbsp.)
- 12 g dutch-processed cocoa powder (2 tbsp.)
- ¼ tsp. baking powder
- ¼ tsp. baking soda
- ¼ tsp. salt
- 85 g peppermint white chocolate such as ghirardelli's peppermint bark (½ c.)
Instructions
Cookie Dough Base
- Add the butter to a small microwave-safe mixing bowl. Melt in 20-second intervals until the butter has fully melted.
- Whisk in both sugars, then whisk in the egg and vanilla until well combined.
- Transfer ½ of the cookie dough base out into another small mixing bowl (~145g).
Vanilla Cookie Dough
- To one of the halves of cookie dough base, add in the flour, baking powder, baking soda, and salt. Use a rubber spatula to fold the mixture together just until a few flour streaks remain.
- Chop up the semi-sweet chocolate and add it into the vanilla cookie dough. Fold the mixture together just until no flour streaks remain.
Chocolate Cookie Dough
- To the other half of cookie dough base, add in the flour, cocoa powder, baking powder, baking soda, and salt. Use a rubber spatula to fold the mixture together just until a few flour streaks remain.
- Chop up the peppermint white chocolate and add it into the chocolate cookie dough. Fold the mixture together just until no flour streaks remain.
- Cover both of the dough bowls with plastic wrap and place them into the fridge for 15 minutes.
- After the dough has had a quick chill, scoop out 1.5 tbsp. scoops of each of the doughs.
- Use a knife or your hands to split each ball of cookie dough in half.
- Alternate adding each half ball of flavor to your hand, for a total of four pieces of dough. Roll the dough into a ball, and repeat with the remaining cookie dough. (For more uniform balls of dough, you can gently press each cookie dough ball into a 3 tbsp. cookie scoop after marblign the doughs together).
- Cover the dough balls and place them in the fridge to chill for 15 minutes.
- Preheat the oven to 350°F / 175°C.
- Evenly space out the cookie dough balls on a parchment lined cookie sheet and top them with extra chocolate and white chocolate.
- Bake for 12-14 minutes, or until the edges of the cookies start to turn golden brown.
- Once the cookies come out of the oven, I recommend "scooting" them. This just means take a bowl, cup, or biscuit cutter that is slightly larger than the cookie, place it on top of the cookie, and swirl the bowl around to make the cookie a little more round.
- Let the cookies sit on the hot baking tray for at least 5 minutes before transferring them to a wire rack to cool. Sprinkle with flaky sea salt, serve and enjoy!
Notes
Nutrition
Please note that the nutrition facts are only an estimate and may vary based on different brands of ingredients and any substitutions made.