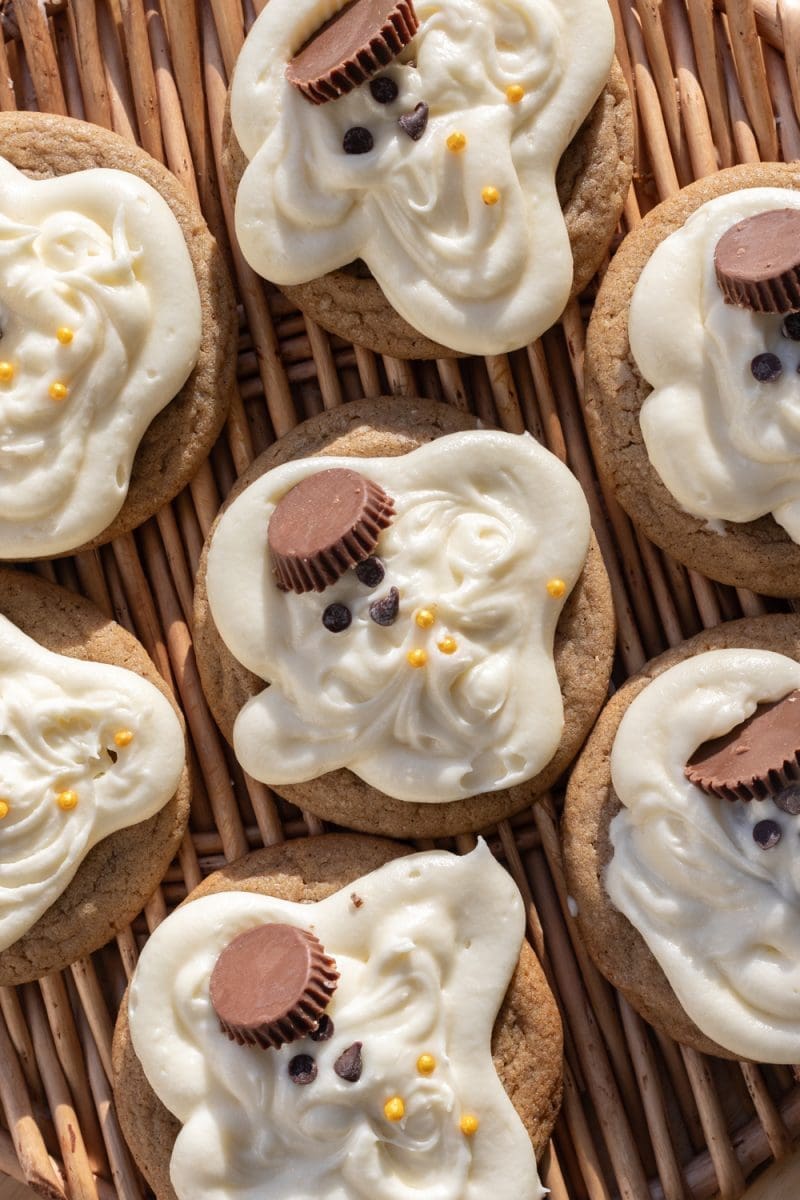
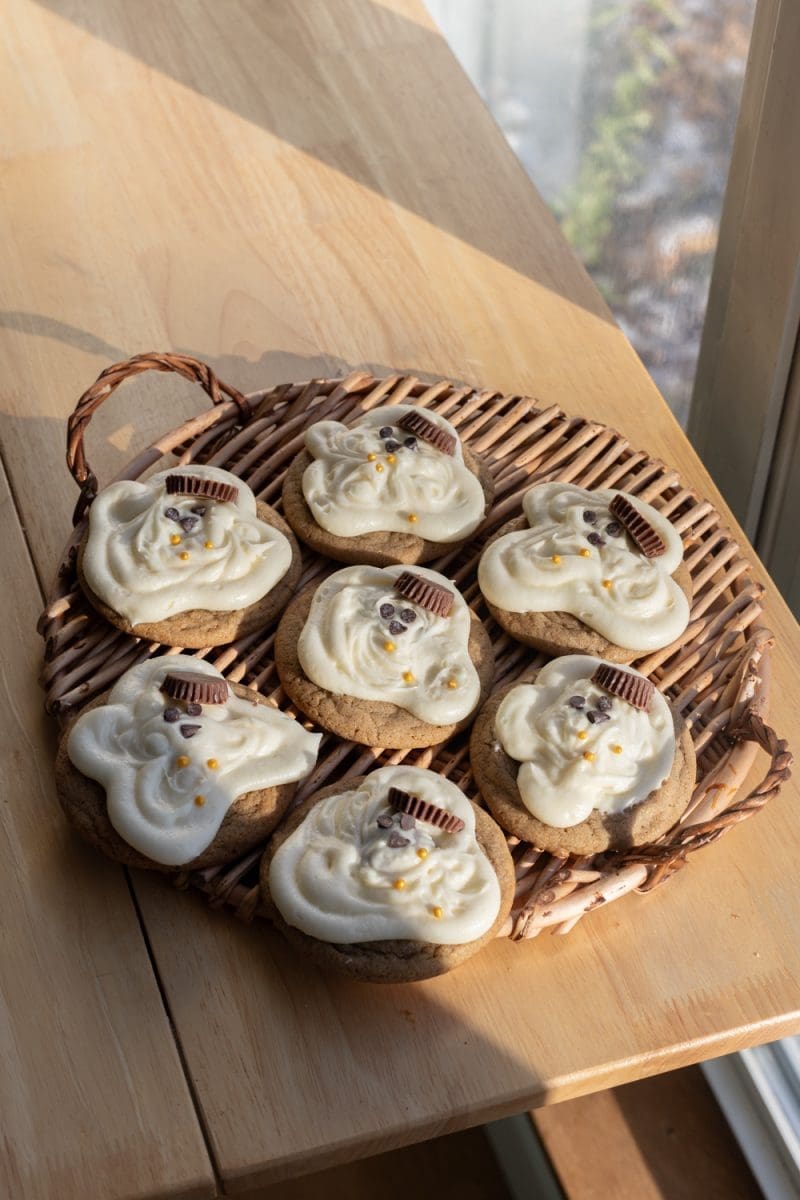
Melting snowman cookies made with a deliciously spiced brown butter chai cookie and topped off with a vanilla cream cheese frosting.
This post may contain affiliate links, please read the privacy policy for details.
melting snowman cookies
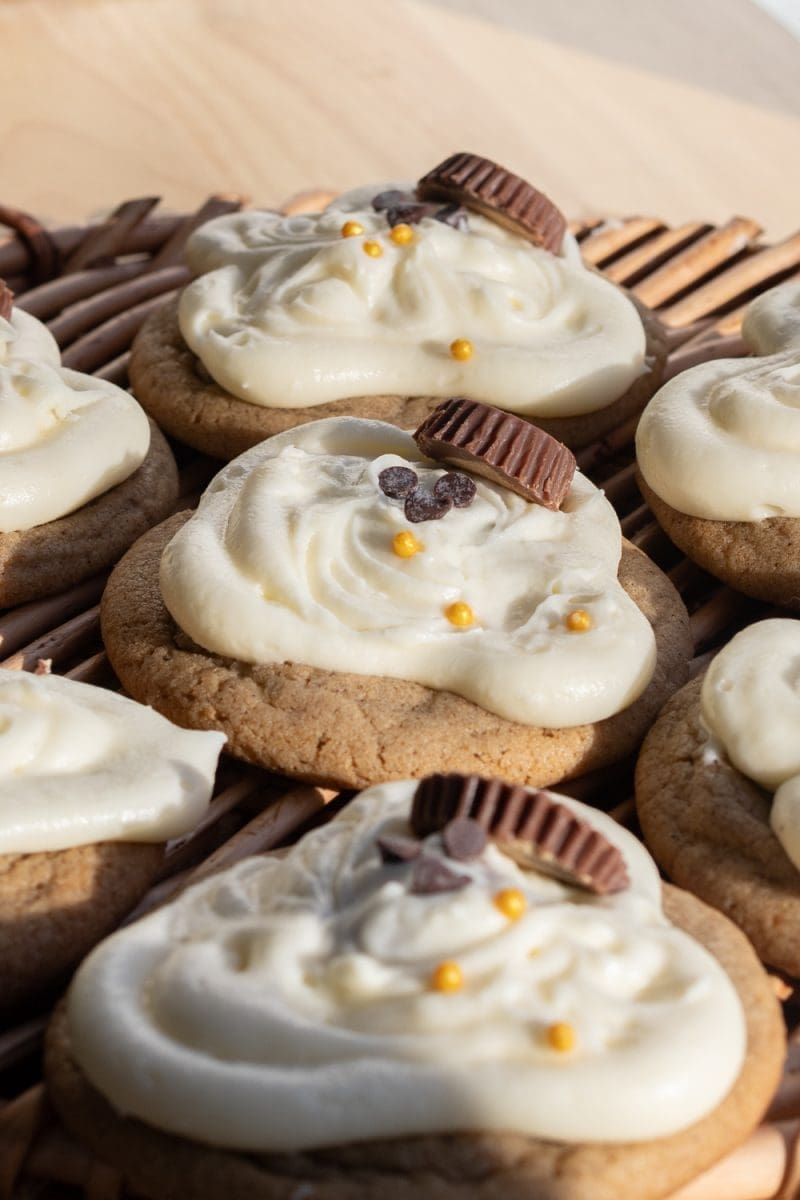
Introducing the PRETTIEST holiday cookies. These melting snowman cookies feature a soft brown butter chai spiced cookie, are topped with a vanilla cream cheese frosting, and are decorated to look like a little snowman melted on top of the cookies (a little sad but also cute?)
Side note: these used to be made with just a regular sugar cookie and some simple icing. I decided to upgrade them to be a little more flavorful, and a little prettier (inspired by Food Network’s Melted Snowman Peanut Butter Cookies!) but if you preferred the first version you can find that recipe right below the new recipe. Happy baking! 🙂
expert baking tips
Weigh your ingredients:
My recipes are all written in grams because it is the most accurate way to bake. When you use a kitchen scale, you ensure that your baked goods turn out as close to the written recipe as possible. Plus, the cleanup is way easier when using a scale! I will provide standard cup measurements but please note that I have not tested the recipe using cup measurements and therefore can not guarantee your recipe will come out how mine did. Here is my favorite kitchen scale.
Mix the dough carefully:
When adding in the flour, only fold the mixture just until no flour streaks remain. Over mixing the dough leads to more gluten formation, which can make the cookies thicker and more tough in texture.
chill the cookies prior to baking
I know, I know – it’s frustrating to have to wait! However, because we’re using melted brown butter in the dough, we want to give the dough time to firm up. We’re going to give the cookies a quick chill before baking them to ensure that they don’t spread out too thin. This also gives the flavors a little bit of time to meld together.
Under bake for perfect cookies:
Cookies continue baking after they have been taken out of the oven. Once the edges turn slightly golden brown, and the cookies look just a little wet on top still, they are ready to come out. Let the cookies rest on the baking sheet for an additional 5 minutes before transferring them to a wire rack to cool.
The secret to perfectly round cookies:
Wanna know the secret to perfectly round cookies? It’s cookie scooting! Right when the cookies come out of the oven, take a bowl, cup, or biscuit cutter that is just slightly larger than your cookies and place it over one of the cookies. Gently swirl the bowl around the cookie to make the cookie perfectly round (and slightly thicker). And that’s all there is to it!
A note on oven temperature:
Ovens vary and fluctuate in temperature and might not always actually be at the temperature they claim to be at. If you love to bake like I do, I highly recommend getting an oven thermometer. They are super helpful for letting you know when your oven might be lying to you! I use this one.
ingredients for melting snowman cookies:
chai cookies:
- All purpose flour: for structure and chewiness.
- Baking soda & baking powder: helps the cookies rise and the edges crisp up.
- Salt: to help balance and bring out the sweetness of the cookies
- Chai tea bag: for infusing with the brown butter. Use your favorite chai brand here. You could also omit it and just use the chai spice for flavor.
- Chai spice: use your favorite blend of chai spices or a pre-made blend here! I used King Arthur’s Chai Spice, which is a blend of ginger, cinnamon, cardamom, allspice, anise, and black pepper. You could also just use cinnamon here for a classic cinnamon roll cookie.
- Unsalted butter: for tenderness and flavor. You can use salted butter in place of the unsalted, just be sure to omit the extra salt from the cookies. We’ll also be browning the butter for some extra delicious toasty flavor. If you’re looking to make this dairy-free, Miyoko’s Creamery vegan butter has the ability to brown just like regular butter and works like a charm.
- Granulated sugar & dark brown sugar: a combination of both gives us cookies with crispy edges and soft and chewy centers. You can use light brown sugar in place of the dark brown sugar in a pinch.
- Egg: for binding and for moisture.
- Vanilla: for flavor.
vanilla cream cheese frosting:
- Cream cheese: the base of the cream cheese frosting.
- Unsalted butter: to thicken up the frosting.
- Salt: to balance and bring out the sweetness.
- Powdered sugar: for sweetness and thickening the frosting.
- Vanilla: for flavor. I used vanilla bean paste here for some cute little speckles in the frosting.
melting snowman decorations:
- Mini reeses: for making the little top hats.
- Mini chocolate chips: for making the eyes and nose.
- Gold pearl sprinkles: for the buttons.
how to make melting snowman cookies
Here’s what the process of making these super cute melting snowman sugar cookies looks like. The full recipe and instructions can be found at the end of this blog post.


- Whisk together the chai-infused brown butter and sugars, followed by the egg and vanilla.
- Fold in the dry ingredients.

- Chill the dough, then scoop and bake.
- Make the vanilla cream cheese frosting, then decorate and enjoy!
melting snowman cookies recipe q&a
What is brown butter?
Brown butter is super simple to make so don’t worry! It’s just regular butter that is cooked on the stove until some of the moisture evaporates, allowing the milk solids in the butter to be toasted. The result is this butter with an amber hue and little speckles that has a toasted and slightly nutty aroma.
can I double this recipe?
Definitely – I’ve tested this recipe up to quadrupling it with no problem. Please be sure to use grams for the best results.
can I make these cookies ahead of time?
Definitely – cookie dough really only gets better with time. You can keep the cookie dough tightly covered in the fridge for up to 2 days before baking. For longer term storage, you can also freeze the cookie dough balls. Just be sure to take the dough out of the fridge at least 30 minutes to 1 hour before you want to bake, so that it becomes soft enough to scoop again.
How to store melting snowman cookies
Once the cookies are frosted, they will need to be stored in an airtight container in the fridge where they will keep well for up to 5 days.
tools and ingredients:
You can find all my favorite tools and ingredients that I use on my Amazon Storefront page, here!
other recipes you might enjoy:

did you make this recipe?
I’d love to see and know your thoughts! please leave a comment and review below, and tag me on instagram @freshbeanbakery. #freshbeanbakery
Melting Snowman Cookies (Chai Cookie Version)
Ingredients
Brown Butter Chai Cookies
- 113 g unsalted butter (8 tbsp.)
- 1 bag chai tea
- 100 g dark brown sugar* (½ c.)
- 50 g granulated sugar (¼ c.)
- 1 egg room temperature
- 1 tsp. vanilla
- 160 g all purpose flour (1 ⅓ c.)
- ½ tsp. baking powder
- ½ tsp. baking soda
- ½ tsp. salt
- 1 tsp. chai spice**
Vanilla Cream Cheese Frosting
- 150 g cream cheese room temperature (⅔ c.)
- 75 g unsalted butter room temperature (⅓ c.)
- ⅛ tsp. salt
- 220 g powdered sugar (1 ¾ c. + 1 tbsp.)
- 2 tsp. vanilla
- 8 mini reeses sliced in half, horizontally
- mini chocolate chips for the snowman eyes & nose
- gold pearl sprinkles for the buttons
Instructions
Brown Butter Chai Cookies
- In a small saucepan set over medium heat, brown the butter. Stir the butter occasionally until it turns amber in color and develops little brown specks.
- Empty a chai tea bag into a small bowl. Pour the butter over the chai, then set it aside to steep and cool off for 5 minutes.
- Add both sugars to a medium sized mixing bowl. Once the butter has slightly cooled off, place a fine mesh sieve over the mixing bowl. Pour the butter through the sieve and over the sugar to filter out the chai tea bag contents.
- Whisk in the egg and vanilla until well combined.
- Add in the flour, baking powder, baking soda, salt, and chai spices. Use a rubber spatula to fold the mixture together just until no flour streaks remain. Cover the bowl tightly with plastic wrap and place it in the fridge for 30 minutes to firm up.***
- Preheat the oven to 350°F / 175°C.
- Scoop out heaping 3 tbsp. scoops of the cookie dough and evenly space the cookie dough balls out on a parchment lined cookie sheet.
- Bake for 12-14 minutes, or until the edges of the cookies start to turn golden brown.
- Once the cookies come out of the oven, I recommend "scooting" them. This just means take a bowl, cup, or biscuit cutter that is slightly larger than the cookie, place it on top of the cookie, and swirl the bowl around to make the cookie a little more round.
- Let the cookies sit on the hot baking tray for at least 5 minutes before transferring them to a wire rack to cool.
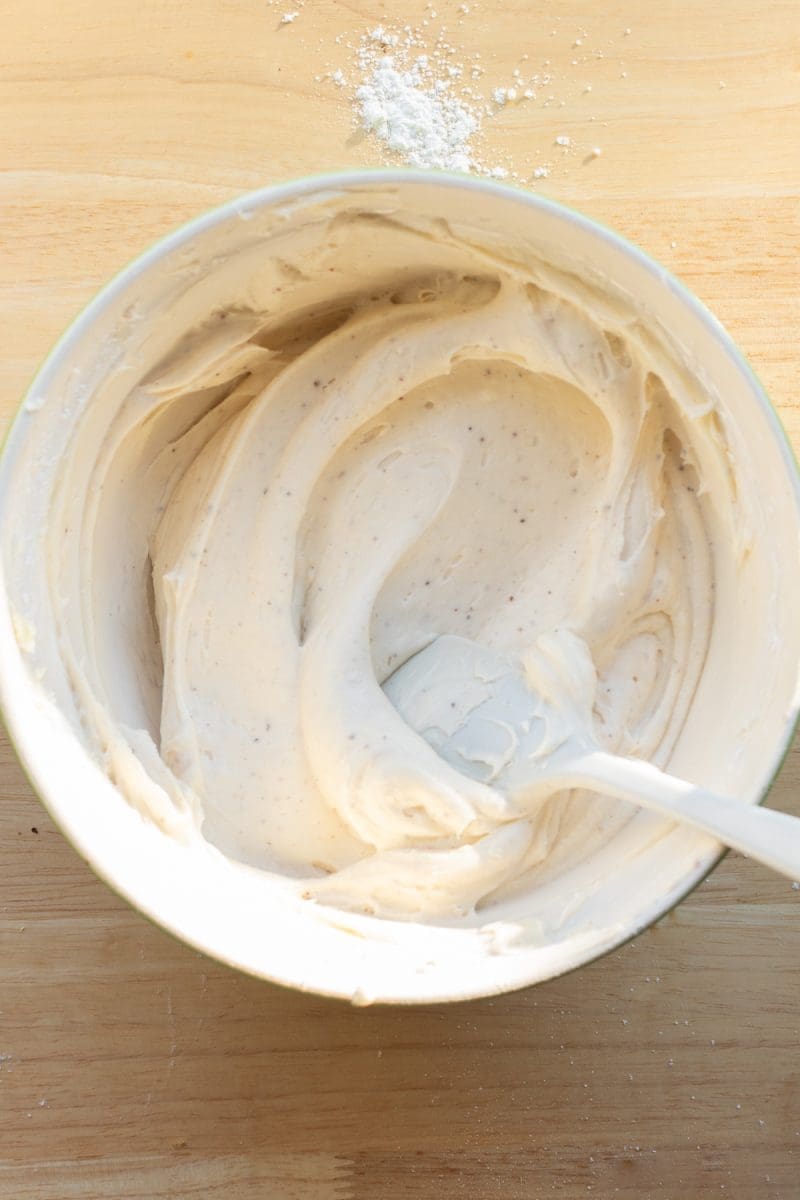
Vanilla Cream Cheese Frosting
- In a small mixing bowl, beat together the cream cheese, butter and salt until the mixture is light and fluffy.
- Slowly beat in the powdered sugar until well combined. Add in the vanilla, then beat for an additional minute.
- Transfer the frosting to a piping bag fitted with a round tip. Place the longer top half of the reeses on top of the cookies. Pipe the frosting in a puddle shape around the cookies, filling in the centers and using a spoon to spread the frosting around.
- Place two mini chocolate chips, pointy side down, into the frosting to form the eyes. Place one mini chip sideways underneath the eyes to make the nose. Then, place the other half of the reeses above the eyes to make a hat and three gold pearl sprinkles below the nose to make the buttons. Serve and enjoy!
Notes
Nutrition

Melting Snowman Cookies (Old Version)
Ingredients
Brown Sugar Cookies
- 90 g unsalted butter room temperature (6 ⅓ tbsp.)
- 150 g dark brown sugar (¾ c.)
- 1 egg room temperature
- 1 tsp. vanilla
- 160 g all purpose flour (1 ⅓ c.)
- 1 tsp. baking powder
- ½ tsp. salt
Melting Snowman Topping
- 330 g powdered sugar (2 ¾ c.)
- 4-5 tbsp. milk
- 8 large marshmallows
- 1 ½ tsp. cocoa powder
- drop of orange food dye
- 24 gold and white pearl sprinkles
Instructions
Brown Sugar Cookies
- With a hand mixer or a stand mixer fitted with the paddle attachment, beat together the butter and sugar until the mixture is light and fluffy (2-3 min.)
- Beat in the egg and vanilla until well combined.
- Add in the flour, baking powder, and salt. Use a rubber spatula to fold the ingredients together just until no flour streaks remain.
- Cover the dough and leave it in the fridge to chill for at least 30 minutes.*
- Preheat the oven to 350°F / 175°C. Line a cookie sheet with parchment paper or with a silicone baking mat.
- Use a 3 tbsp. cookie scoop to dish out the cookies on the prepared cookie sheet, placing them at least 2” apart to allow room for spreading. Bake for 10-12 minutes, until the sides of the cookies start to turn golden brown.
- Immediately after taking the cookies out of the oven, you can take a bowl that is slightly larger than the cookies and swirl it around over the cookies to make them a little more uniform and circular.
Decorating
- Mix together the powdered sugar and milk, adding in one tablespoon of milk at a time until it's thick enough to pipe.
- Remove ~1 tbsp. of the thick frosting into a small bowl, and ~3 tbsp. into another small bowl.
- Into the 1 tbsp. bowl, mix in orange food coloring. To the 3 tbsp. bowl, mix in the cocoa powder. If either of the colored frostings seems too thick, you can add a bit of powdered sugar in to thicken it up.
- Slice off a bit of the bottom of each marshmallow so that you have a shorter head. The sliced-off side will be the side that sticks to the icing on the cookie. Transfer the orange and brown icing to piping bags fitted with small round tips, then make the faces on the marshmallows.
- Add a bit more milk to the remaining white icing to thin it out a bit so that it can spread easily on the cookie.
- Use a spoon or a piping bag fitted with a larger round tip to drizzle the white icing all over the cookies, allowing some parts of the cookie to remain exposed.
- Place the decorated marshmallow onto the cookie. Use the remaining brown icing to draw arms on each of the cookies, then place 3 sugar pearls as buttons on each cookie.
- Serve and enjoy!