
Yield: 1 loaf dutch oven bread // Total Time: 14 hr. // Disclaimer: This post includes affiliate links.
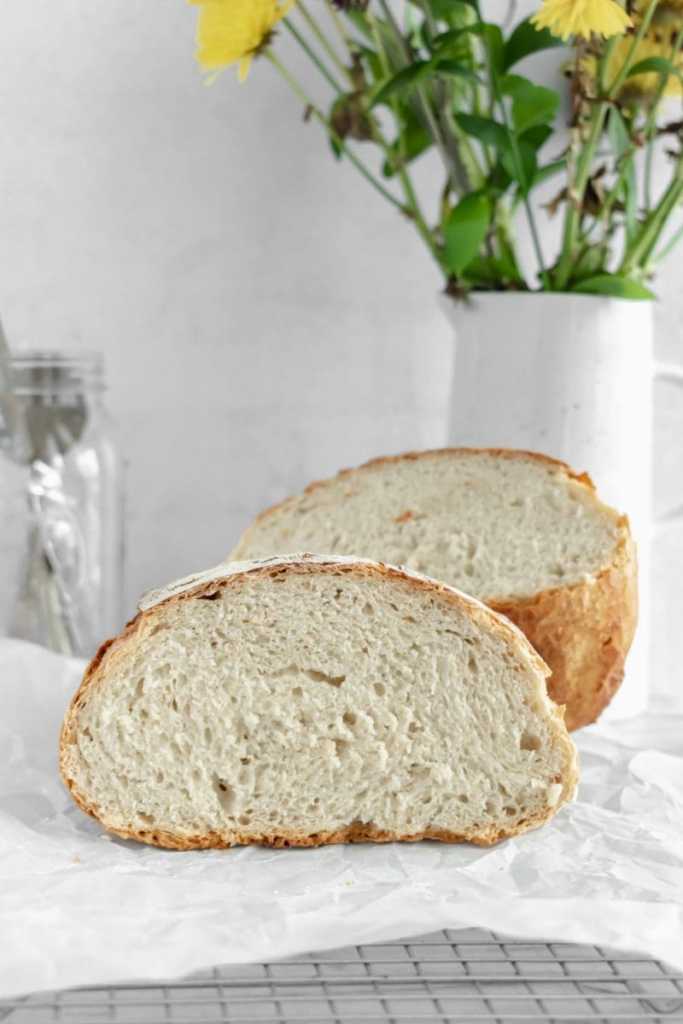
This dutch oven bread is super easy to make, requiring only 4 ingredients! It features a prominent crust and soft, fluffy bread inside. I know the time on this recipe looks quite high, but most of the time on this bread is resting time so that the bread can develop a bit of flavor while rising overnight. If you are looking for a weekend baking project, this is the recipe for you! You can start the dough on Friday or Saturday night, and make fresh bread in the morning perfect for eating plain, as a side to breakfast, or for making sandwiches!
Quick and important notes
Measuring the ingredients
My recipes are all written in grams because it is a more accurate way to bake. When you use a kitchen scale, you ensure that your baked goods turn out as close to the written recipe as possible. Plus, the cleanup is way easier when using a scale! Here is my favorite kitchen scale, and here’s an article about why I use a kitchen scale, and why you should too!
Work with wet hands
The dough will feel sticky but avoid adding more flour! If you used the gram measurements, the dough will be at the right consistency. The easiest way to work with the dough when stretching and folding is to wet your hands right beforehand.
Ingredients and substitutions
All purpose flour: the foundational structure of the bread! I do not recommend using bread flour as the higher protein content will effect the hydration level of the bread.
Water: for hydration
Salt: for flavor and for preventing the yeast from making the bread rise too much
Yeast: leavens the bread. I use instant yeast but you can easily do a 1:1 substitution with active dry yeast, no changes to the recipe needed!
Dutch oven bread Q&A
Why do you mix together the flour & water first?
Mixing together the flour and water and letting it sit is a process known as autolyse. Autolyse is essentially giving the flour time to start to absorb the water and gluten to start to develop. This is important because the bread is quite high in hydration (74%) and does not get kneaded.
What is the stretch & fold method?
The stretch and fold method is another way that we will develop gluten and some structure into this bread. Imagine that the bread has four sides. Pick up one “side” of the dough, stretch it upwards as much as you can, then fold it back down on to the rest of the dough ball. Repeat on all sides. This process adds some structure to the bread and allows us to produce a nice and tall loaf!
Can I add other mix-ins?
Yes! I would recommend adding in no more than 120g of mix-ins if you do. Below is a variation I make and love:
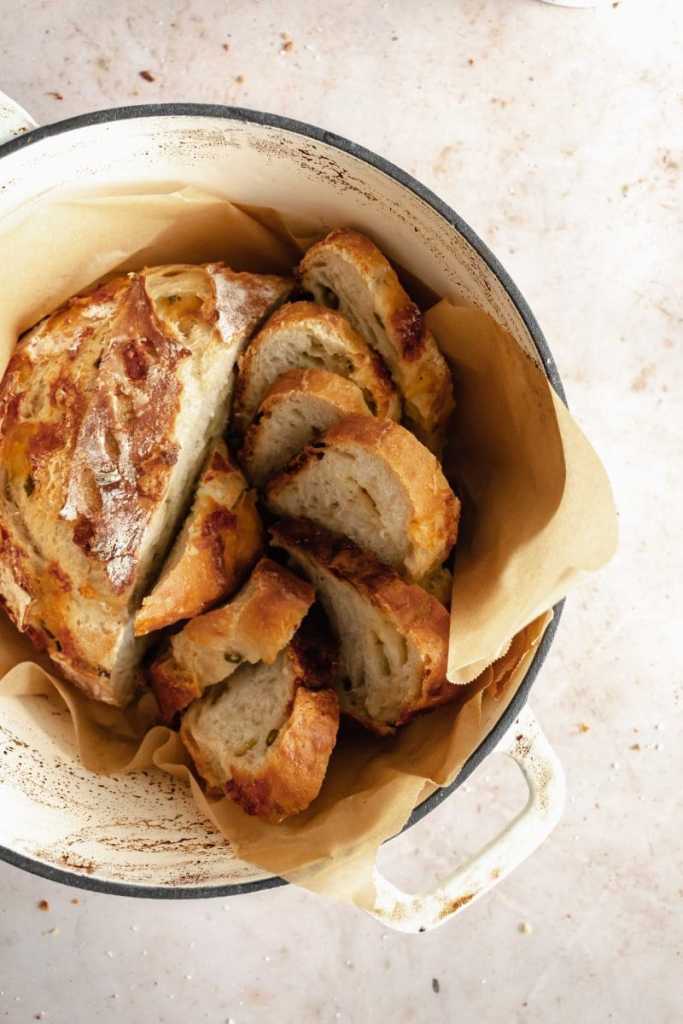
- Jalapeno pepperjack dutch oven bread: on the second stretch and fold, add in 30g diced fresh jalapeno and 80g diced pepperjack. Make the recipe as stated and enjoy a spicy, cheesy fresh dutch oven bread perfect for sandwiches!
How to make dutch oven bread
Tools and ingredients
For a full list of tools, equipment and ingredients that I use and love, you can check out this page here.
Did you make this dutch oven bread?
If you made this dutch oven bread I would love to see and know your thoughts! Please leave a comment and review down below, and tag me on Instagram @freshbeanbakery. If you have any questions about the recipe I will gladly do my best to answer them in the comments below!
Dutch Oven Bread
Ingredients
- 420 g all purpose flour
- 310 g water room temperature, divided
- 9 g salt
- 7 g instant yeast
Instructions
Day 1
- In a large bowl, mix together the flour and 290g of the water until well combined. Cover the bowl and let rest for 40 min.
- Pour the remaining 20g of water, yeast, and salt over the flour mixture. Mix until well combined. Cover the bowl and let rest for 20 minutes.
- Start the stretch & fold process. Start with wet hands. Looking at the dough as having four "sides", pick up one side of the dough and stretch it upwards, then fold it back down onto the dough. Repeat with all four sides, then do it again. Cover the dough and rest for 20 minutes.
- Repeat the stretch and fold process. Cover the dough and rest for 20 minutes.
- Repeat the stretch and fold process again. Cover the dough and place in the fridge to rest overnight.
Day 2
- Take the dough out of the fridge and lightly stretch and fold into a ball, being careful to not knock out too much of the air. Place the dough onto a sheet of parchment paper, and place a bowl on top of the bread. Let rest for 30 minutes.
- Start preheating the oven to 450°F / 230°C. Place the dutch oven, with the lid on into the oven to preheat as well. Leave the dutch oven in the oven for 35 minutes.
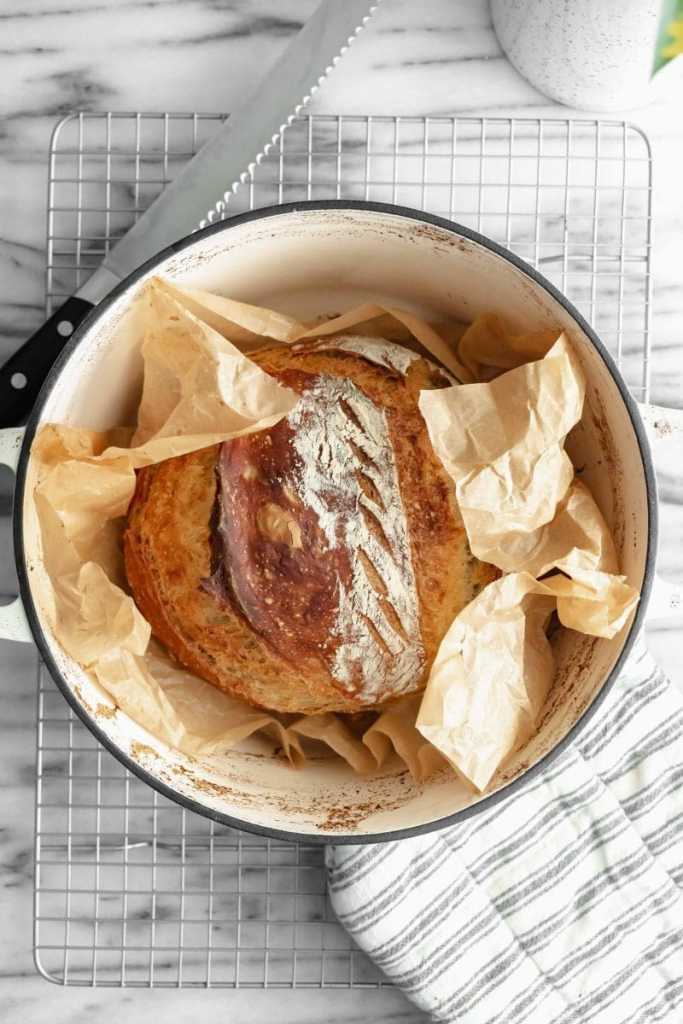
- When the dutch oven is done preheating, use a sharp knife or a bread lame to make a gash on one side of the top of the bread.
- Place the bread in the dutch oven, put the lid on, and bake in the oven for 30 minutes.
- After 30 minutes, turn down the oven temperature to 425°F / 220°C. Take the lid off of the oven and bake the bread for an additional 25 minutes.
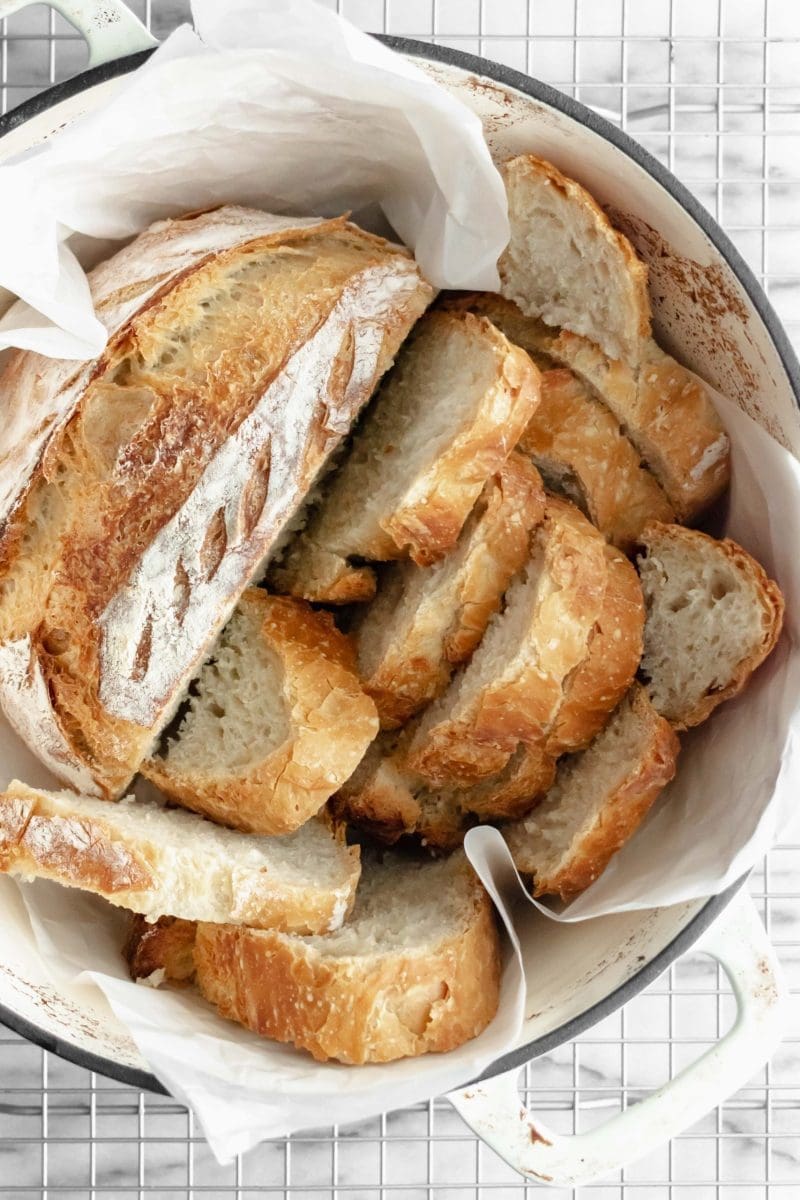
- Let the loaf cool down to room temperature before slicing. Serve, and enjoy!


This was my first time making bread and it was such a simple recipe to follow and turned out so delicious! I don’t own a dutch oven, but I was able to use a stainless steel stockpot that could withhold the temperature in the oven and it worked just as well! It was fluffy on the inside and perfectly chewy on the outside. Love your recipes!
This is a great bread recipe! It was very easy to follow, and super convenient since it’s an overnight bread. I ended up covering it with only a dish towel overnight and it did have a crust on top, so I would cover it with something better next time. I did find that it didn’t need quite as long in the oven- I baked for the full half hour with the lid, and after taking it off and lowering the temperature, I only needed 10-15 minutes more. The bread had a nice crusty exterior, and the inside was nice and soft- perfect for smearing all sorts of fun toppings on! I doubled the batch so we had extra, and once we had eaten our fill, I turned the rest into croutons. They were delicious and this bread was the perfect consistency for them! I will definitely make this bread again.
Thank you so much Adelaide, I’m so happy you enjoyed the recipe! I’ll have to try making croutons from it next time because that sounds delicious! 🙂