
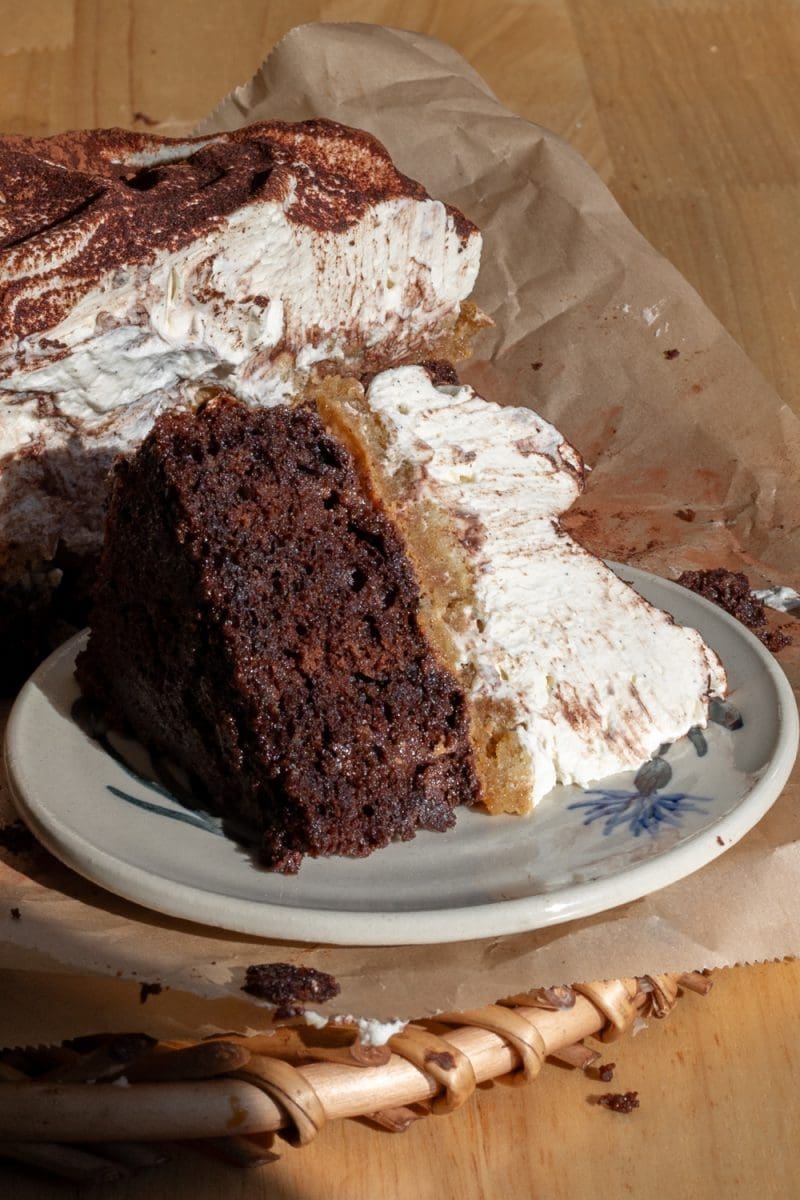
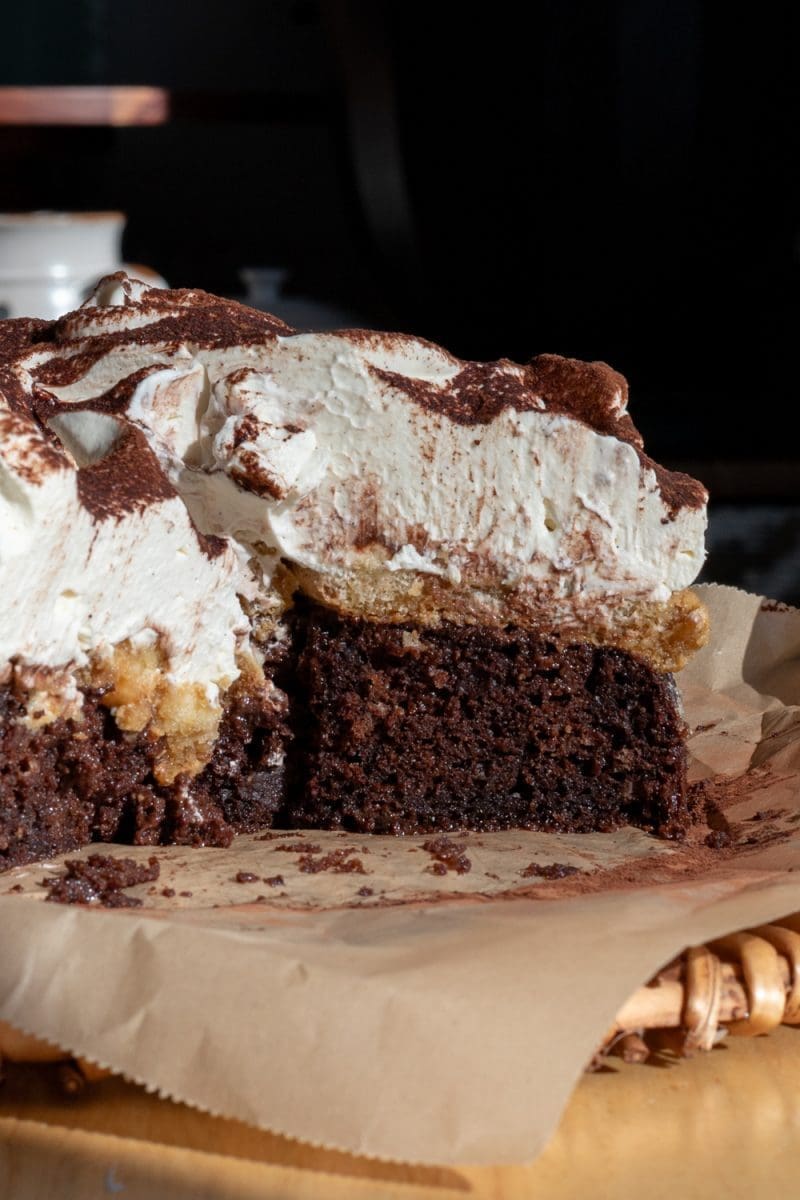
Tiramisu chocolate cake – with a moist espresso-soaked chocolate cake, espresso-soaked ladyfingers, mascarpone whipped cream & a dusting of cocoa.
This post may contain affiliate links, please read the privacy policy for details.

tiramisu chocolate cake
Hello hello! This cake is for all my fellow coffee and tiramisu lovers (and my single-layer cake lovers that also aren’t’ the best at decorating layered cakes.) This is my chocolate tiramisu cake. It starts out with a super moist chocolate espresso cake that’s soaked in more espresso after it’s baked to make it even more moist and flavorful. Then, it’s topped off with espresso-soaked ladyfingers, a ton of delicious mascarpone whipped cream, and a dusting of cocoa. The only thing special you’ll need is a 7″ springform pan – you can find the one I used here. But other than that, this cake is super easy to make. So let’s get into it! 🙂
why you’ll love this tiramisu chocolate cake:
- It’s super moist and chocolatey: espresso helps bring out the chocolate flavor, and sour cream & an espresso soak keep this cake super moist.
- Mascarpone whipped cream: no frosting here – a hefty layer of lightly sweetened mascarpone whipped cream takes the place of frosting and mimics tiramisu filling.
- Easy assembly: because it’s a single cake layer, it’s super easy to assemble.
expert baking tips
Weigh your ingredients:
My recipes are all written in grams because it is the most accurate way to bake. When you use a kitchen scale, you ensure that your baked goods turn out as close to the written recipe as possible. Plus, the cleanup is way easier when using a scale! I will provide standard cup measurements but please note that I have not tested the recipe using cup measurements and therefore can not guarantee your recipe will come out how mine did. Here is my favorite kitchen scale.
How to make your chocolate more chocolatey:
The secret to getting more chocolate flavor into your chocolate cake? Bloom your cocoa powder! Blooming your cocoa powder just means that you’re mixing the cocoa with a hot liquid. Here we’re using hot espresso to both bloom the cocoa and add moisture into the cake. Adding in the hot liquid releases the cocoa powder particles from a very thin membrane on them, exposing cocoa solids and bringing out more flavor. It’s truly such a simple way to add more chocolate flavor into your bakes, and makes it easier for the cocoa to incorporate into the batter.
Be careful when mixing the cake batter:
When you over-mix your batter, you create more gluten in the batter which will make your cake go from light and moist to dense and chewy. When you’re mixing in the dry ingredients, be sure that you only mix *just until* that last streak of flour disappears into the batter.
Use room temperature ingredients:
This is super important for allowing the batter to come together smoothly. You’ll want to take your ingredients out of the fridge about an hour before baking to allow them enough time to come to room temperature.
Keep a close eye on the cake while it bakes:
Cakes and cupcakes like to go from under-baked to over-baked super quickly so it is important to keep a close eye on them. I’d recommend that you start checking on the cake around 25 minutes.
A note on oven temperature:
Ovens vary and fluctuate in temperature and might not always actually be at the temperature they claim to be at. If you love to bake like I do, I highly recommend getting an oven thermometer. They are super helpful for letting you know when your oven might be lying to you! I use this one.
ingredients for tiramisu chocolate cake:
chocolate cake:
- All purpose flour: the structure of the cake.
- Baking powder: for leavening and giving that “cakey” texture.
- Salt: for balancing and bringing out the sweetness
- Dutch process cocoa powder: gives the cake a deep, rich chocolate flavor. I wouldn’t recommend using natural unsweetened cocoa here, but you could use black cocoa powder for an even richer flavor.
- Espresso: for moisture in the cake and for blooming the cocoa powder.
- Vegetable oil: tenderizes the cake. Any neutral oil, such as canola, will also work here.
- Granulated sugar: sweetens the cake and helps lock in the moisture.
- Egg: contributes moisture to the cake and helps bind the batter together
- Sour cream: tenderizes and adds moisture to the cake. I recommend using full-fat sour cream for the best texture.
ladyfinger soak:
- Espresso: the base of the soak. You could also use cold-brew or strongly brewed coffee here.
- Coffee liquor: my favorite (and the one I used here) is Kahlua. You can also leave out the liquor if desired.
- Ladyfingers: make sure you have the hard, crunchy ladyfingers rather than the cakey ones which will fall apart. If you’re able to get them, Savoirardi are the ones I use and prefer.
mascarpone whipped cream:
- Mascarpone: for flavor and for thickening the whipped cream.
- Vanilla: for flavor, you can use extract or vanilla bean paste.
- Granulated sugar: for a bit of sweetness.
- Heavy whipping cream: the base of the whipped cream, whips up the mascarpone.
- Cocoa powder: for dusting on top – any cocoa powder will work here.
how to make a tiramisu chocolate cake
Below are some images of what the cake looks like at various points of the process. You can find the full recipe at the end of the blog post!


- Mix together the cocoa powder and hot espresso, then whisk in the remaining wet ingredients.
- Add in the dry ingredients, fold them in, then bake the cake.

- Poke holes in the baked cake, then pour espresso over it.
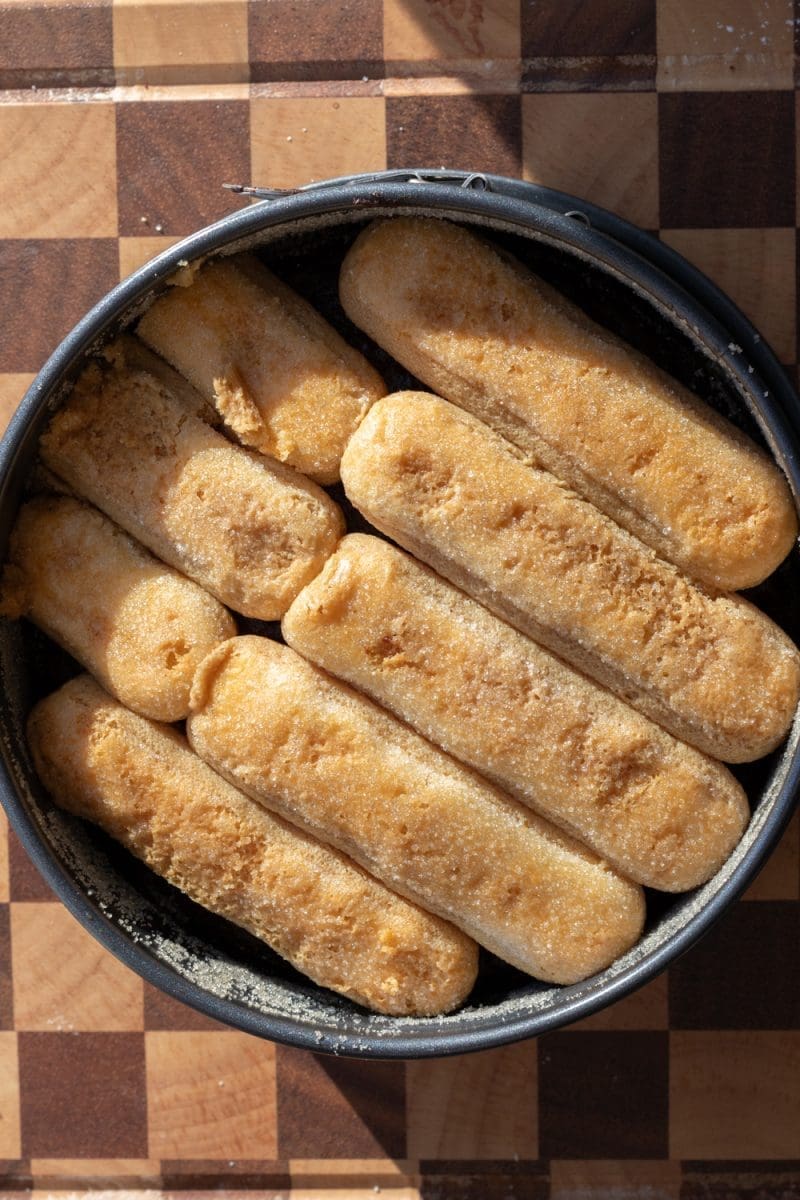
- Top the cake with espresso-soaked ladyfingers, mascarpone cream, and. a dusting of cocoa. Slice, serve, and enjoy!
tiramisu chocolate cake recipe q&a
can I turn this into cupcakes?
If you’d like to turn these into cupcakes, you definitely could! Bake them off as cupcakes (of course.) You will get around 6-8, depending how much you fill the liners. Once they’ve cooled, place a big ol’ scoop of mascarpone whipped cream on top, then dust them with cocoa powder. You won’t need the ladyfingers if you turn these into cupcakes.
Can I bake this chocolate cake in a different sized pan?
You could bake this in a tall 6″ pan (3″ tall, or springform”) I wouldn’t recommend going up to 8″ or the cake will be too thin.
can I make this cake ahead of time?
Definitely! You can bake the cake up to two days in advance and keep it stored in an airtight container at room temperature. I would recommend waiting to soak and assemble the cake until the day you want to serve it.
how to store tiramisu chocolate cake
Once you assemble the cake, you’ll want to keep it stored in an airtight container in the fridge, where it will keep well for about 3 days.
tools and ingredients:
You can find all my favorite tools and ingredients that I use on my Amazon Storefront page, here!
other recipes you might enjoy:

did you make this recipe?
I’d love to see and know your thoughts! please leave a comment and review below, and tag me on instagram @freshbeanbakery. #freshbeanbakery
Tiramisu Chocolate Cake
Ingredients
Chocolate Cake
- 30 g dutch process cocoa powder (¼ c. + 1 tbsp.)
- 60 g freshly brewed espresso (2 oz.)
- 75 g vegetable oil (¼ c. + 2 tbsp.)
- 100 g granulated sugar (½ c.)
- 1 egg room temperature
- 90 g sour cream (¼ c. + 2 tbsp.) room temperature
- 80 g all purpose flour (⅔ c.)
- 1 tsp. baking powder
- ¼ tsp. salt
Ladyfinger & Espresso Soak
- 60 g cold brew or cooled espresso (2 oz.) for soaking the cake
- 90 g cold brew or cooled espresso (3 oz.) for soaking the ladyfingers
- 1 tbsp. coffee liquor like kahlua, optional
- 7 ladyfingers
Mascarpone Whipped Cream
- 150 g mascarpone (⅔ c.)
- 2 tbsp. granulated sugar
- 2 tsp. vanilla bean paste
- 200 g heavy whipping cream (¾ c. + 2 tbsp.)
- cocoa powder for dusting
Instructions
Chocolate Cake
- Preheat the oven to 350°F / 175°C. Generously butter a 7" springform pan and coat it with sugar.
- Brew 60g (2 oz.) of espresso. In a medium sized mixing bowl, mix together the cocoa powder and freshly brewed espresso until no lumps remain.
- Add in the vegetable oil, sugar, egg, and sour cream. Whisk vigorously until combined.
- Add in the flour, baking powder, and salt. Gently fold the dry ingredients into the wet ingredients just until no streaks of flour remain.
- Pour the chocolate cake batter into your prepared 7" cake pan. Bake for 28-35 minutes. To check for doneness: I recommend using a thermometer for the best results: when stuck into the middle of the cake the thermometer should read 205°F / 96°C. The cake is also done when the center no longer jiggles and the top becomes more firm.
- Allow the cake to rest in the cake pan for at least 15 minutes before transferring it out to a cooling rack to cool to room temperature.
Ladyfinger & Espresso Soak
- Once the cake has cooled and you're ready to assemble it, place the cake back into the springform pan. Use a small straw to poke a bunch of holes in to the cake.
- Pour 60g (2 oz.) of cooled espresso over the cake.
- In a small shallow bowl, combine the cold brew and coffee liquor (optional).
- Dip the ladyfingers into the coffee mixture on both sides, and place them on top of the cake. You will need to cut ~two of the ladyfingers to fit.
- Cover the cake and let it sit in the fridge for 30 minutes to allow time for the coffee to soften the ladyfingers.
Mascarpone Whipped Cream
- In a medium sized mixing bowl with a hand or stand mixer, beat together the mascarpone, sugar, and vanilla just until the mixture is cohesive.
- Slowly beat in the heavy whipping cream. Once all of the heavy cream has been added, beat the mixture until stiff peaks form.
- Remove the cake from the fridge and pile it high with the mascarpone whipped cream. Take the cake out of the pan, dust it with cocoa powder, slice, serve, and enjoy!
Notes
Checking for doneness:
I wouldn’t recommend using the toothpick test for this cake. While testing, I found that once the toothpick came out of the cake clean, the cake was over-done and dry after baking. Instead, I highly recommend checking the internal temperature of the cake with a thermometer (as noted in the recipe)Nutrition
Please note that the nutrition facts are only an estimate and may vary based on different brands of ingredients and any substitutions made.


I have now made this cake twice. Both times were a huge hit. I only had a 10 inch spring form pan so I doubled the recipe and it worked out perfectly. I did notice that the cake was done long before the inner temperature reached the recommended level so I wouldn’t rely on that. I think the most time consuming part was making the espresso. My machine only makes two ounces at a time so I had to do this several times. I also added Kahlua into the espresso that I poured onto the cake. It was a lovely modification. With mascarpone being so expensive the only challenge I have is what to do with the remaining cheese as the recipe, even doubled, doesn’t use a whole container.